Draw Process and Invoicing
Invitation to participate in a draw
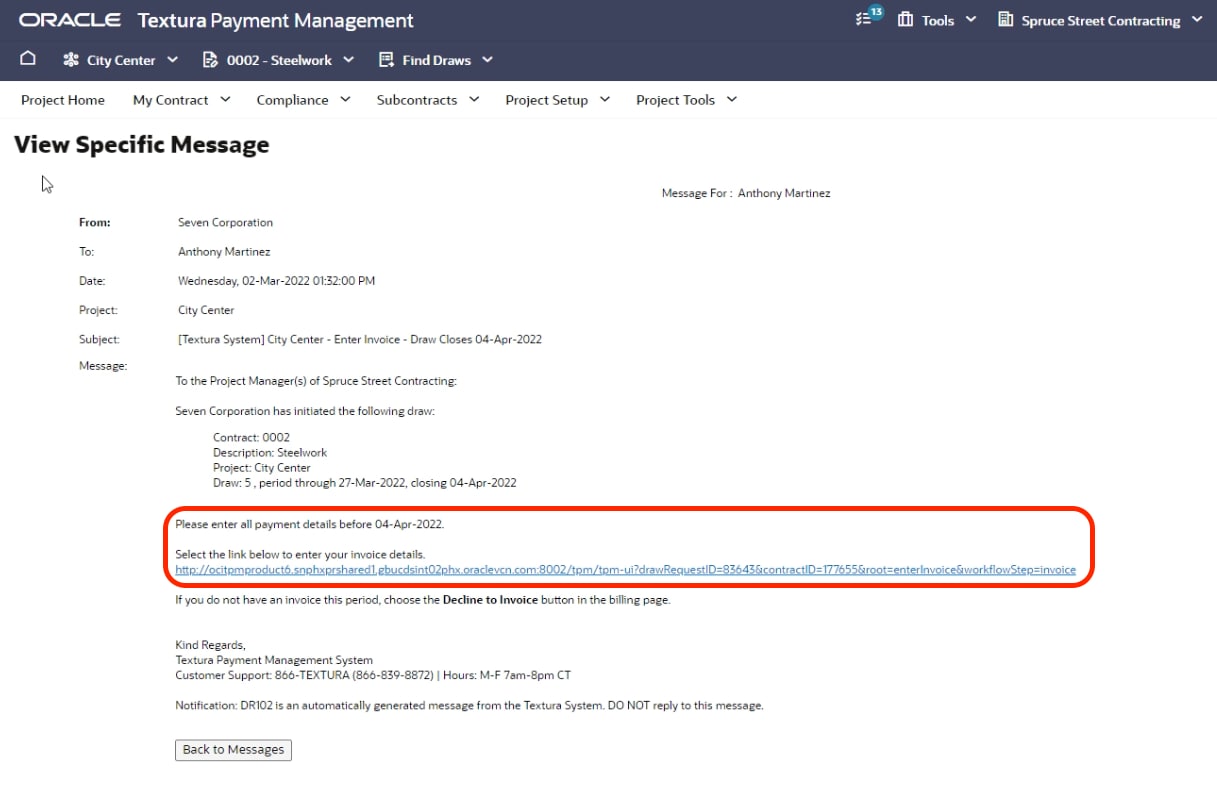
When your organization is invited to participate in a draw, the system sends an email notification to your project managers. Follow the link in the email to navigate to the Enter Billing Details page.
The Project Home page also displays a task in the open draws section. Click the task.
Enter billing details
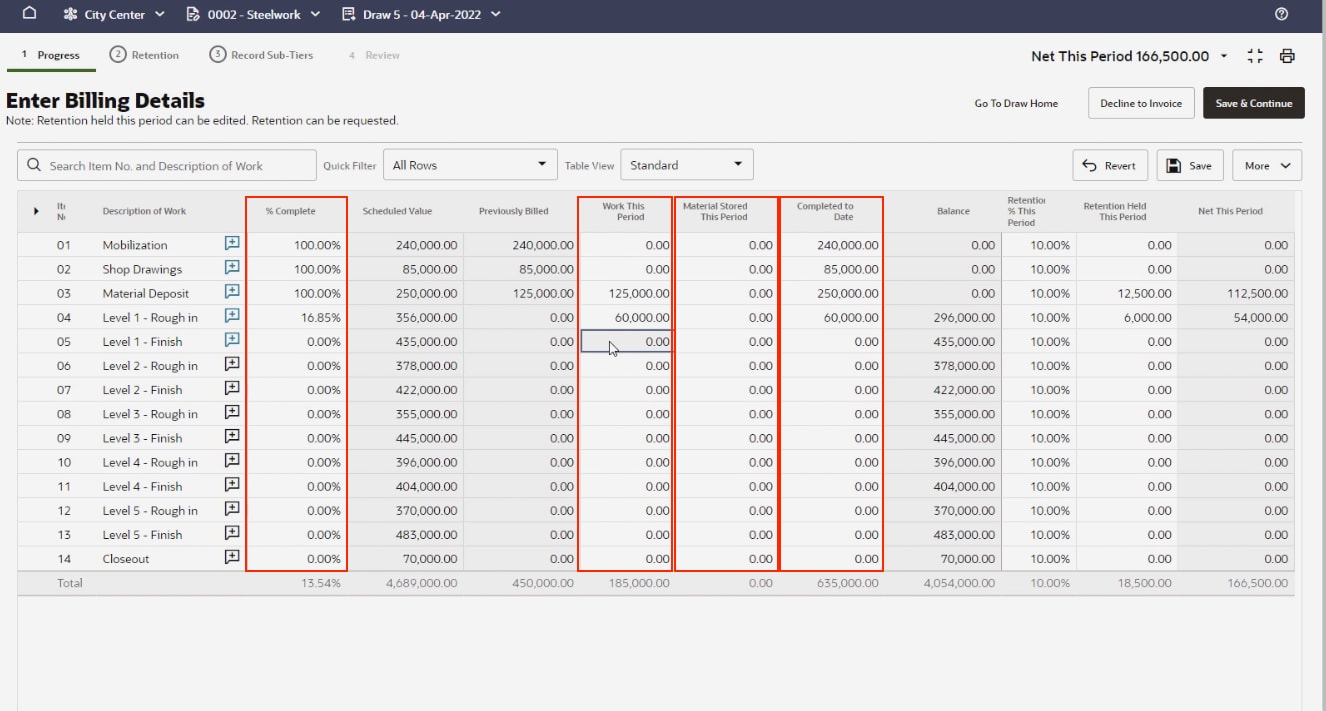
- The top of the Enter Billing Details page displays the steps to submit your invoice. Process steps may differ slightly depending on what you're allowed to bill for. Usually, you'll start on the Progress tab, which allows you to bill for progress against your line items.
- There are multiple ways to enter billing details. You can enter the percent complete to date in the % Complete column, or you can enter a dollar value in the Work This Period, Material Stored This Period or Completed to Date columns. When you enter a value, retention and totals are automatically calculated. Note: any cell with a white background can be edited.
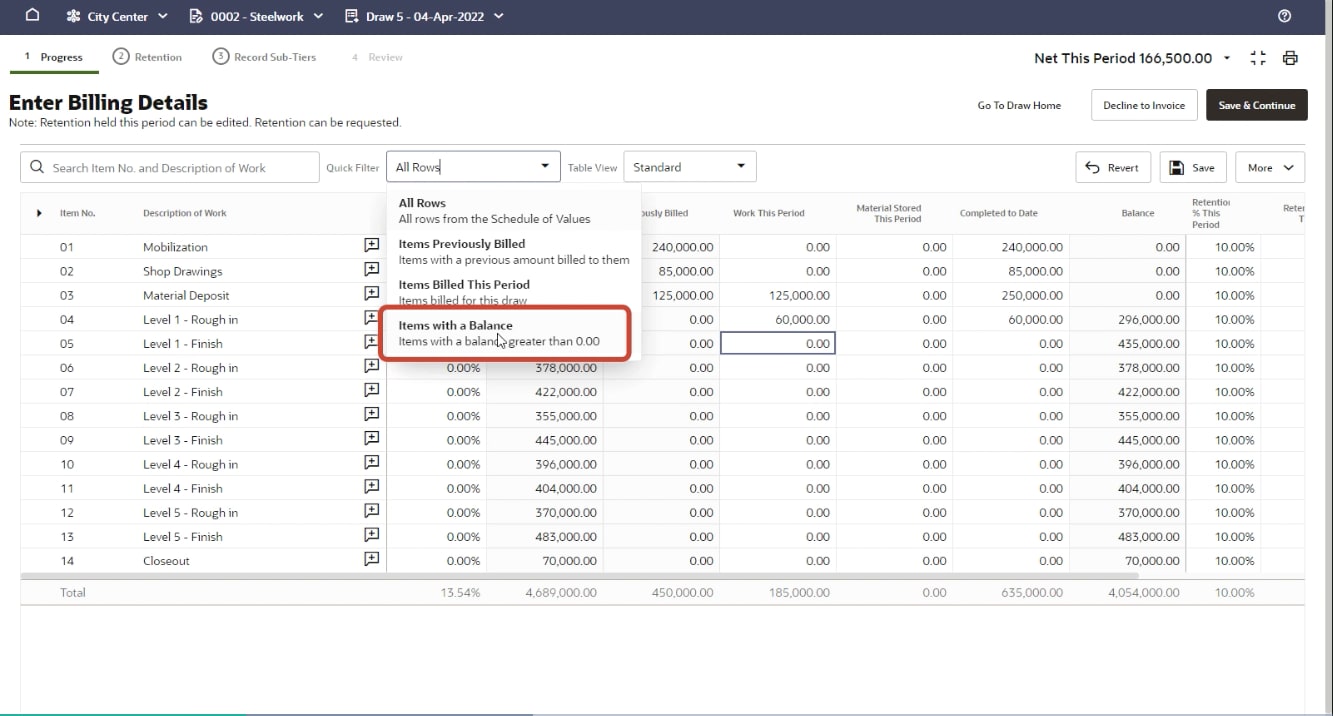
- Use a quick filter to hide certain rows, or search for an item number or description to quickly find the rows you're looking for.
Tip!
The More drop-down menu in the upper right provides other options to make your billing easier, such as uploading your values from a CSV file, downloading your current values, or making changes to the percentage complete or retention values across all of the items in your contract. Click Save and Continue to proceed to the next step.
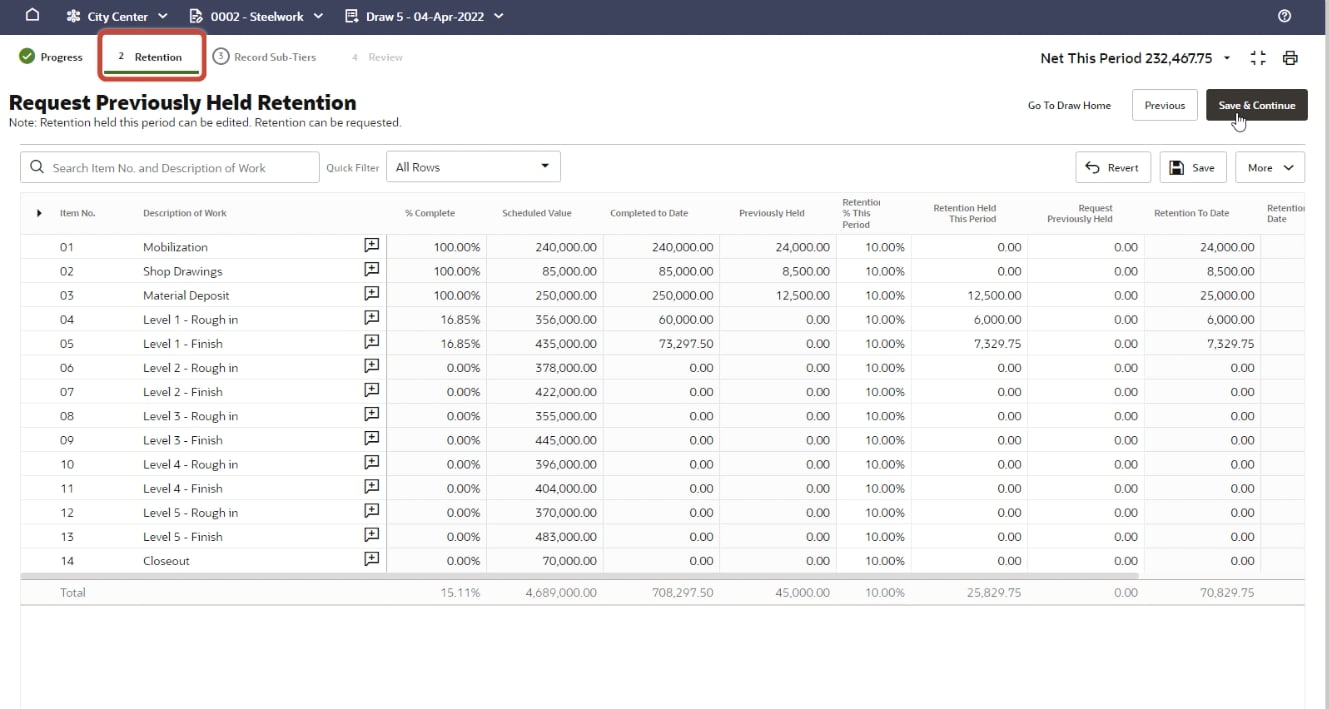
Billing for retention (if allowed)
If you're allowed to bill for retention held in previous draws, the Retention tab displays. If you're allowed to bill for progress only, the Retention tab will not display. The Retention tab enables you to make changes to the retention held this period, and request previously held amounts based on what the General Contractor allows.
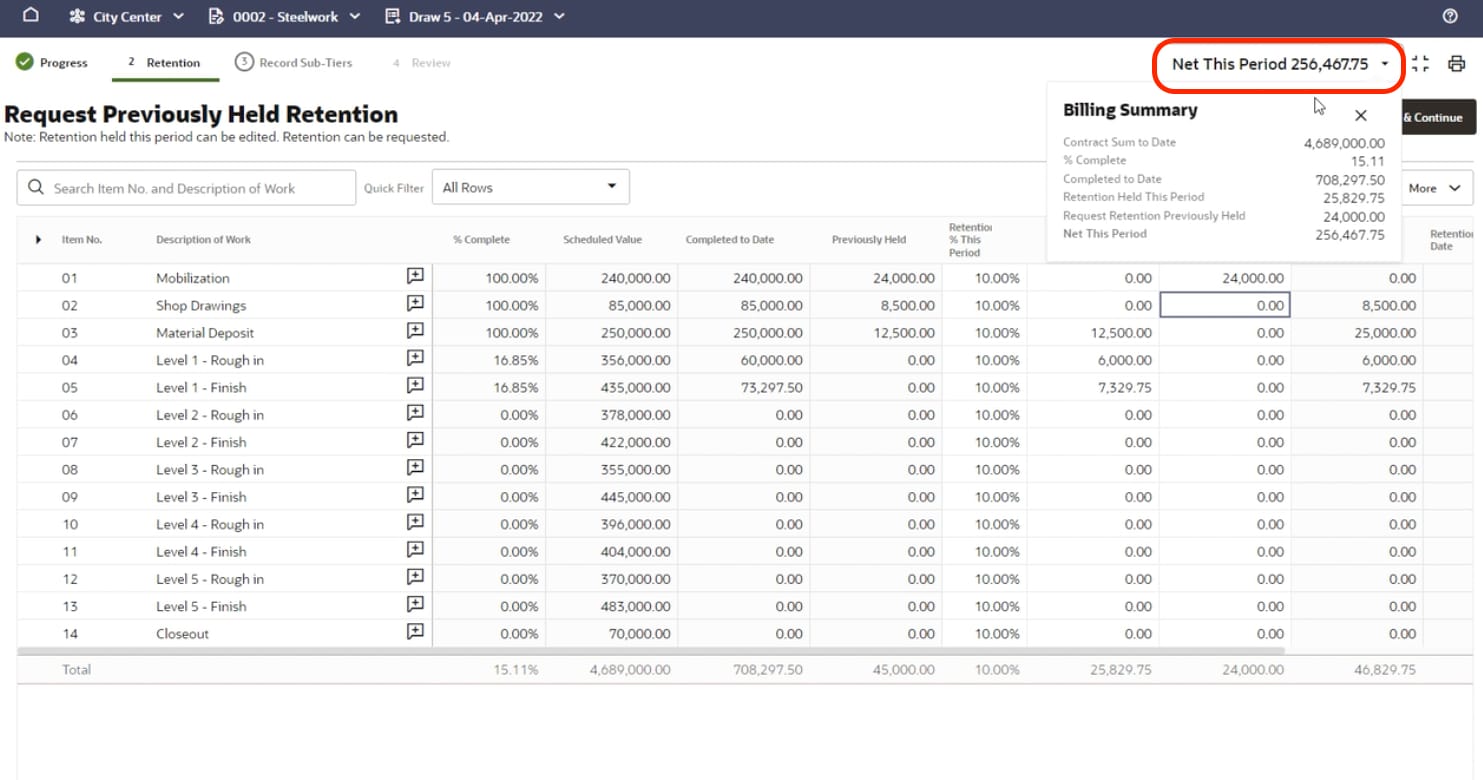
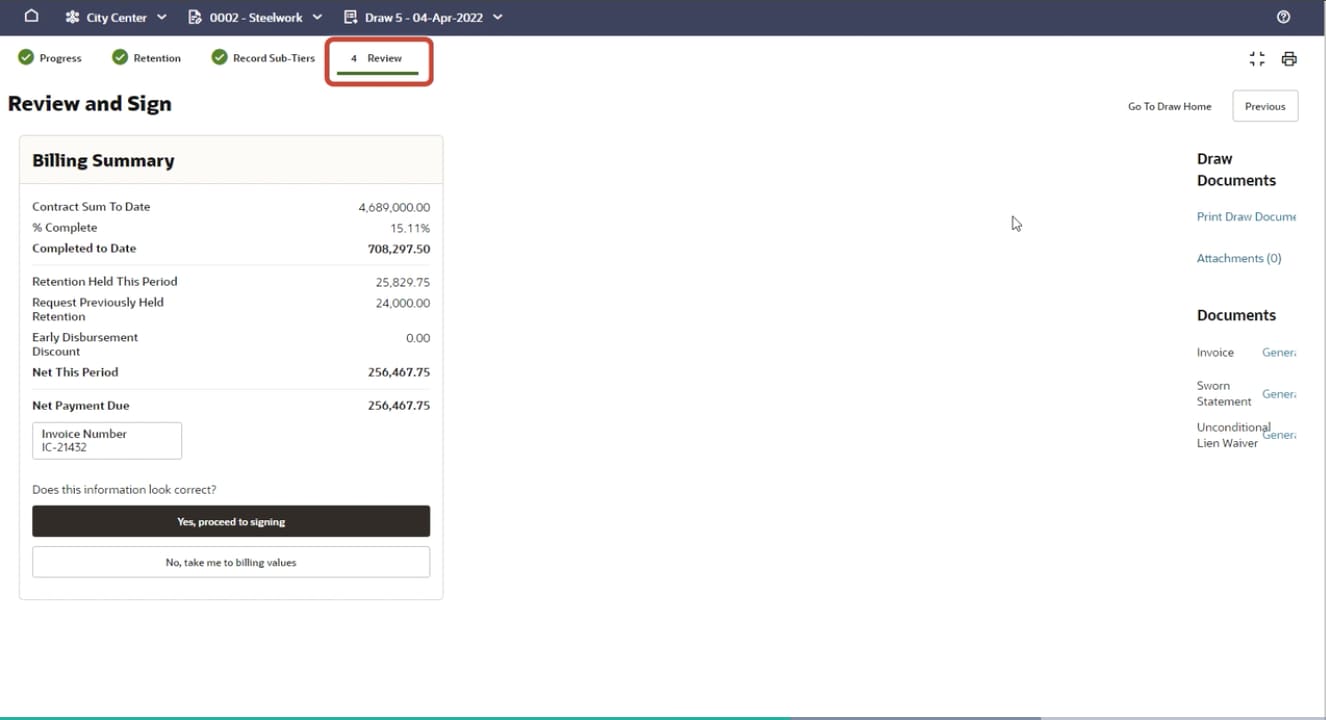
Double-check your billing amounts using the Billing Summary at the top right of the page.
Click Save and Continue to proceed to the next step.
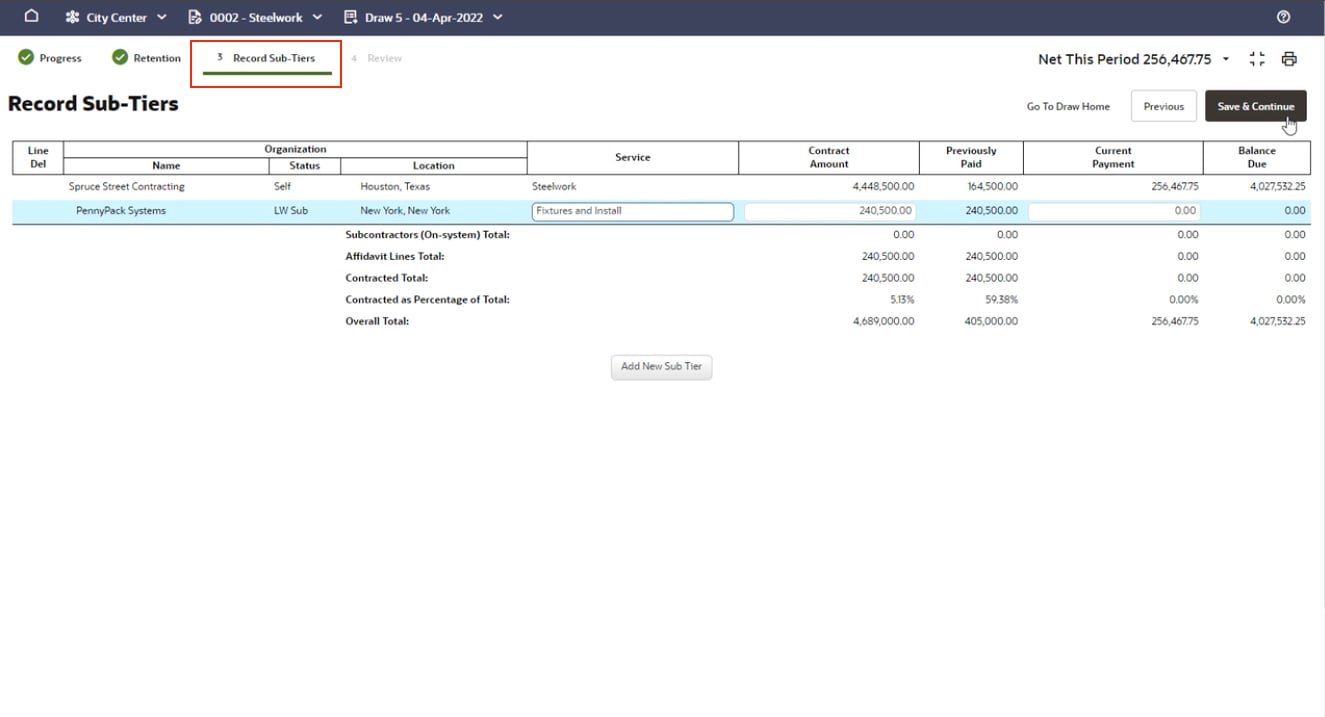
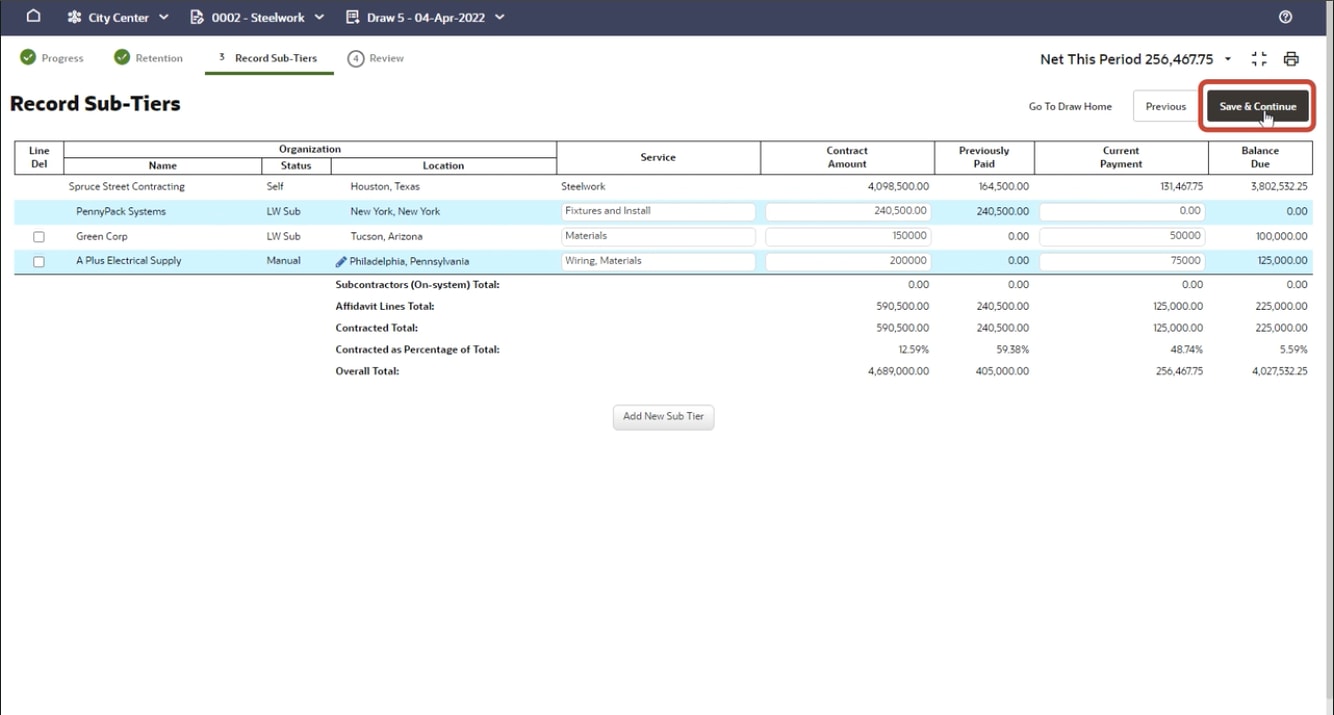
Billing for Sub-Tiers (if required)
- If the General Contractor requires that you record contract and payment amounts for your sub-tier, record that data on the Record Sub-Tiers page.
- To add a Subcontractor or Supplier, click Add New Sub-tier.
- When you enter an organization's name, Textura searches its database for matching companies.
- Type a service description, contract amount, and current payment amount.
- Add as many sub-tiers as you have on the project.

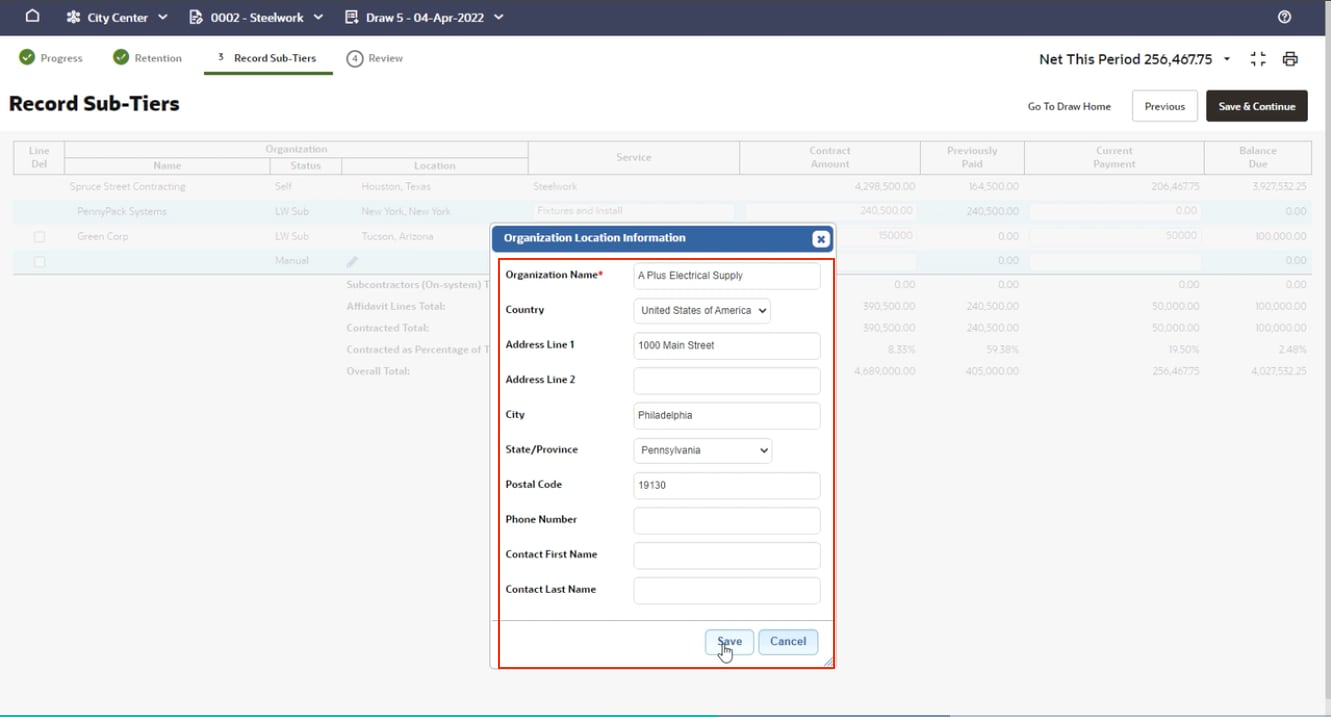
Manually adding sub-tiers
If your search fails to return the organization you're looking for, enter the relevant information manually. If you don't have an exact contract value, provide an estimate. Totals and balance due are calculated automatically. When you're finished, click Save and Continue.
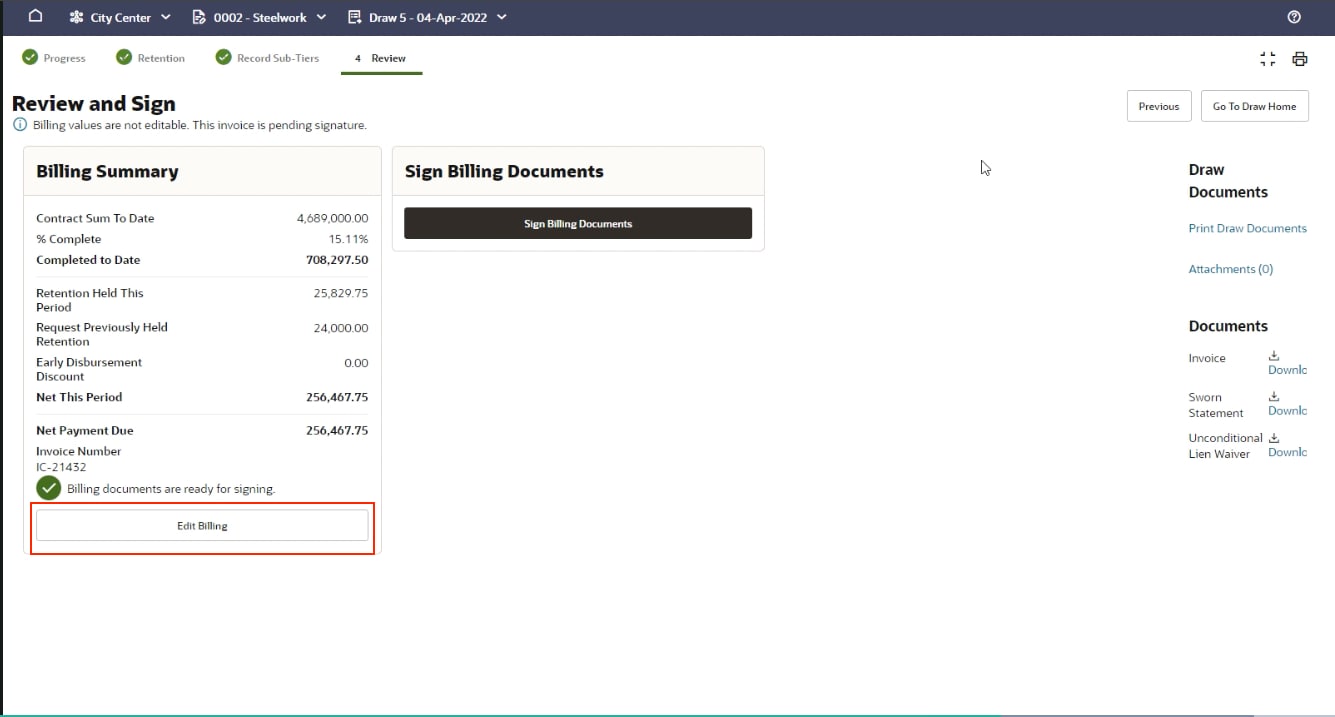
Review Billing
- Now that all of your data is entered, the Review tab enables you to review your work. Check the amounts in the billing summary for accuracy. Use the Previous button in the upper-right corner to go back and make changes.
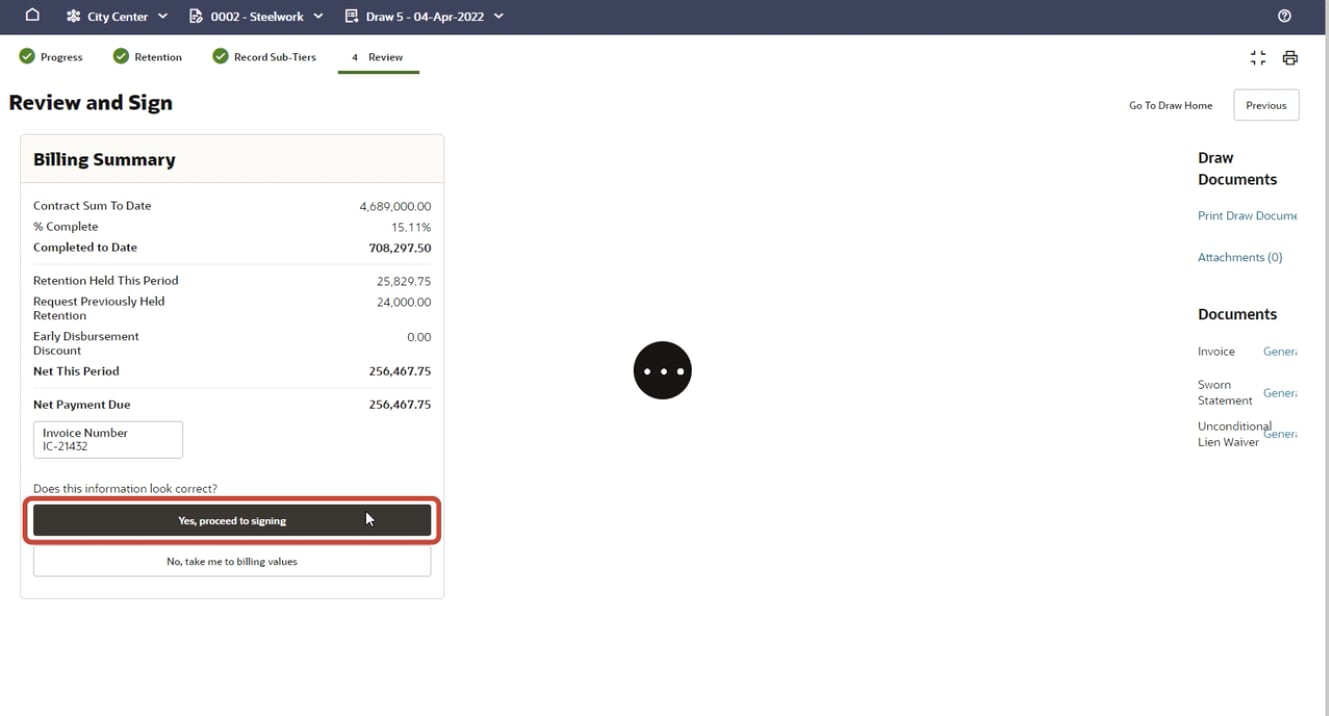
- If the information is correct, click Yes, proceed to signing.
Sign billing documents
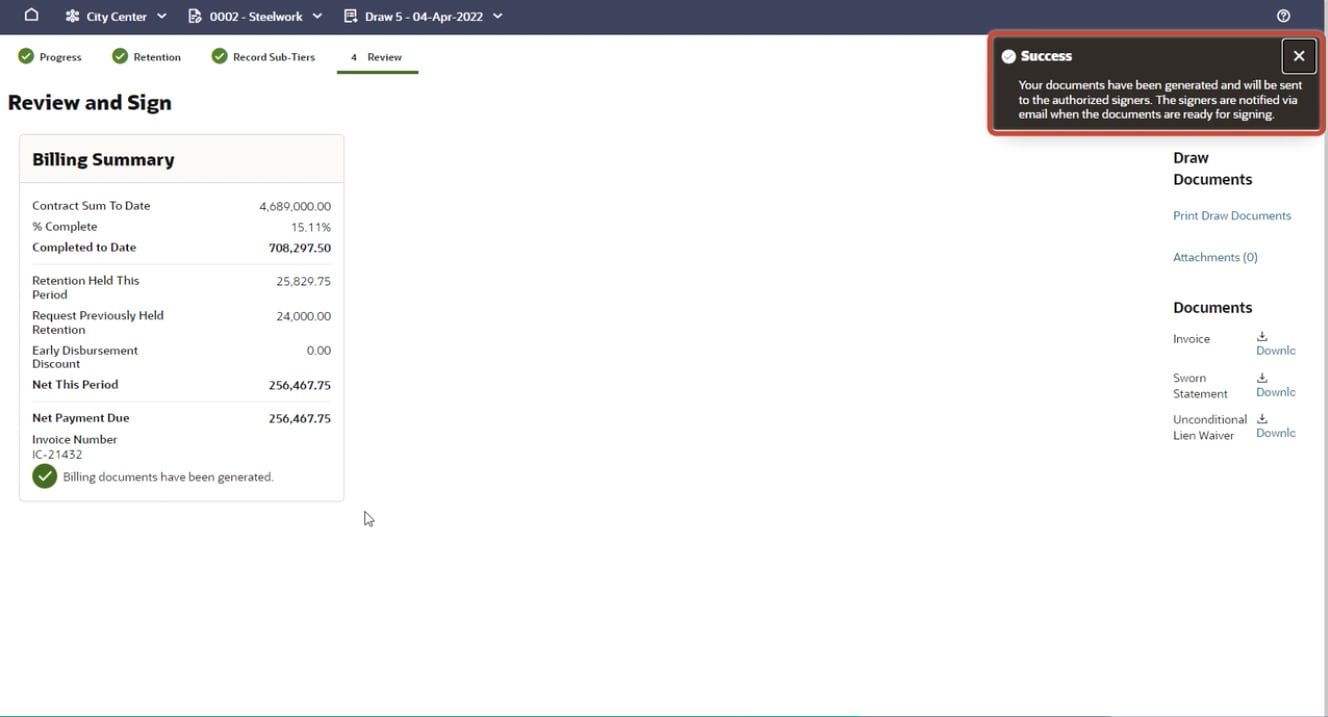
- Textura now generates your billing documents in the format required. This typically takes only a few seconds.
- If you're a signer on the project, the page will automatically update when the documents are ready for you to sign.
- Signers will receive an email with a link to navigate to the documents. The names of the signers will also display on the page.
- Before signing, double-check the billing summary. Click Edit Billing to open the invoice for modification if necessary.
- To proceed, click Sign Billing Documents.
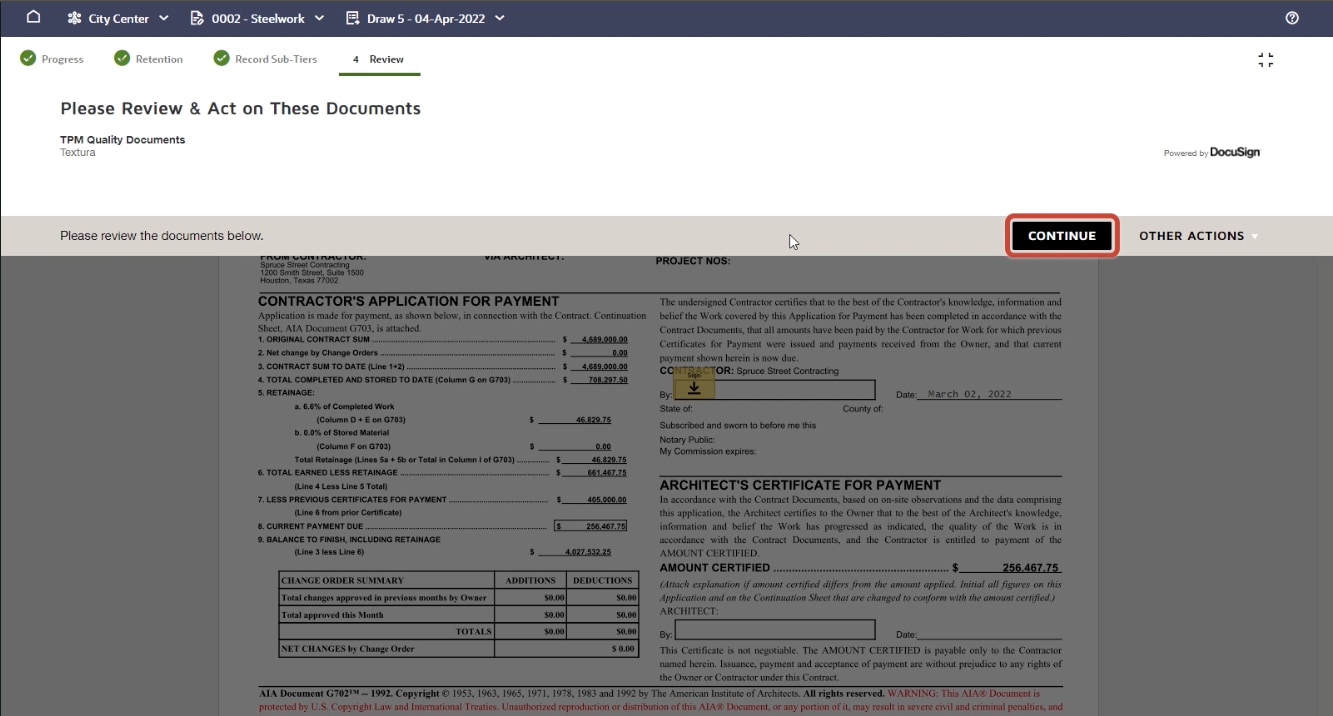
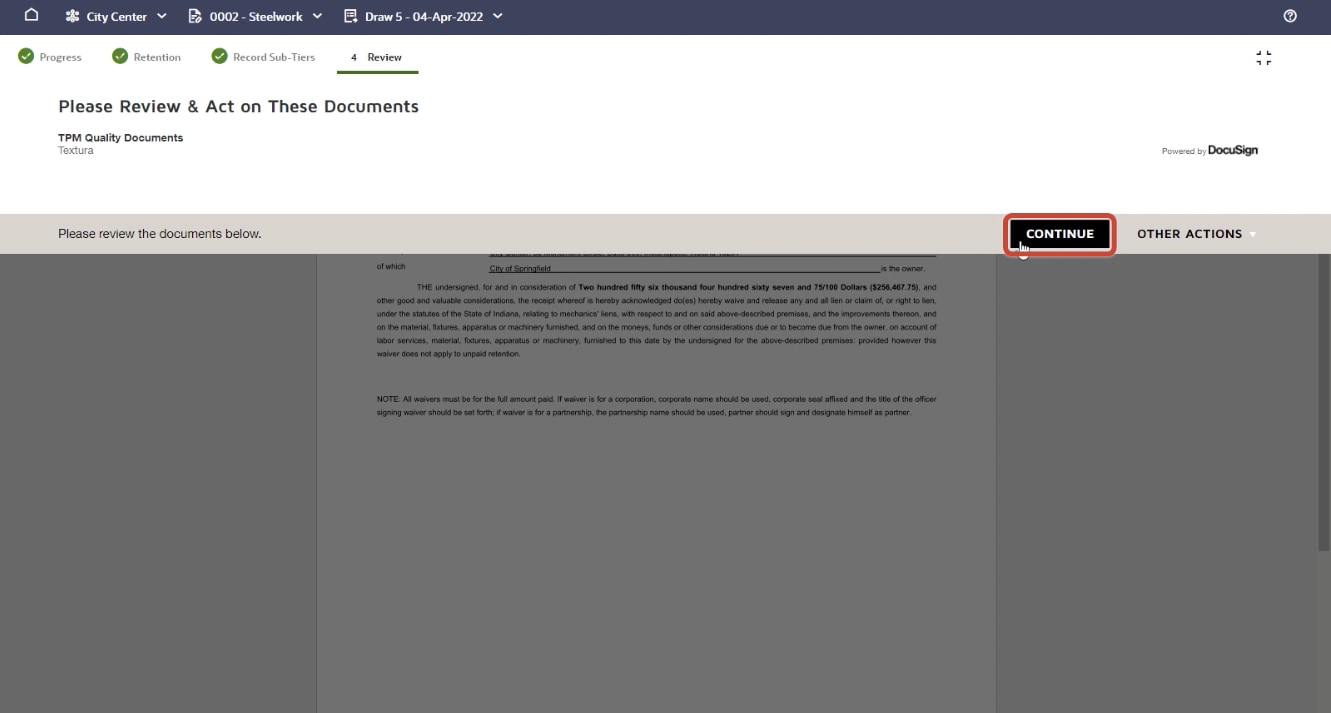
Using DocuSign
- You're presented with your PDF in DocuSign. Click Continue, then Start, and apply your signature to the documents where necessary.
- Click Finish to complete the process.
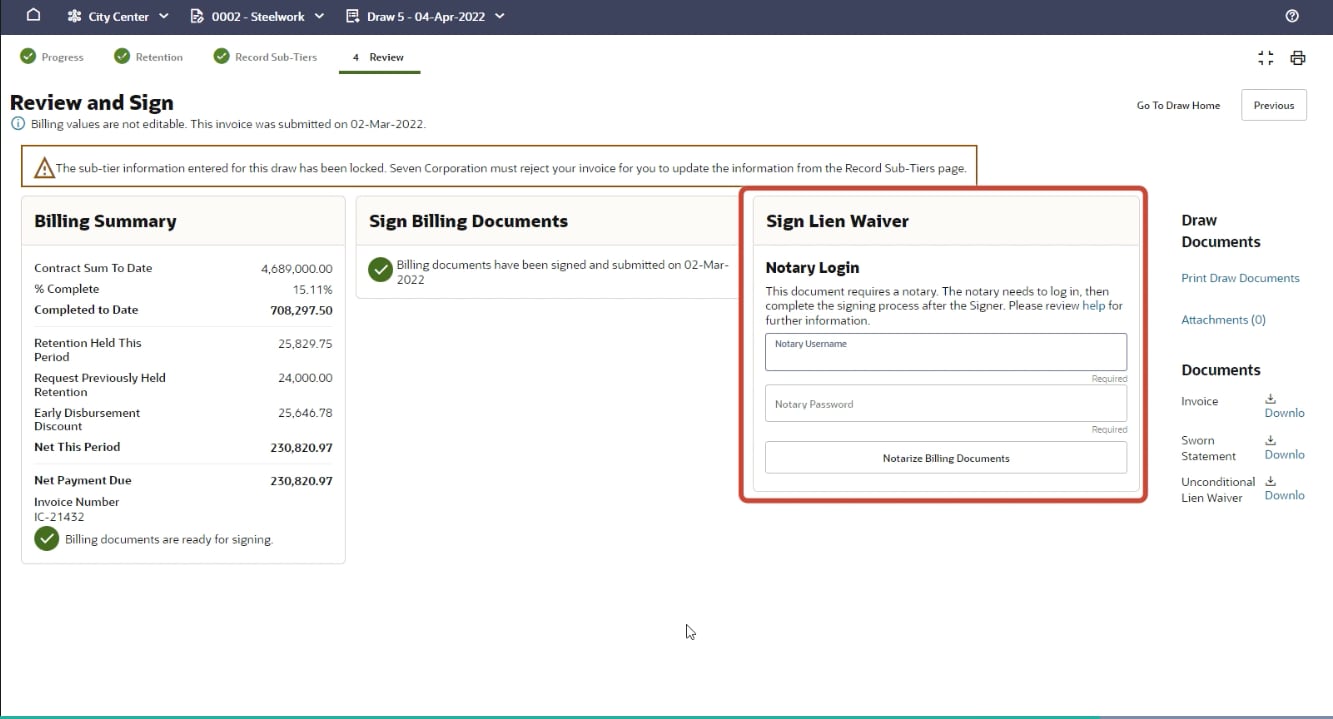
Sign your lien waiver
- Next, you're prompted to sign your lien waiver. If the General Contractor requires that the lien waiver be notarized, the notary is required to have their own Textura user account and be at your computer to complete the signing process. The notary enters their credentials and logs in.
- After the notary logs in, click Sign Lien Waiver.
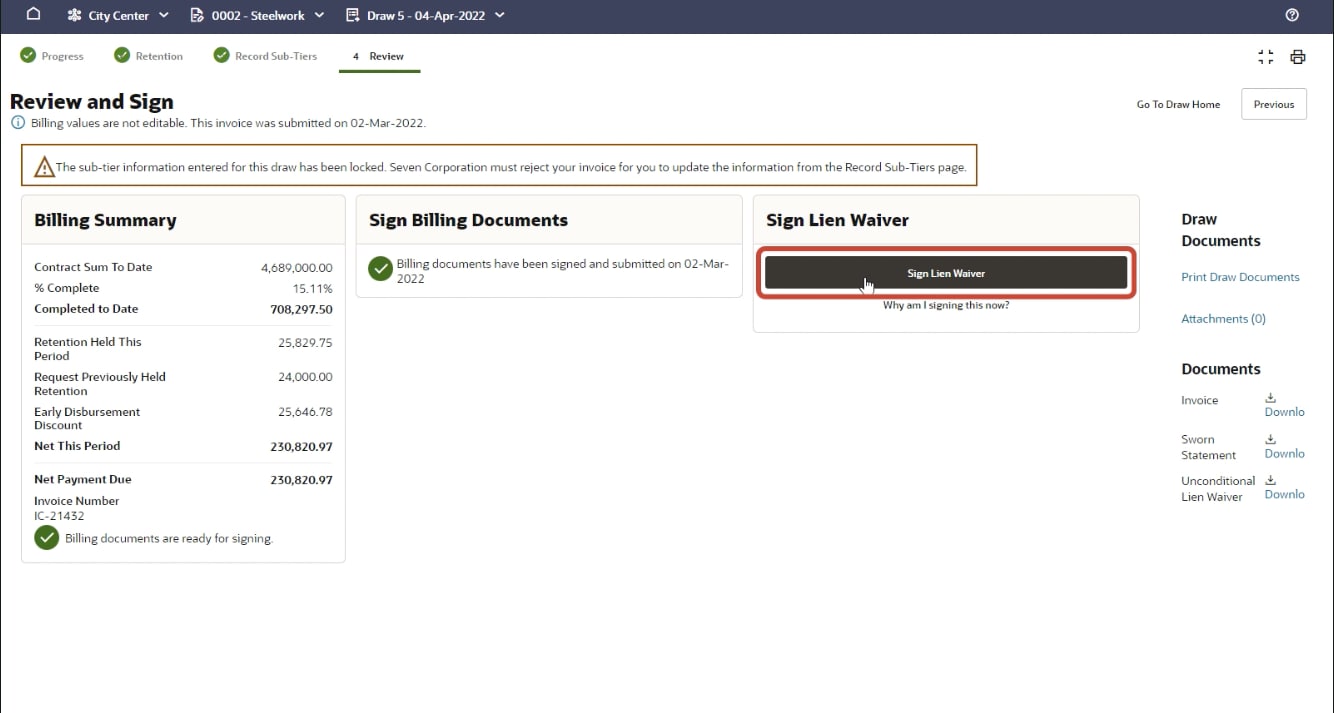
Document signing
Again, you're presented with the PDF in DocuSign. Click Start. Apply your signature where necessary, and click Finish. After you're finished, the notary clicks Notarize Lien Waiver and repeats the steps in DocuSign to notarize the document.
Note: If there's no Notary set for the project, the signing steps continue as noted.
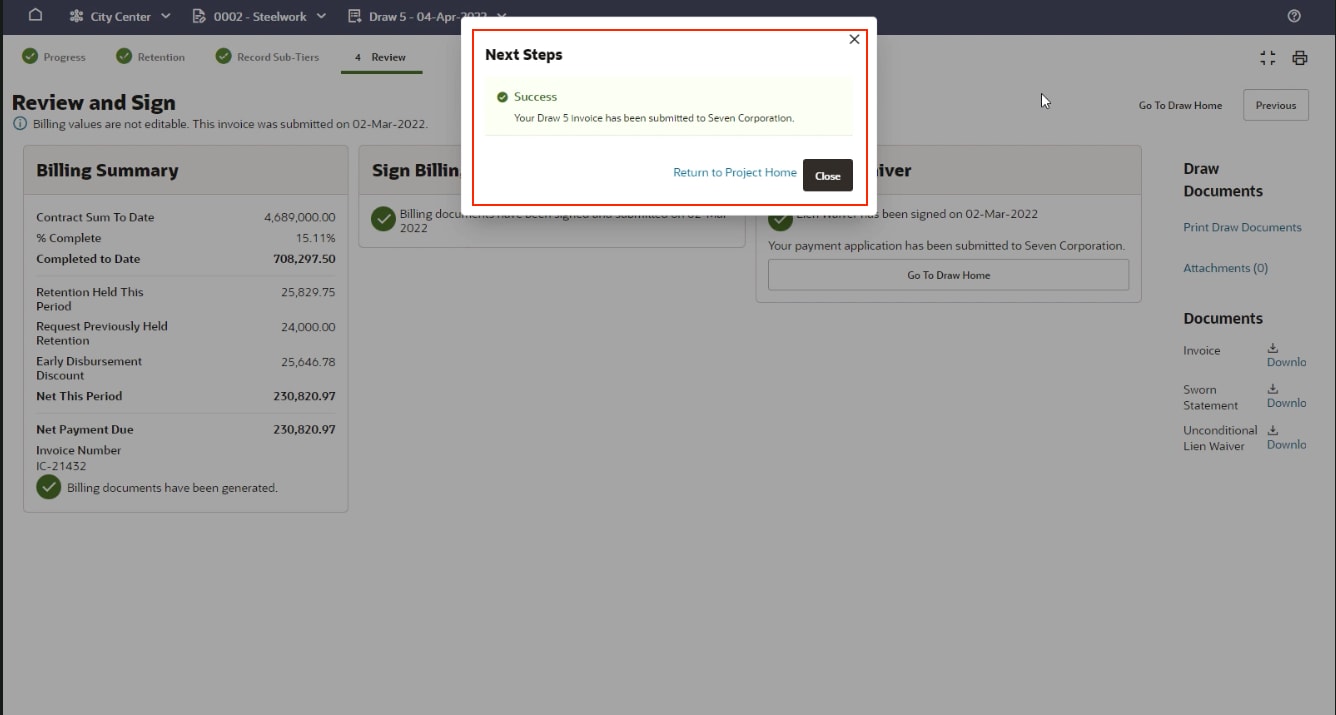
Confirmation of submission
You'll receive confirmation that your payment application has been submitted. Return to the project homepage to print your documents.