Before You Begin
Purpose
This tutorial covers OEMM backup and restore of repositories, configuration management and metadata stitching.
Time to Complete
Approximately 20 minutes.
Introduction
This Oracle By Example (OBE) is third in a series of seven OBEs. The recommendation is to do them in order. The series is:
- Installing OEMM, on a Windows PC.
- Harvesting Metadata from Various Sources: DB, ODI, OBIEE, and others.
- Managing the Configuration and Metadata Stitching with OEMM, backup and recovery and source-to-destination mapping (you are currently viewing this OBE).
- Configuring Data Lineage Analysis, graphically and exporting to Excel.
- Using Impact Analysis, the "opposite" of data lineage.
- Creating a Business Glossary in OEMM, using the enterprise edition.
- Administering OEMM, creating users, roles, and scripts.
You will be using the models (from Oracle Database, ODI and OBIEE) already existing in the VM repository because these are part of a functioning application. This means the objects inside the model will match correctly with their ounterpart in another model. For example, tables defined in the physical layer of the OBIEE model are named exactly same as in Data Warehouse model in the database. This will allow us to "stitch" the models together.
Scenario
You have several models from several sources in the Tutorial folder. You know that the data flows from model A to B to C, and you want to indicate that graphically.
Software and Hardware Requirements
The following is a list of software and hardware requirements used in this Oracle By Example (OBE):
- Software
- Oracle Database 11.2.0.4.0 or higher
- Oracle Business Intelligence Enterprise Edition (OBIEE) was installed at one time, but no longer is installed.
- Oracle Enterprise Metadata Manager (OEMM) 12.1.3.0.2 or higher. The OEMM Install and Setup Guide is available online and in the product itself.
- Oracle Data Integrator (ODI) 12.1.3 or higher. At least one copy of ODI for Windows must be on the same machine as OEMM. (ODI is not a requirement for OEMM, but is a requirement for parts of this OBE.)
- Alternatively, the VM contains Database, ODI, and OEMM sample repositories (but not OEMM software) pre-installed with Oracle Enterprise Linux (OEL) 6.4. The VM (approx 7 GB) requires Oracle VirtualBox to run. The VM is available in either of two places (both are the same VM):
- internally for employees only
- externally on OTN for all students and customers
- Hardware
- At least 2 GB RAM for each target (database or ODI)
- At least 5 GB RAM for the VM (if you are using that)
Prerequisites
Before starting this tutorial, you should:
- Have an account to download Oracle software.
- Have access to or have installed the sample lab artifacts
- Have attended ODI 12c training, [D82167GC10] Oracle Data Integrator 12c: Integration and Administration, or equivalent experience. (ODI is not a requirement for OEMM, but is a requirement for parts of this OBE.)
Typographic Conventions
These are the conventions used throughout this practice to indicate who types what.
-
Filenameor/path/subdirectory/. Often you can navigate to a destination without having to type it. - Command or value that you type, such as gedit .bashrc. Be mindful of periods at the end of sentences that are not part of the command.
- Click this such as or .
- Some variable or
<variable>as something you replace. Often prefixed with "my" such as<myName>or<myHost>. - A Menu Item or dialog Field Prompt or Tab name. For example, "click the Designer tab and select Models > New Model".
- Generally a red rectangle in the graphics is not part of the original image, but added to draw your attention to an item.
1. Performance Test
In order to backup and restore, you want to make sure that it will finish in a reasonable time. To test this, there is a performance test script that should finish in about one minute. To run the performance test script, perform the following steps:
1.1 Run the Script
-
On the top-right corner, navigate to Tools > Administration.
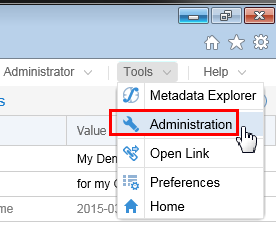
Description of this image -
On the System tab, click Scripts > Test performance.
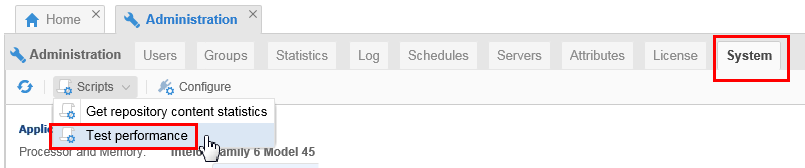
Description of this image -
The script that is about to run is displayed for your information.
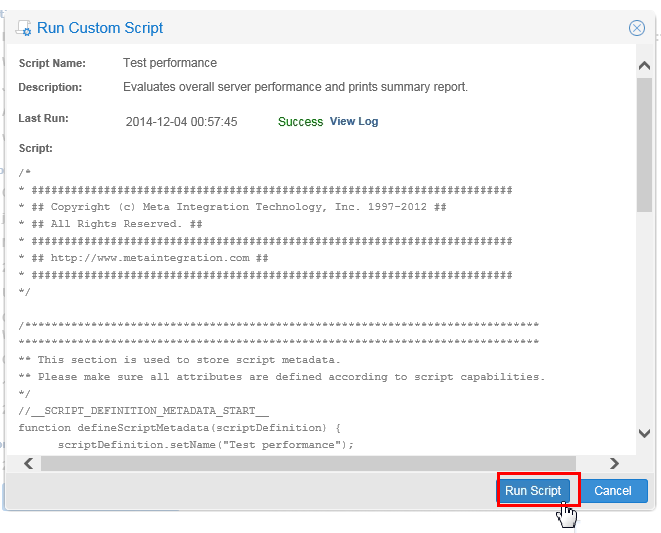
Description of this image Click .
-
There is an intentional 30 second pause built-in. Note the Total run time.
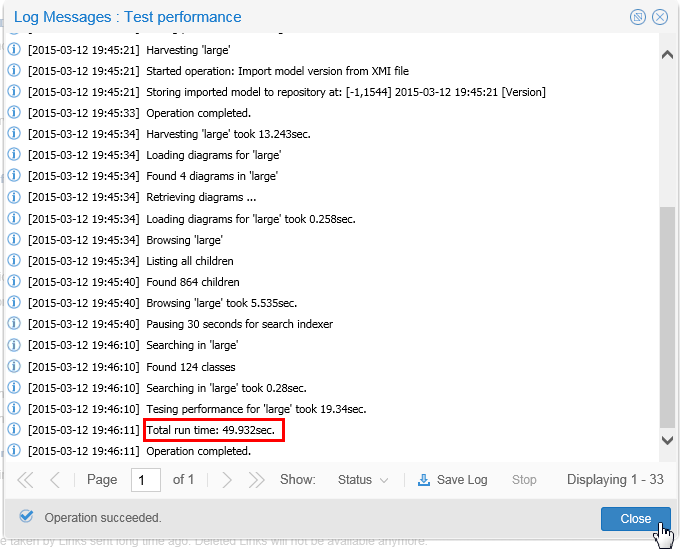
Description of this image When the performance test is finished, click . Close the Administration tab.
You have successfully run the performance testing script.
1.2 Interpret the Test Results
- If the total time is less than one minute, you are all set to proceed with backups and restores. Skip to Topic 2.
- If the total time is greater than two minutes, try increasing the RAM size of the VM, or closing other apps on the host of the VM.
- If you suspect network latencies, if possible, locate both the VM and the Windows host on the same subnet.
- See if only one of the tasks is taking the bulk of the time. Try to determine why.
After these corrective steps, rerun the performance test and see if it is acceptable now.
You have successfully run the performance testing script in preparation of doing a backup and restore.
2. Backup and Restore
In order to backup and restore the repository of metadata, perform the following steps:
2.1 Backup
-
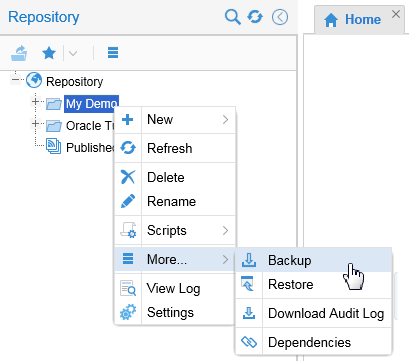
On the main navigation panel, right-click Repository and select More > Backup.
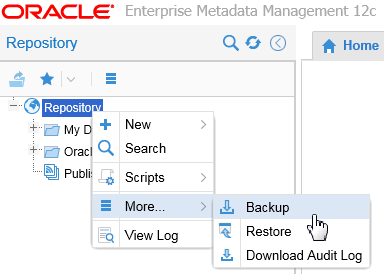
Description of this image -
Browse or type an existing directory destination for the backup files. It must be a drive writeable from the OEMM (Windows) PC.
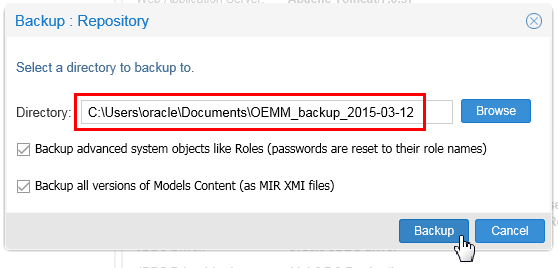
Description of this image It is a good practice to put the date in the folder name. Click .
-
The log messages show the progress of the backup. This can take a while.
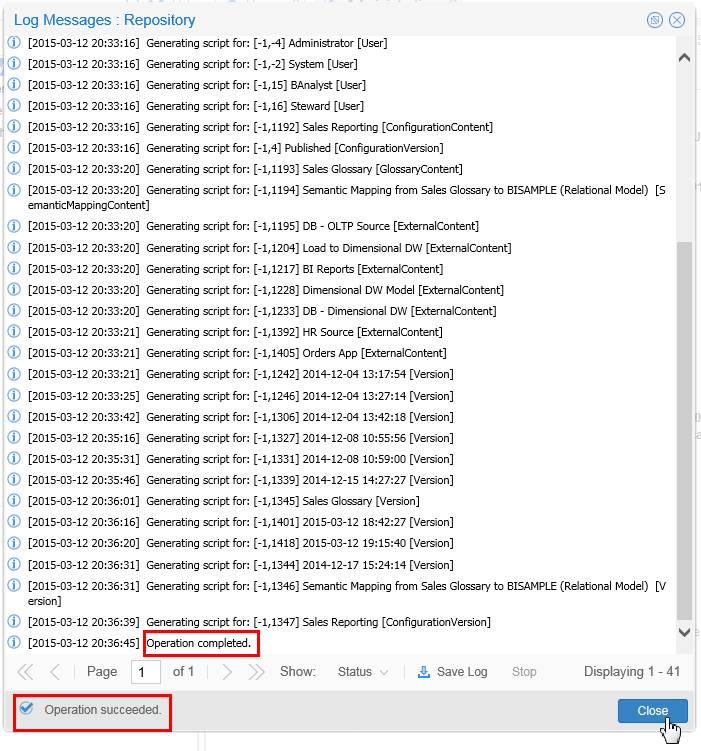
Description of this image When the backup is finished, click .
-
Examine the files that are created as part of the backup.
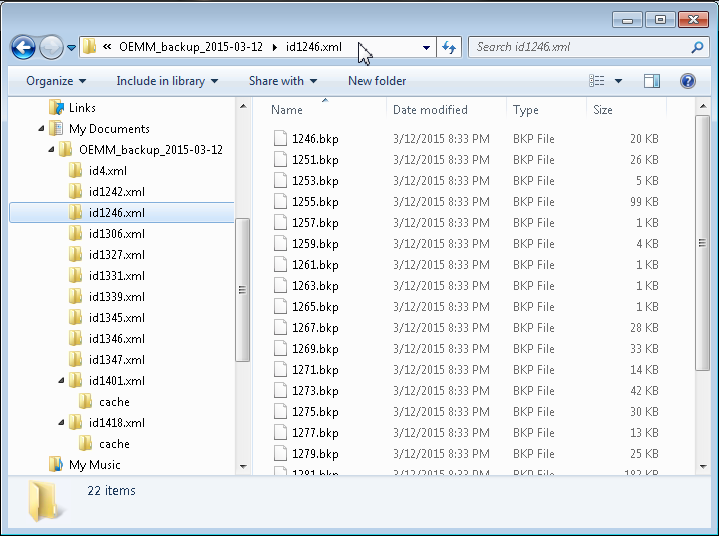
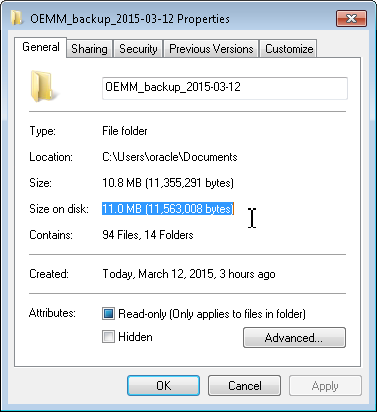
Description of this image The backup is composed of lots of little files. That is why you want to put this in its own directory.
-
For your information, you can also back up subsets of the repository, such as individual folders.
Description of this image Do not bother to actually do this, this is just to show you that you could.
You have successfully backed up the repository.
2.2 Delete
-
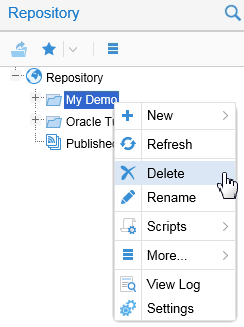
To simulate a catastrophe, right-click My Demo and select Delete.
Description of this image -
It does warn you, but only once!
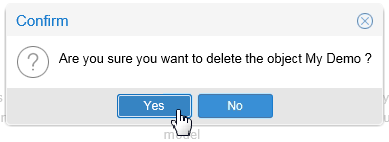
Description of this image Click to continue.
Unfortunately, deleting is very easy! Fortunately, so is restoration.
2.3 Restore
-
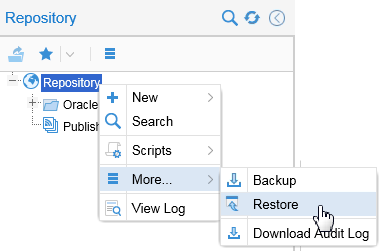
To recover from our simulated catastrophe, right-click Repository, and select More > Restore.
Description of this image -
Browse to where you stored the backup, and then click .
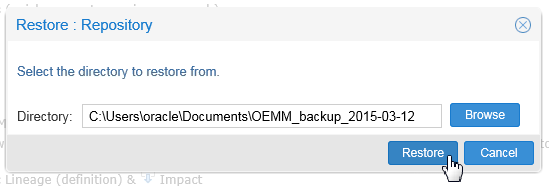
Description of this image You cannot restore pieces of the backup, it is all or nothing. It is smart enough to not duplicate what is already there, but to overlay/replace it.
-
Examine the Log Messages to see that it completed successfully.
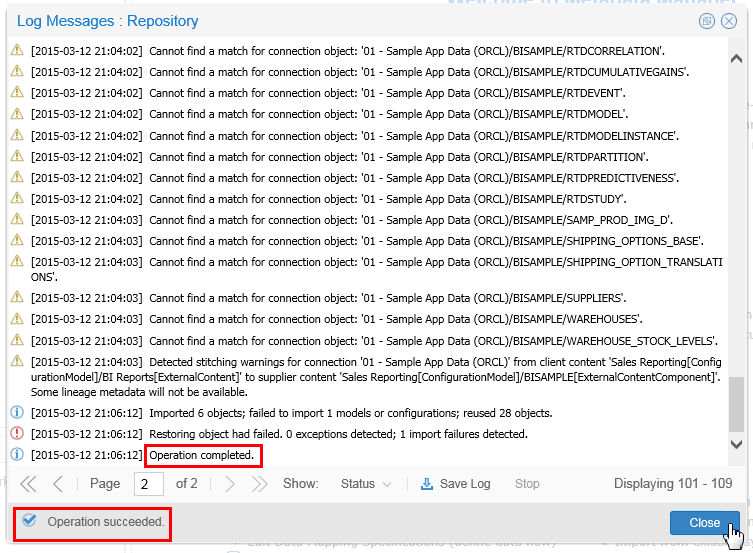
Description of this image Click to continue.
-
Verify that the My Demo folder has been restored successfully.
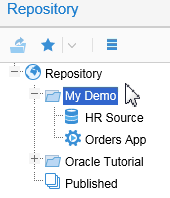
Description of this image
You have successfully restored a folder to the repository.
You have successfully completed backup and restore operations.
3. Configuration Management and Metadata Stitching
After we have harvested the models, we will stitch them together by creating a configuration. A configuration is a set of models deployed together. Data Lineage/Impact Analysis/Semantic analysis is done within the scope of a configuration. There can be more than one configuration in the repository for analysis purposes.
3.1 Create a Configuration
-
Create a new configuration by right-clicking on Repository > My Demo and selecting New > Configuration.
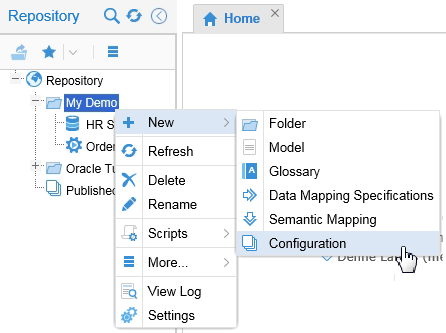
Description of this image -
Give the configuration the name: Sales Reporting Application.
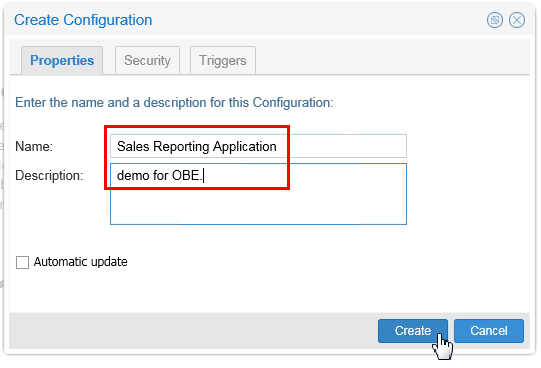
Description of this image Click to continue.
An empty configuration exists. It needs to be populated.
3.2 Populate the Configuration
-
Select four Oracle Tutorial models from the Repository:
- DB - Dimensional DW
- DB - OLTP Source
- Load to Dimensional DW
- BI Reports
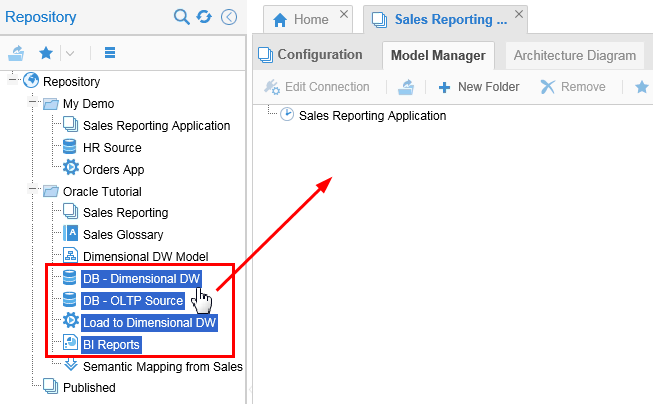
Description of this image Use the [Ctrl] key to select multiple objects.
-
Drag and drop into the configuration Model Manager.
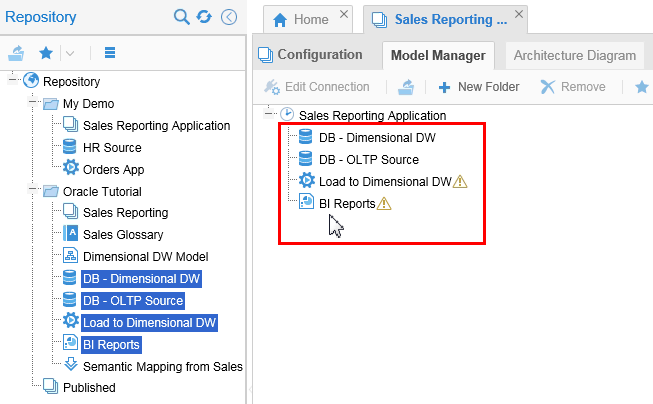
Description of this image Note the Warning icons (
 ) indicating that you are not done yet.
While the four objects are in the configuration, the flow (source and destination) still needs to be specified.
3.3 Set Source and Destinations
The objects need to be linked together in a specific order for metadata stitching. The ultimate goal is the following logical order:
- DB - OLTP Source
- Load to Dimensional DW
- DB - Dimensional DW
- BI Reports
-
Select Load to Dimensional DW. (You know this needs further configuration because of the
icon.) 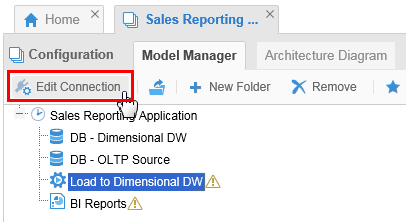
Description of this image Click .
-
Select SRC_ODIDEMO.OLTP_SRC as the Source, and under Store, select DB - OLTP Source.
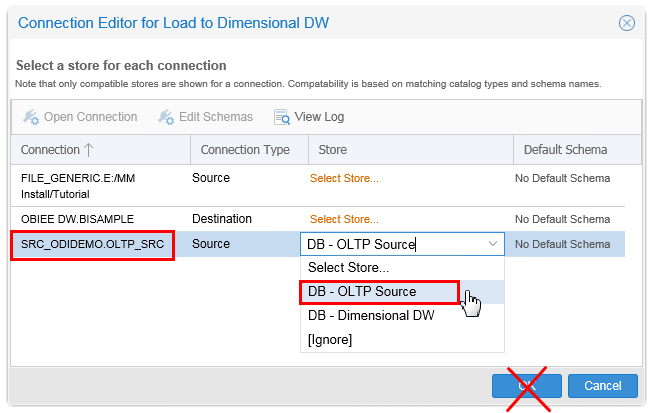
Description of this image Stay on this panel, do not click OK yet.
-
Select OBIEE DW.SAMPLE as the Destination, and under Store, select Dimensional DW.
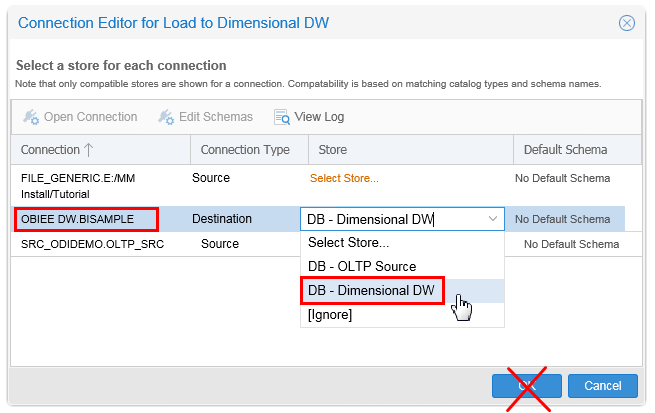
Description of this image Stay on this panel, do not click OK yet.
-
Select FILE_GENERIC.E, and under Store, select [Ignore].

Description of this image Now click . (The
icon should be cleared now.) -
Select BI Reports as well. You know this needs further configuration because of the
icon. Click . Only 01 - Sample App Data (ORCL) needs to be mapped to DB - Dimensional DW, and the others will be ignored. 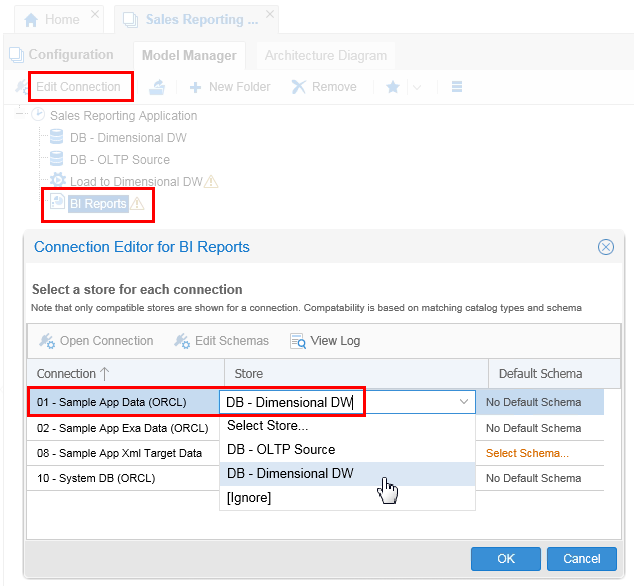
Description of this image Click .
The source and destination have been identified, the non-source/destinations are ignored.
The stitching has been configured, but it still needs to be validated.
4. Cleanup
There had been warnings during validation. It means some attributes didn't stitch properly.
4.1 Examine Warning/Error Messages
-
On the Sales Reporting > Model Manager tab, click .
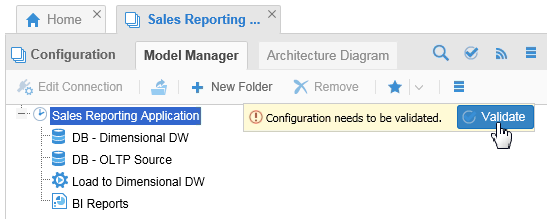
Description of this image -
Nothing to do here, just look.
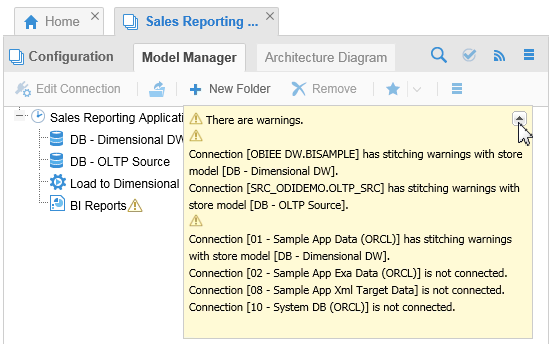
Description of this image The alert
icon is next to BI Reports, so that is where you need to look next. -
Click Architecture Diagram tab. (This requires Adobe Flash Player.)
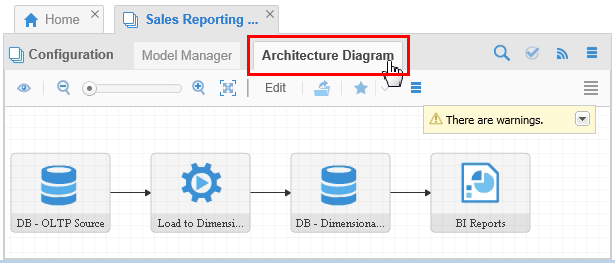
Description of this image Nothing to do here, just look.
The configuration messages have been examined.
4.2 Warning/Error Messages Research
-
To see why you are getting validation warnings, open the Connection Editor for BI Reports.
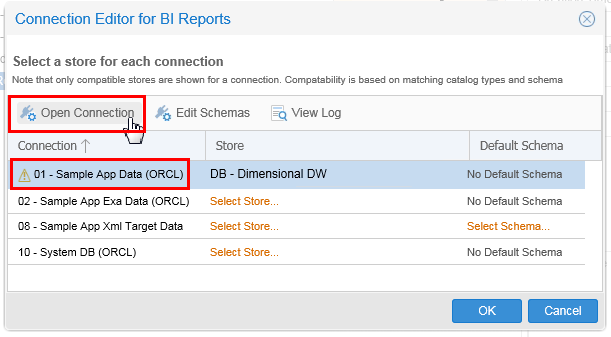
Description of this image Click .
-
You can see the attributes match between database
BISAMPLEand the attributes in the connection Sample App Data (ORCL) of BI Reports model. Notice that some attributes have not matched. This is why there was a warning. If attributes do not match, the metadata analysis for those attributes cannot be done. It also will cause errors in deployed applications. Some reports in BI Report will not find the table/columns in theBISAMPLEdatabase and fail.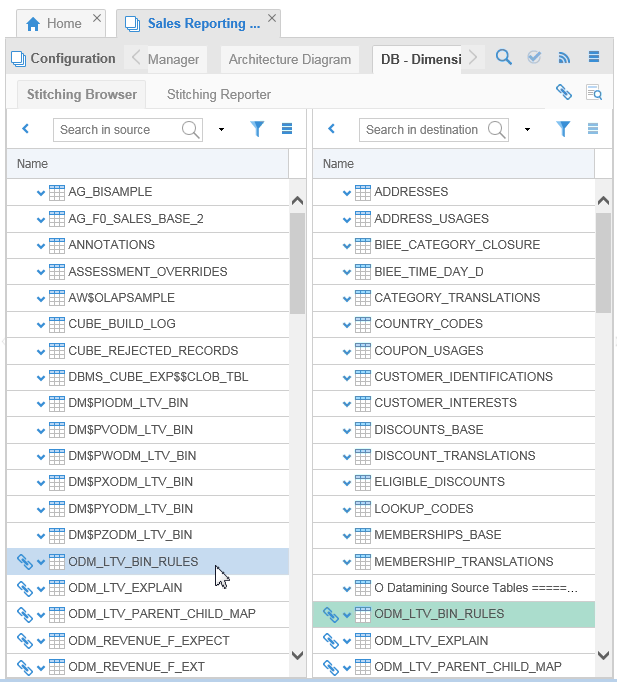
Description of this image The two highlighted lines,
ODM_LTV_BIN_RULESare examples of matching lines (with the blue chain link icon). The lines above them (for example,DM$PZODM_LTV_BINandMEMBERSHIP_TRANSLATIONS) are examples of non-matching lines (no chain shown). For our purposes, these non-matching stitching errors can be ignored.
The errors have been acknowledged, but not corrected. We can live with that.
This completes the cleanup. The stitching is now complete.
Want to Learn More
Much of this is preparation to configure the OEMM objects for harvesting. While OEMM can discover many things on its own, in this phase you need to know which objects feed other objects (specifying sources and destinations).
In this tutorial, you learned to:
- Run a performance test script to validate that the environment is sufficiently robust
- Backup and restore the whole repository (with instructions on how to do just a piece of the repository)
- Configure the source and destinations in such a way as to stitch the objects together in the proper order
- Validate the configuration and examine the error messages
Resources
Following is a list of conceptual or procedural Help topics relevant to the topic of this tutorial:
- Product marketing information
- Product documentation in PDF format.
- Virtual Machine demo environment on OTN
- Internal (employee) resources:
- MetaIntegration, the owner of the OEM version of this product.
- To learn more about OEMM, refer to additional OBEs in the Oracle Learning Library <can link to a specific set of OBEs on the subject or product(s)>
Credits
- Lead Curriculum Developer: Jayant Mahto
- Other Contributors: Steve Friedberg