Before You Begin
Purpose
This tutorial covers using OEMM to build and maintain a Business Glossary and a set of semantic mappings.
Time to Complete
Approximately 20 minutes.
Introduction
Critical to the development and management of complete data architecture is a Business Glossary. OEMM provides an ISO 11179 based Business Glossary to capture, define, maintain and implement an enterprise Business Glossary of terminology, data definitions, code sets, domains, validation rules, and so on. In addition, semantic mappings describe how elements in a source Model (more conceptual like the Business Glossary) define elements in a destination Model (closer to an implementation or representation).
A Business Glossary is organized into categories, which may then contain terms, domains or other categories. Terms and domains may be cross-linked in a wide variety of ways. Simply edit a specific term or domain to do so. We will go through the tutorial and create some categories.
An important consideration when producing any semantic model (including a glossary) is to take advantage of the metadata sources with the most well defined business metadata such as descriptions, domains, business rules, relationship definitions, generalizations, etc. When populating a glossary based upon one of these metadata sources, OEMM will look for all of these types of metadata and create equivalents within the glossary. In addition, it can create a new semantic mapping and create individual mappings between the newly create glossary equivalents and the specific metadata objects from which they were constructed. In this way, you may perform sophisticated impact (where used) and reverse lineage (show definition or meaning) type of lineage analysis.
This Oracle By Example (OBE) is sixth in a series of seven OBEs. The recommendation is to do them in order. The series is:
- Installing OEMM, on a Windows PC.
- Harvesting Metadata from Various Sources: DB, ODI, OBIEE, and others.
- Managing the Configuration and Metadata Stitching with OEMM, including backup and restore.
- Configuring Data Lineage Analysis, graphically and exporting to Excel.
- Using Impact Analysis, the "opposite" of data lineage.
- Creating a Business Glossary in OEMM, using the enterprise edition (you are currently viewing this OBE).
- Administering OEMM, creating users, roles, and scripts.
Scenario
Note that there are two distinct versions of Metadata Management:
- Oracle Enterprise Metadata Management (OEMM), which is fully featured enterprise edition, specifically it does include Business Glossary
- Oracle Metadata Management for Oracle Business Intelligence Applications (OMM), which is limited for use with OBIA, specifically it does not include Business Glossary
orcl.HR sample schema, then you will use an existing Sales Glossary based on the model Dimensional DW.
Software and Hardware Requirements
The following is a list of software and hardware requirements used in this Oracle By Example (OBE):
- Software
- Oracle Database 11.2.0.4.0 or higher
- Oracle Business Intelligence Enterprise Edition (OBIEE) was installed at one time, but no longer is installed.
- Oracle Enterprise Metadata Manager (OEMM) 12.1.3.0.1 or higher. The OEMM Install and Setup Guide is available online and in the product itself.
- Oracle Data Integrator (ODI) 12.1.3 or higher. At least one copy of ODI for Windows must be on the same machine as OEMM. (ODI is not a requirement for OEMM, but is a requirement for parts of this OBE.)
- Alternatively, the VM contains Database, ODI, and OEMM sample repositories (but not OEMM software) pre-installed with Oracle Enterprise Linux (OEL) 6.4. The VM (approx 7 GB) requires Oracle VirtualBox to run. The VM is available in either of two places (both are the same VM):
- internally for employees only
- externally on OTN for all students and customers
- Hardware
- At least 2 GB RAM for each target (database or ODI)
- At least 5 GB RAM for the VM (if you are using that)
Prerequisites
Before starting this tutorial, you should:
- Have an account to download Oracle software.
- Have access to or have installed the sample lab artifacts
- Have attended ODI 12c training, [D82167GC10] Oracle Data Integrator 12c: Integration and Administration, or equivalent experience. (ODI is not a requirement for OEMM, but is a requirement for parts of this OBE.)
Typographic Conventions
These are the conventions used throughout this practice to indicate who types what.
-
Filenameor/path/subdirectory/. Often you can navigate to a destination without having to type it. - Command or value that you type, such as gedit .bashrc. Be mindful of periods at the end of sentences that are not part of the command.
- Click this such as or .
- Some variable or
<variable>as something you replace. Often prefixed with "my" such as<myName>or<myHost>. - A Menu Item or dialog Field Prompt or Tab name. For example, "click the Designer tab and select Models > New Model".
- Generally a red rectangle in the graphics is not part of the original image, but added to draw your attention to an item.
1. Create a New Glossary
For this tutorial, you will create a new Glossary using the orcl.HR sample schema, then you will use an existing Sales Glossary based on the model Dimensional DW
..
1.0 Verify the Prerequisite Connectivity
-
Expand [+] Repository > My Demo, right-click HR Source model and select Settings.
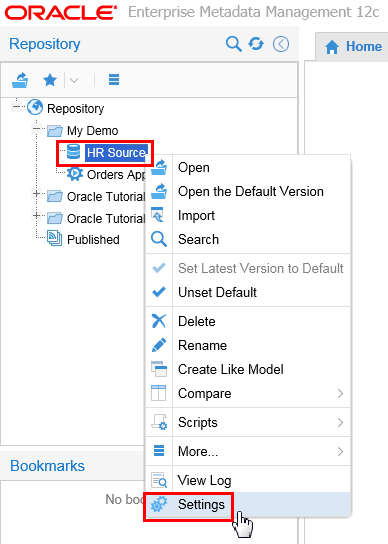
Description of this image -
Select Import Setup tab and click Test.

Description of this image If the test is successful, click in the Alert pop-up, and then the Settings for HR Source panel. Skip the next step and proceed to the next topic.
-
If the test is NOT successful, verify the Host, User, and Password as configured in OBE 2: Harvesting Metadata, and re-Test until successful. Once successful, click .
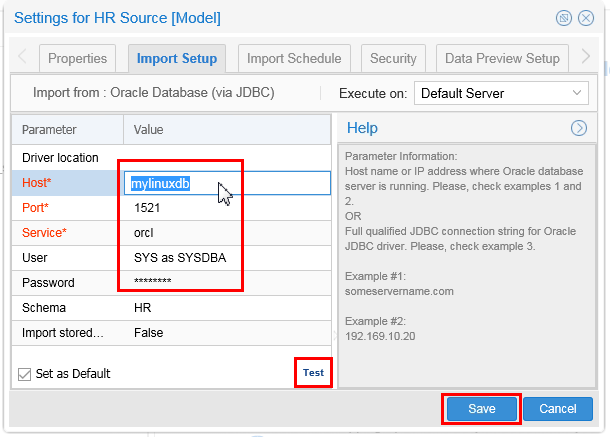
Description of this image The Host address depends on whether the Linux VM database is in the same host with the Windows OEMM. This will determine whether you use
localhostor not. -
Once successful, click then to close the Settings for HR Source panel.
You have verified that you will be able to reach the intended source of the glossary.
1.1 Create an Empty Glossary
-
Right-click My Demo folder and create a New > Glossary.
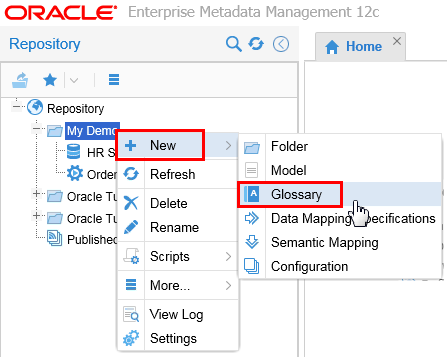
Description of this image You can have more than one Glossary in each folder.
-
Name it Tutorial Glossary. A Description is always a good idea.
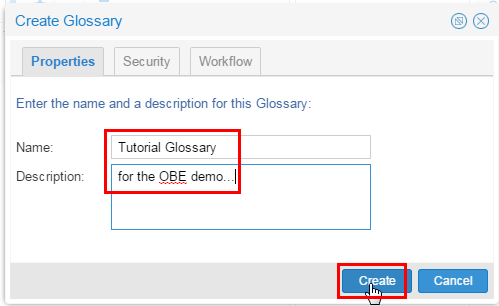
Description of this image Click .
-
Click for adding a category. You will populate the Glossary by dragging the HR model into it rather than creating the category and terms manually.
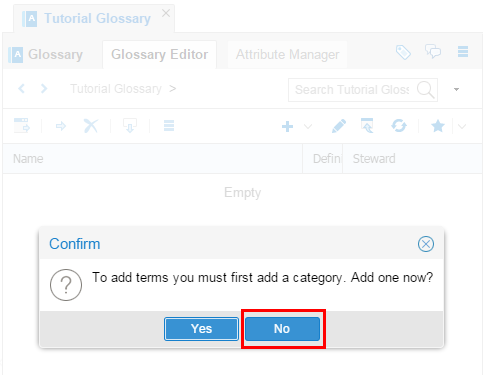
Description of this image .
You have created a new empty Glossary.
1.2 Populate the Glossary
-
Drag the HR Source model into the Glossary Editor to seed the repository.
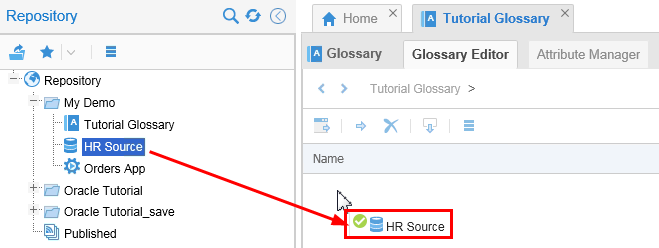
Description of this image This will create the terms in the Glossary using the entities/relationships/constraints in the HR Source model based on the HR schema in the
orclinstance. -
Enter Steward to populate default values in the business terms or you can leave it blank and update it later. This value can also be updated after the Glossary population.
Select the check box to Create a Semantic Mapping. Keep the default name of the semantic mapping. This mapping is similar to data mapping described earlier. The difference is that it is between a semantic model (glossary) and the physical model. This mapping is created automatically which can be updated later.
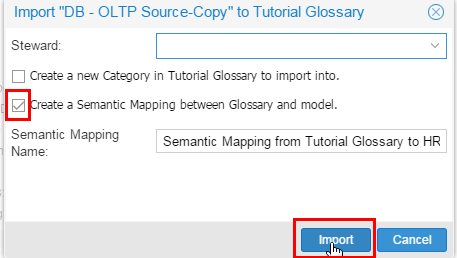
Description of this image Click .
You have started the import of a model into a Glossary.
1.3 Import into the Glossary
-
Depending on the size, this may take a few seconds. Once the import starts, you can close the import window and it will run in the background.
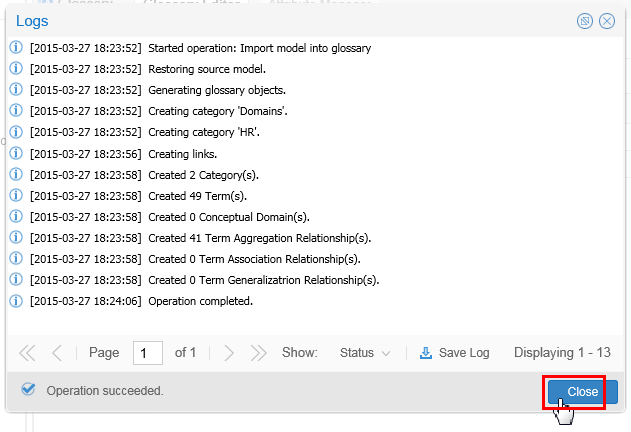
Description of this image Click for the Logs.
-
You can always look at the log any time by right-clicking on the object and selecting View Log.
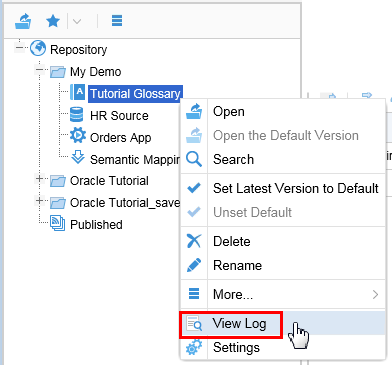
Description of this image Click
 Refresh to check current status. Once it is completed move to the next step.
The database model has been imported into the new Glossary.
You have created a new Glossary (and semantic mapping).
2. Explore New Glossary
This new Glossary is a fairly simplistic one. You can explore it and also the pre-created one named Oracle Tutorial > Sales Glossary. Eventually you will just use the pre-existing Sales one.
2.1 Refresh
-
Refresh
the Repository panel to see the new Glossary and the Semantic link. Refresh
the Glossary Editor to check the newly populated repository. 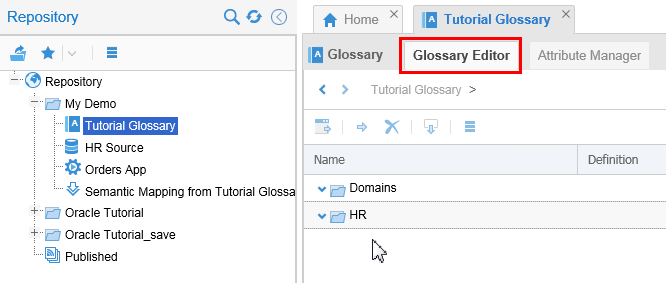
Description of this image The automated process has created two categories: Domains and HR.
-
Expand the two categories: Domains and HR.
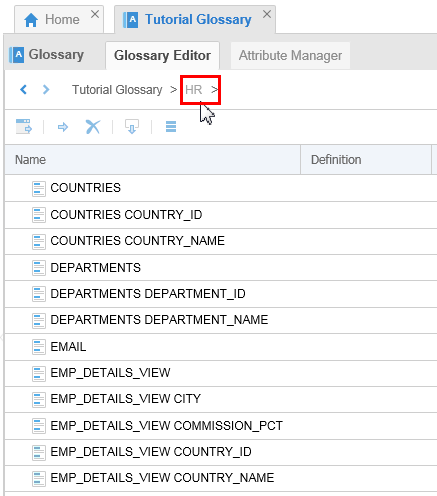
Description of this image The Domains category is empty since there was no such thing in the HR Source model.
The HR category contains all the terms seeded from the model HR Source. All entities and attributes from HR Source are flattened and equivalent terms are created under this category. These are all seeded and can be further updated and maintained in OEMM.
If there had been constraints in the base model then OEMM would have created a category called
Business Rules
based on the constraints. -
Compare and contrast this new Glossary with the existing one named Oracle Tutorial > Sales Glossary. It was created when the environment contained a BI application. Since then, the BI application has been disconnected, but the metadata persists (though obviously in a static state).
Description of this image Close the Tutorial Glossary tab, you will be using the Sales Glossary from now on.
You have refreshed new and existing Glossaries.
2.2 Exploring Glossaries
-
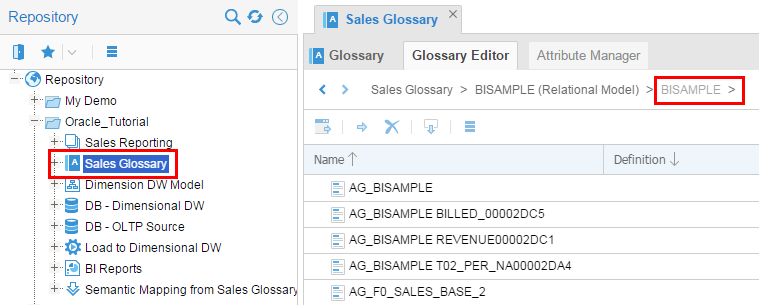
Click the down triangle in BISAMPLE model to open the category. You will see flat list of terms. Scroll down to
SAMP_REVENUE_F.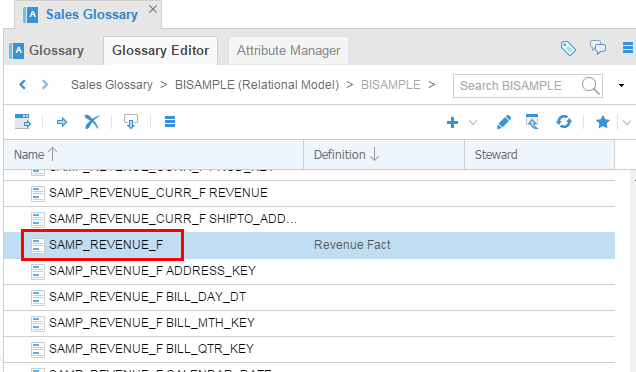
Description of this image Optionally you can Search BISAMPLE
 and filter for text.
 -
Click Edit (pencil) to switch to edit mode. This is a toggle button.
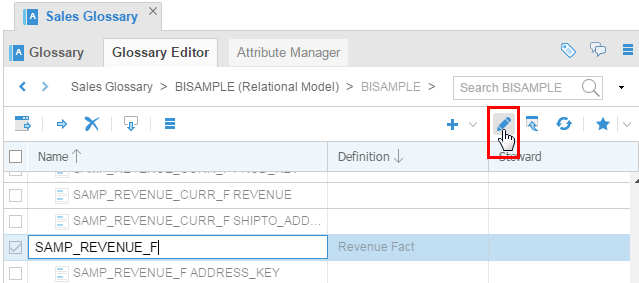
Description of this image Do not change anything yet, this was just so you could see how for later. The way you can tell which mode you are in is that in Edit mode there are check boxes on the far left, whereas in View mode there are no boxes.
-
Click the right edge of the column header to sort or include/exclude additional columns.
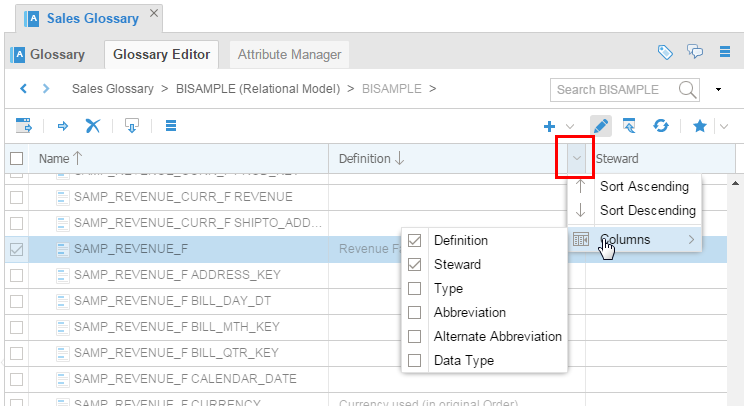
Description of this image Note that many of the definitions are empty because there were only a very few descriptions in the base model Dimensional DW. A rich base model will result in a richly seeded Glossary.
You have explored some of the fields in the BISAMPLE model in the Sales Glossary.
2.3 Update
-
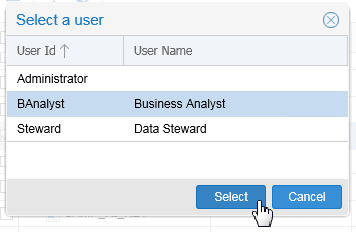
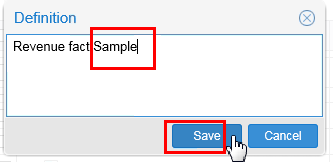
Update the Definition of
SAMP_REVENUE_Fto Revenue Fact Sample. You can also update the Steward value to any other user in the pick list.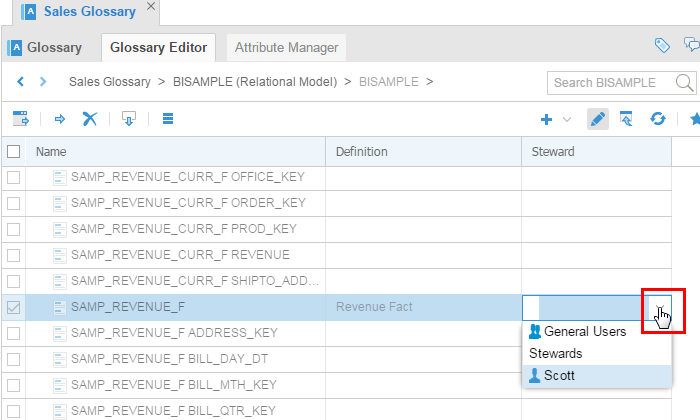
Description of this image This way you are assigning the terms for further maintenance.
-
Go back to view mode using Edit toggle button.
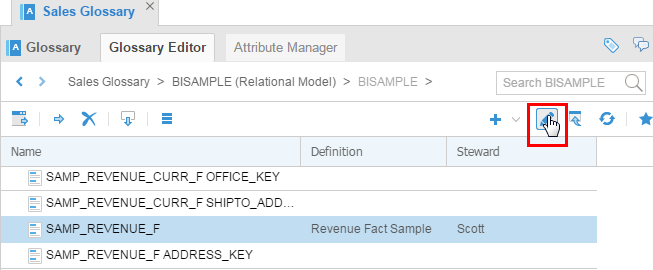
Description of this image The way you can tell which mode you are in is that in Edit mode there are check boxes on the far left, whereas in View mode there are no boxes.
-
Double-click
SAMP_REVENUE_Fto see the detailed properties, documentation, and relationships.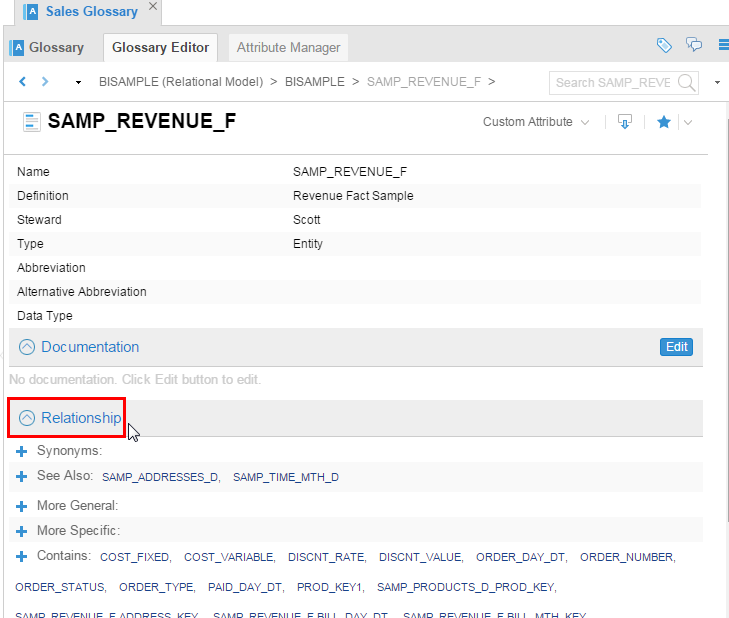
Description of this image Notice entries in the Relationship section. All the attribute of this fact are mentioned under Contains:. This shows that although all the entities/attributes are flattened in the Glossary, the relationship is maintained for semantic analysis.
-
In Contains:, click
COST_FIXED.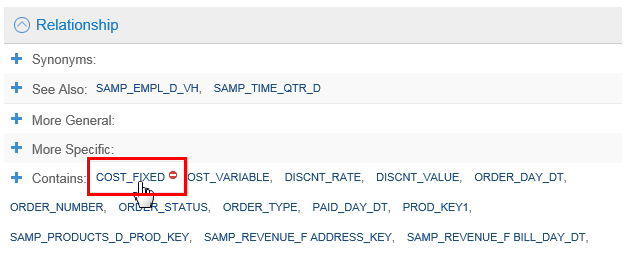
Description of this image -
Update the Definition of
COST_FIXED(just add anything). Check that its property saysSAMP_REVENUE_Fin Contained By relationship. Notice that Stewards can add comments to the section Development Logs to keep track of the updates.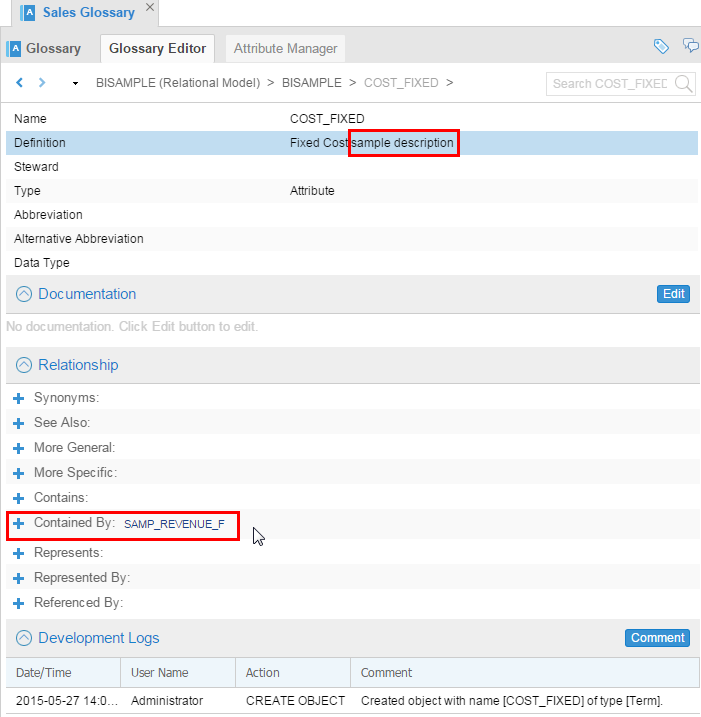
Description of this image Changing the Definition opens a separate dialog box.
-
Click Sales Glossary to go back to the top level of this Glossary.
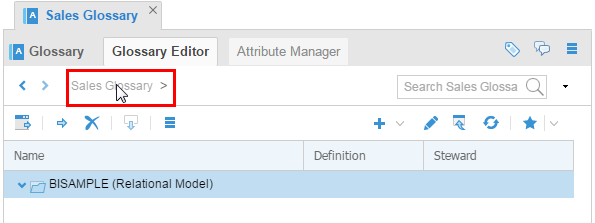
Description of this image
You have updated fields in the Glossary.
You have explored the new and existing Glossaries.
3. Generalization
Now you will create a new category for generalization.
3.1 Add a Category
The goal is to gather all of the cost terms scattered throughout the glossary into one category.
-
Click
 (plus sign) to Add a Category.
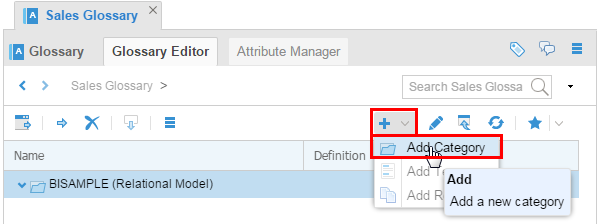
Description of this image -
Name it Generalizations. In this category, select Add Term to add a generic term.
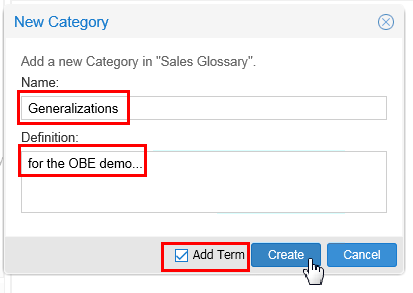
Description of this image Click .
-
Add a new term called All Costs under the category Generalizations. Deselect Create Another since we are creating only one term.
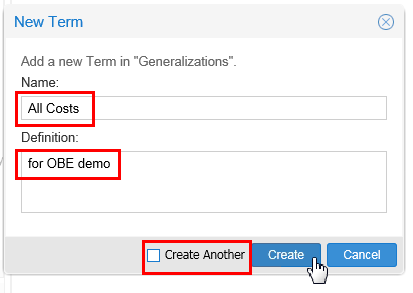
Description of this image Click .
-
Double click All Costs, then under Relationship, click
More Specific. 
Description of this image In the next few steps you are going to add all the terms here that are costs.
-
Search for COST in the Glossary.
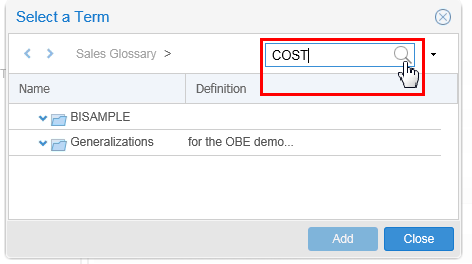
Description of this image Click
to start the search. -
Add all the cost terms by selecting all of them and then clicking .
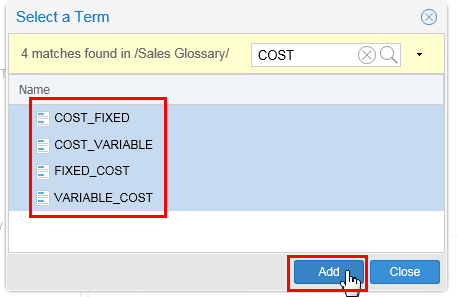
Description of this image After Add, then click .
-
Check that all these terms are added into a generalized term called All Costs.

Description of this image Leave the tabs open for the next step.
You have added a new category to the Glossary for costs.
3.2 Semantic Analysis
Some of the work has already been done for you, specifically the linking of the Glossary and Semantic map to the rest of the model in the Model Manager. Normally you would have to do that step first.
To get semantic analysis for All Costs, perform the following steps:
-
In the Glossary Editor, select Sales Glossary > Generalizations > All Costs, then click Trace Semantic Usage.

Description of this image -
Even though this Glossary and the Semantic map is already in the configuration, you may need to validate it before you can do analysis. If asked for validation, click .
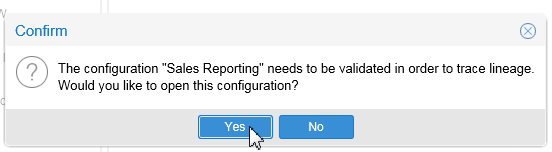
Description of this image However, validation may not be necessary if there are no other changes. In that case, OEMM will directly take you to the graphical view of the semantic Usage. Jump to "Post Validation" step #5 if no validation needed.
-
Open the configuration Sales Reporting Application to validate the linking of the Sales Glossary and Semantic Mapping from Sales Glossary to BISAMPLE in the Model Manager. The Warnings (
 ) tell you the same thing.
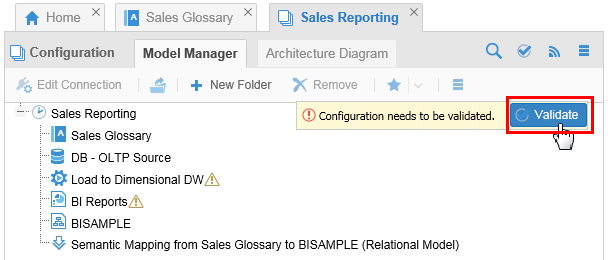
Description of this image Click .
-
It may take up to 10 minutes. If nothing happens after 10 minutes then log out and log back in. Remove first the semantics map Semantic Mapping from Sales Glossary to Dimensional DW and then Sales Glossary from the configuration. After that validate the configuration and drop the semantic link again. It will bring in Sales Glossary in the configuration since it is linked. Validate again.
You have done a simple semantic analysis. There are many more things you can do in this area, but this is the first exposure to OEMM semantic analysis.
3.3 Post Validation
-
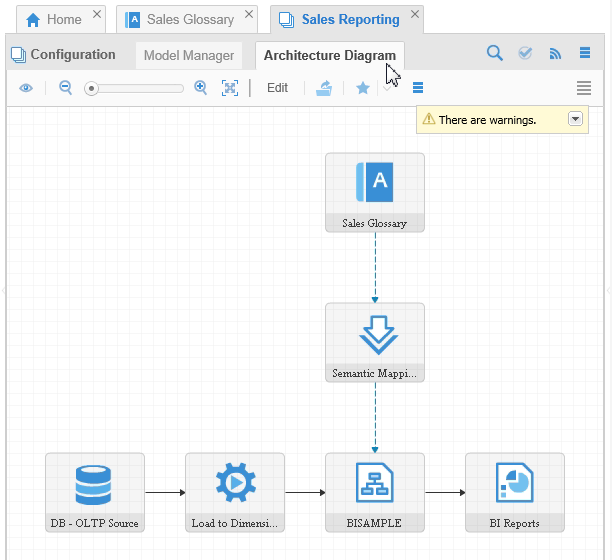
After it is validated, go to the Architecture Diagram tab. You will see the Sales Glossary linked to Dimension DW via the semantic link.
Description of this image -
Go to the Glossary Editor and search for All Costs term that you had created earlier.
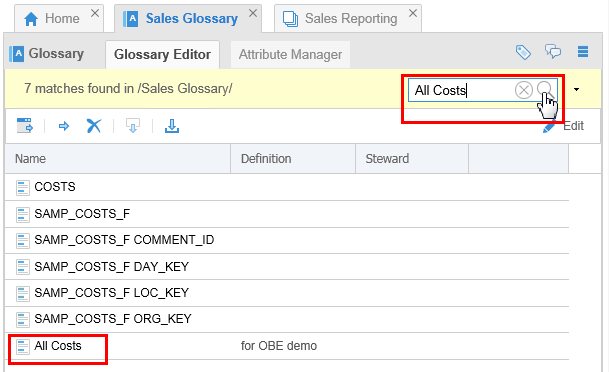
Description of this image The last entry is the one you want.
-
Open
All Costsby double-clicking it. Trace semantic usage for this term.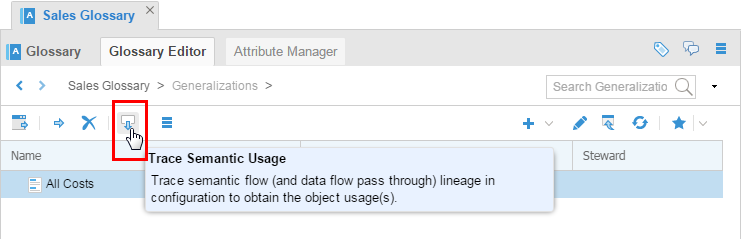
Description of this image This time it will work since this glossary is in the configuration.
-
View the same trace graphically. The dotted blue lines depict semantic linkage (compared to solid lines in data flow lineage trace).
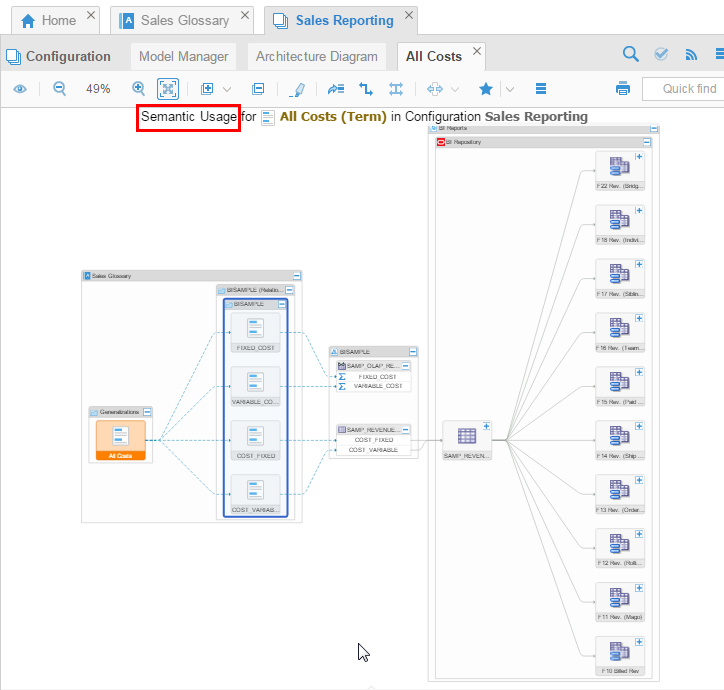
Description of this image You can always zoom in, collapse and expand boxes, and so on to read the tiny text.
-
Click
SAMP_OLAP_REVENUE_F_Vand expand the Properties panel on the right. Notice that this database view in the model Dimensional DW is also linked to the business term called All Costs on the left.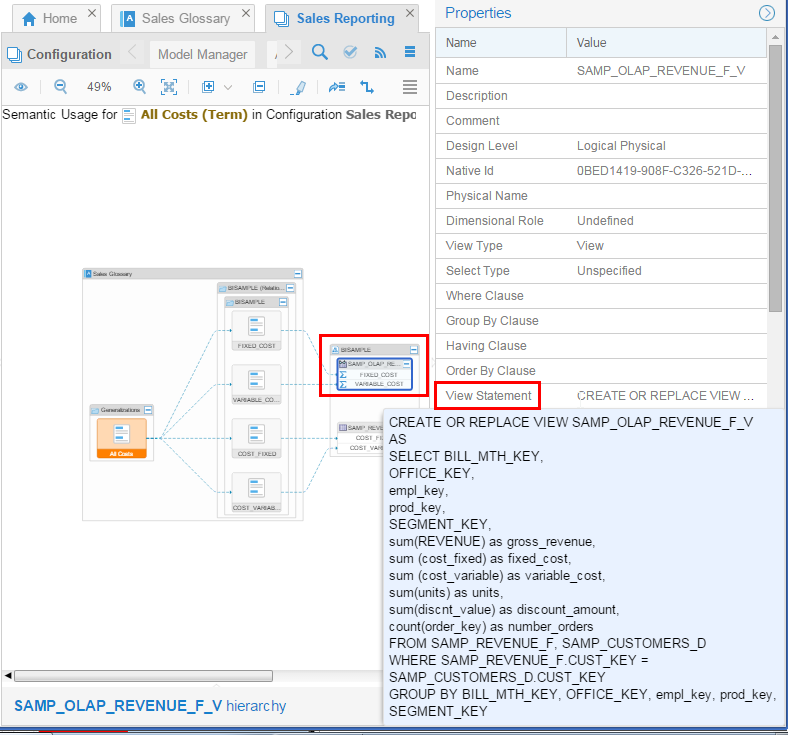
Description of this image
After validation you have confirmed the objects' linkages to views.
You have made a new generalization All Costs and explored all of the properties of it.
Want to Learn More
OEMM provides tools to use existing models to create glossaries and semantic analysis based on metadata descriptions, business rules, constraints, generalizations, and so on. You can view the results either in a textual, tabular format, or in a graphical tree format. While exact matches of fields makes this job easy, there are tools provided for you to manually indicate that (for example) the columns AMT in table A and AMOUNT in table B are really the same thing.
In this tutorial, you learned to:
- Create new glossary by importing models
- Explore the new and existing glossaries
- Update some of the metadata within a glossary
- Create generalization categories
- Do (limited) semantic analysis for a field in both a textual and graphical format
Resources
Following is a list of conceptual or procedural Help topics relevant to the topic of this tutorial:
- Product marketing information
- Product documentation in PDF format.
- Virtual Machine demo environment on OTN
- Internal (employee) resources:
- MetaIntegration, the owner of the OEM version of this product.
- To learn more about OEMM, refer to additional OBEs in the Oracle Learning Library <can link to a specific set of OBEs on the subject or product(s)>
Credits
- Lead Curriculum Developer: Jayant Mahto
- Other Contributors: Steve Friedberg