Confirm contracts
This article will walk you through the process of confirming contracts in Textura.
Confirm your contracts
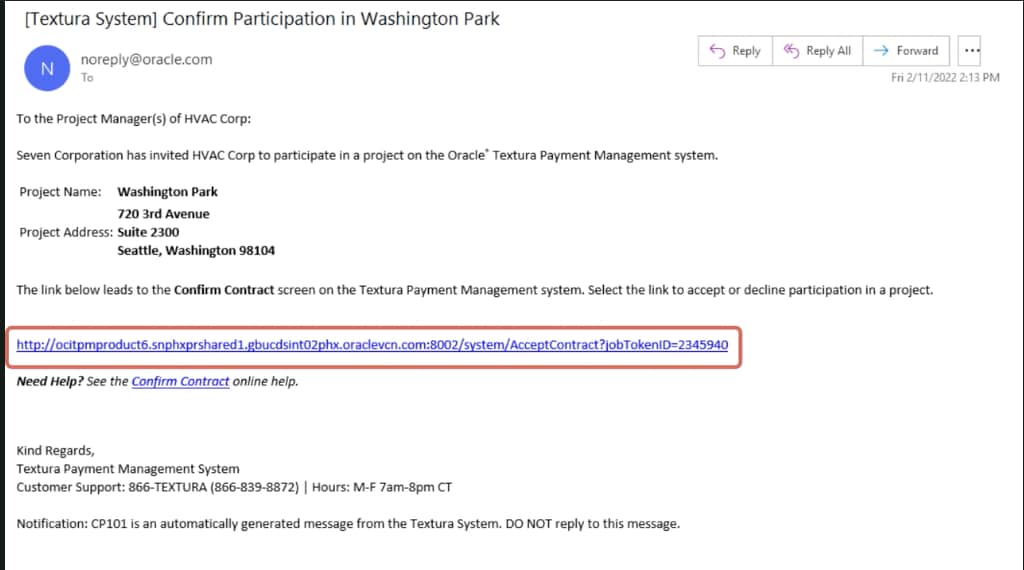
When your organization is invited to participate in a project, you'll receive an email from Textura with a link to the Confirm Contract page.
A link is also displayed in the Overview section of the Project Home page and on your Tasks list.
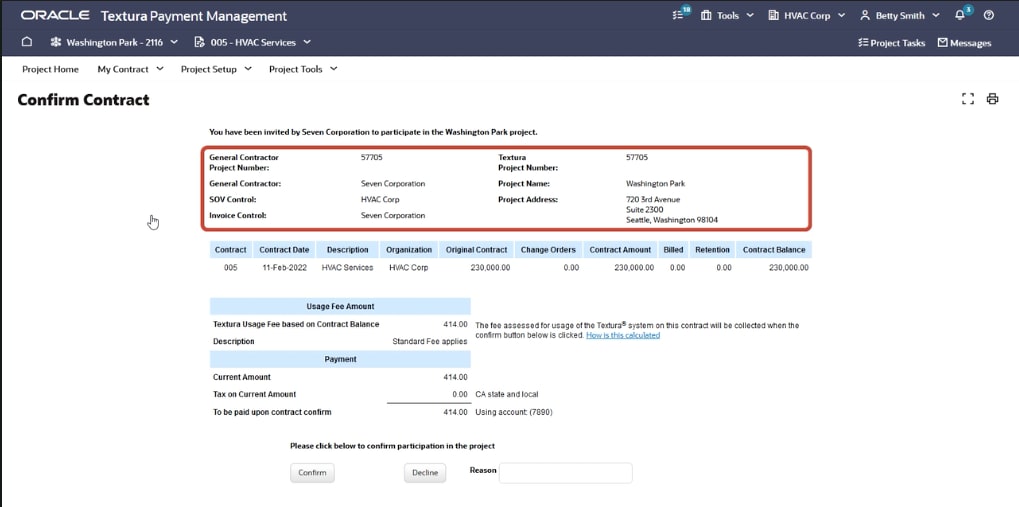
Contract summary information
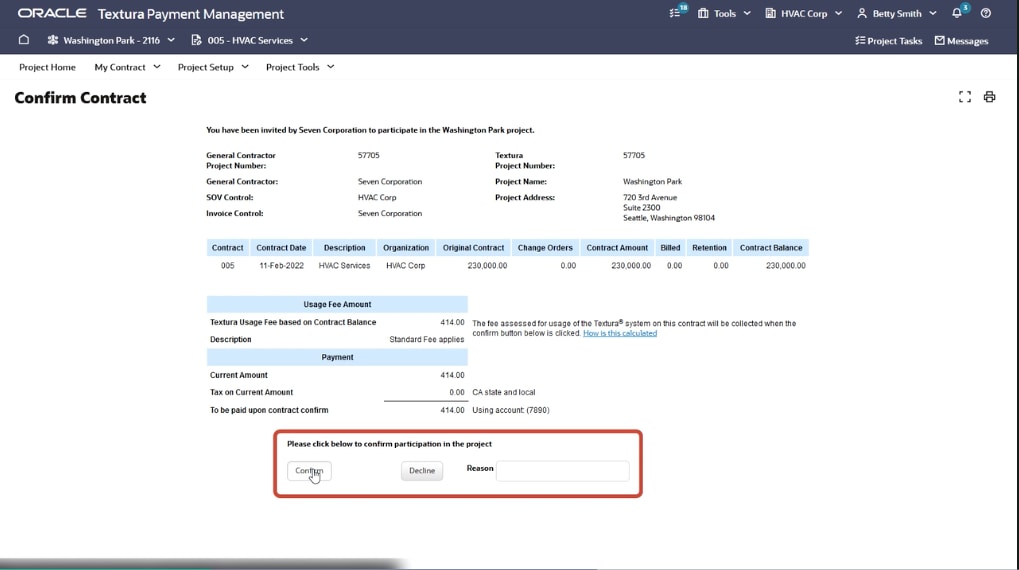
The top of the Confirm Contract page displays summary information about the project, such as the name of the General Contractor, the project number, name, and address, and who controls the budget breakdown and invoicing.
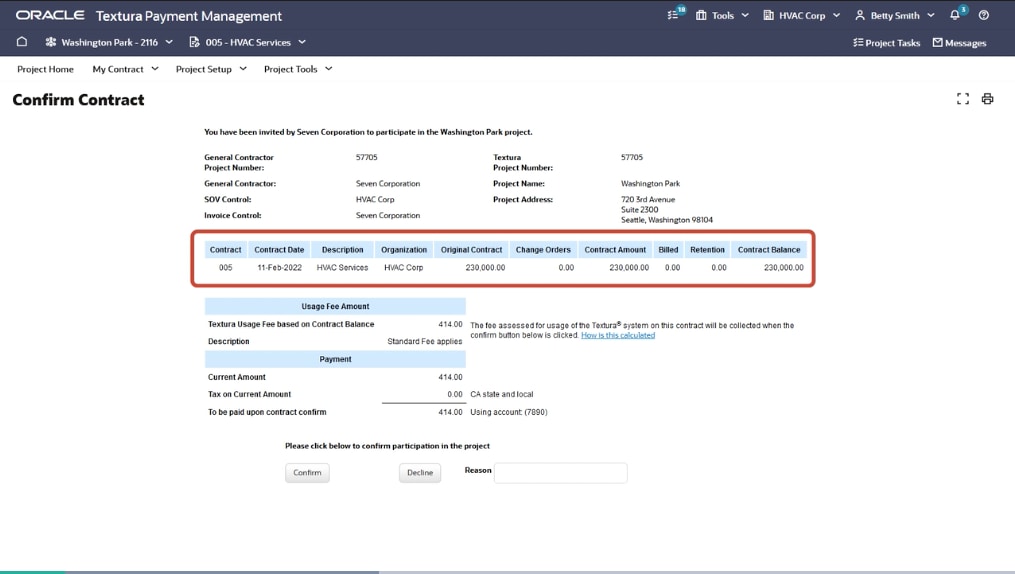
Contract details
The next section displays contract details, such as the contract number, date, and amount. It also displays the usage fee, as well as the applicable tax and method of payment.
Confirm or decline participation
Click to either Confirm or Decline participation in the project.
Clicking Confirm will trigger the collection of the usage fee.
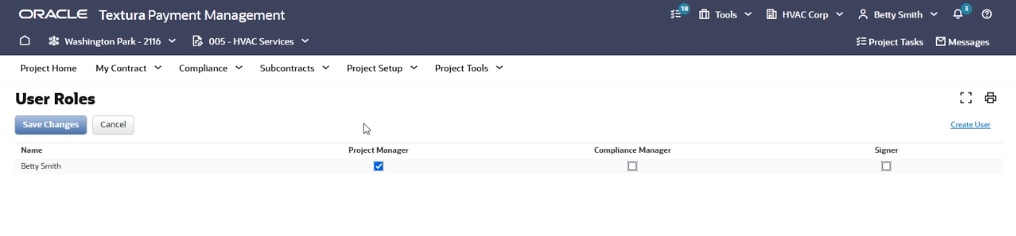
Assign users (if necessary)
After confirming the contract, you may need to assign Textura users to the project if there are other members in your organization. The User Roles page displays the individuals in your company who are registered to use the Textura system and the roles for which they are qualified, such as Project Manager, Compliance Manager, or Signer. (To add a new user, see the next section.)
Select the desired user roles, then click Save Changes to register users with the project. They will receive automatic notifications when actions are required by their user roles. Note that a user can have more than one role, and more than one user can have the same role.
Tip!
Roles reflect the permissions a user is assigned in the user profile. If a specific role is unavailable for a user, that user's permissions must be updated in their profile. Visit this page for more information.
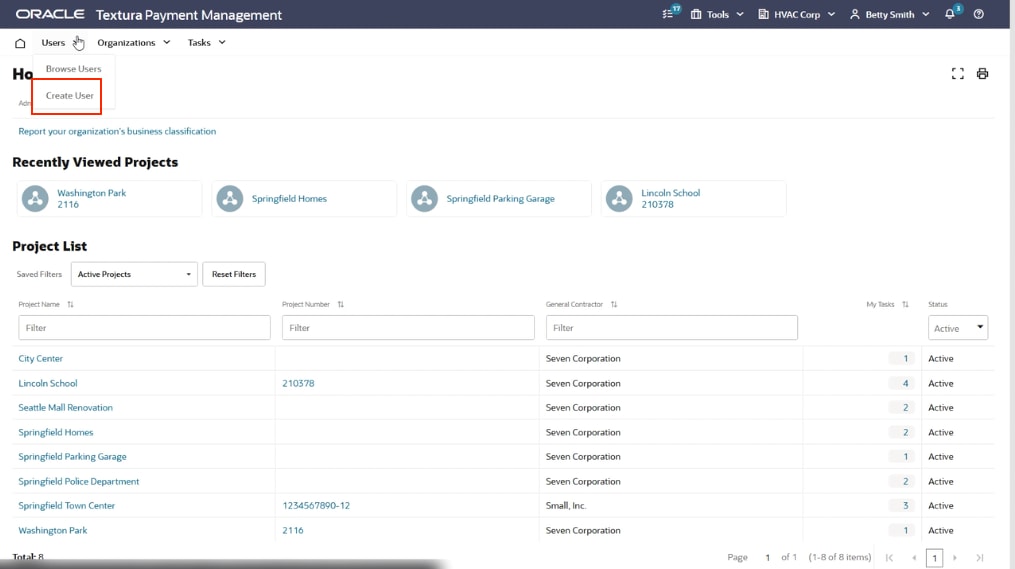
Adding new users (if necessary)
To add new users in Textura, go to the Home page. On the Users menu, click Create User. Fill in the user and contact information sections. Required fields are marked with a red asterisk.
Select the appropriate permissions for the user:
- Manage Projects
- Manage Compliance
- Sign on behalf of the company
These permissions will be reflected on the User Roles page. If adding a new user, return to the User Roles page to complete assignments for the project.
Complete this process as many times as needed.