Developing .NET Applications for Oracle Autonomous AI Database
These tutorials show you how to connect .NET applications to Oracle Autonomous AI Database (ADB) using Oracle Data Provider for .NET Core via the command line and with Visual Studio. Also learn how to connect .NET Framework apps to ADB using Visual Studio and Oracle Data Provider for .NET. Visit Developing .NET Applications for Oracle Database (On-Premises) for a tutorial using an on-premises database.
1. Provision an ADB Instance
Click on the links below to walk through these steps if you have not yet provisioned an ADB instance. Remember the database name and password. You will use them to connect .NET to ADB.
You may select the Always Free option to use the Always Free Oracle ADB. Choose the Shared Infrastructure deployment type, which will have the Sales History schema that the ODP.NET sample code uses.
2. Obtain Client Credentials
Below are the instructions to download the client credentials from the Oracle Cloud Console. Alternatively, obtain the credentials from your administrator.
- From the Oracle Cloud Console, navigate to the page for your Oracle Autonomous AI Database instance.
- Click the Database Connection button.
- A new window will appear. Click the Download Wallet button.
- Enter a wallet password in the Password field and confirm the password in the Confirm password field. Then, click the Download button.
- Save the credentials zip file to a secure location.
- Unzip the credentials files into a directory in a secure location. You will need this directory location later on.
3. Install the .NET SDK
- Download and install .NET SDK if you do not already have it installed on your machine.
4. Build and Run a .NET Application
- From a command line, create a new directory for your application and change into that directory.
- Use the dotnet executable to create a new project (click the copy button in the lower right corner of the code box in the examples below to copy and paste the contents):
dotnet new console - Add ODP.NET Core to the project:
dotnet add package Oracle.ManagedDataAccess.Core - Open Program.cs in a text editor.
- Replace the contents of the Program.cs file with the following code:
using System; using Oracle.ManagedDataAccess.Client; namespace ODP.NET_Core_Autonomous { class Program { static void Main() { //Enter your ADB's user id, password, and net service name string conString = "User Id=<ADMIN>;Password=<MYPASSWORD>;Data Source=<mydb_high>;Connection Timeout=30;"; //Enter directory where you unzipped your cloud credentials OracleConfiguration.TnsAdmin = @"<MYDIRECTORY>"; OracleConfiguration.WalletLocation = OracleConfiguration.TnsAdmin; using (OracleConnection con = new OracleConnection(conString)) { using (OracleCommand cmd = con.CreateCommand()) { try { con.Open(); Console.WriteLine("Successfully connected to Oracle Autonomous AI Database"); Console.WriteLine(); cmd.CommandText = "select CUST_FIRST_NAME, CUST_LAST_NAME, CUST_CITY, CUST_CREDIT_LIMIT " + "from SH.CUSTOMERS order by CUST_ID fetch first 20 rows only"; OracleDataReader reader = cmd.ExecuteReader(); while (reader.Read()) Console.WriteLine(reader.GetString(0) + " " + reader.GetString(1) + " in " + reader.GetString(2) + " has " + reader.GetInt16(3) + " in credit." ); } catch (Exception ex) { Console.WriteLine(ex.Message); } } } } } } - Modify Program.cs to include your ADB connection information:
- User Id: Enter ADMIN which is the user created by default during the creation of Autonomous AI Database. (If you created another ADB user, you can use that user instead.)
- Password: Enter user's password. If ADMIN user is used, enter the password that was provided during the Create Autonomous AI Database step while provisioning Autonomous AI Database.
- Data Source: Enter the net service name such as DBName_high. DBName is Database Name entered during the Create Autonomous AI Database step while provisioning Autonomous AI Database.
- OracleConfiguration.TnsAdmin: Enter the directory where the Client Credentials for Autonomous AI Database were unzipped to.
- Save changes to Program.cs.
- Run the app:
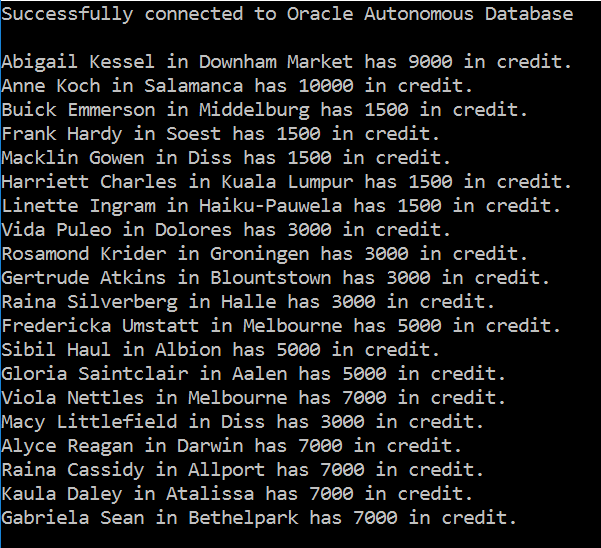
dotnet run - You should see a message that you connected to ADB and customer information returned from the database. Congratulations! You have successfully queried the Oracle Autonomous AI Database.
This sample application uses the Sales History (SH) sample schema. SH is a data set suited for online transaction processing operations. The Star Schema Benchmark (SSB) sample schema is available for data warehousing operations. Both schemas are available with your shared ADB instance and do not count towards your storage. You can use any ADB user account to access these schemas.
Note: If you connect to ADB from behind a firewall, you will likely encounter a connection timeout error. Set your ODP.NET network configuration to use an HTTP proxy to connect successfully to ADB. Learn how to do this in this ADB documentation section. Scroll down to the "Connections with an HTTP Proxy" section on the doc page.
.NET Command Line
Open all Close allThis tutorial shows you how use the command line to connect .NET applications to Oracle Autonomous AI Database (ADB) using Oracle Data Provider for .NET (ODP.NET) Core. Follow the steps below:
1. Install Oracle Developer Tools For Visual Studio
- Install Visual Studio 2026 if you do not already have it.
- From the Visual Studio menu select Extensions > Manage Extensions. In the Browse tab, enter "Oracle" in the search box. Locate "Oracle Developer Tools for Visual Studio" and select Install.
- After the download completes, close Visual Studio.
- The installation of the extension will begin once Visual Studio closes. Once the installation is complete, launch Visual Studio 2026 again.
2. Connect to Oracle Cloud Infrastructure from Visual Studio
- Follow these steps to create a cloud account if you do not already have one.
- Follow these instructions to create a config file that will be used to connect to your Oracle cloud account from Oracle Developer Tools for Visual Studio.
- An entry for your profile named DEFAULT will now appear under the Oracle Cloud Infrastructure node in Server Explorer.
- Right click on this profile name and select Change Compartment or Region. In the dialog select your compartment and region where your Autonomous AI Database is located or where you wish to create a new Autonomous AI Database.
3. Provision an ADB Instance
If you already have an ADB instance that you would like to use, you can skip to step 4: Connect to Oracle Autonomous AI Database.
- In Server Explorer, under your profile name, right click on Transaction Processing and choose Create New
- The Create Autonomous AI Database Serverless dialog opens. Fill in the dialog. When selecting the Network Access Type, choose Secure Access from everywhere (wallet required).
- Click the Create Autonomous AI Database button to create the database.
- You will see an icon for your database instance appear in the tree control under the Autonomous Transaction Processing Databases node. It will contain an orange ball while it is starting up. The database will be ready to use when the orange ball inside the icon disappears.
4. Connect to Oracle Autonomous AI Database
- In Server Explorer, locate the Autonomous AI Database icon for the instance created in the Provision an ADB Instance step. (A green star indicates that the ADB instance is Always Free). If the icon is contains an orange ball, wait for it to become available (no colored ball). If you skipped the Provision an ADB Instance step and wish to use another Autonomous AI Database, the instance should be available (the icon should not show an orange or red colored ball).
- Right click on the ADB icon and choose Create Data Connection from the menu.
- In the Create Data Connection dialog, if you see Download credentials (wallet) check the Download credentials files for the database check box and change the Files path if you desire to download the credentials file to a different location. Remember the path to your credentials files as you will use this later on in your .NET Framework application. Press the Continue button.
- If instead, you see Select Authentication and Connection String this means that your database does not use wallets. In this case, copy the connection string to a temporary file to be used in your application and then press OK
- The Connection Properties dialog opens with most fields pre-populated. If you are using a wallet, Select a Data Source Name from the drop down and make a note of this name as it will be used in your .NET app later. Enter Username ADMIN and enter the password that you provided in the Provision an ADB Instance step. Then click OK.
- A connection will appear in the Data Connections node in Server Explorer.
5. Execute a SQL Statement
In this step we will test a SQL statement that we will include in our application later. The sample application uses the Sales History (SH) sample schema. SH is a data set suited for online transaction processing operations. This schema is available with your shared ADB instance and do not count towards your storage. You can use any ADB user account to access these schemas.
- In Server Explorer, under Data Connections, right click on the newly create connection node and select Open New SQL File. The SQL and PL/SQL File Editor will open.
- Copy and paste the following SQL statement into the editor (click the copy button in the lower right corner of the code box in the examples below to copy and paste the contents):
select CUST_FIRST_NAME, CUST_LAST_NAME, CUST_CITY, CUST_CREDIT_LIMIT from sh.customers order by CUST_ID fetch first 20 rows only - Right click on the SQL statement in the editor and choose Execute
- View the results.
6. Build and Run a .NET (Cross Platform) Application
- From the Visual Studio menu choose File->New->Project/Solution. In the Create a new project dialog, enter console into the Search field. Select the Console Application project type listed for C# and .NET. Then press the Next button.
- In the Configure your new project dialog enter ODP.NET_Core_Autonomous for the Project Name and then press the Next button.
- In the Additional Information dialog, select a .NET version and then press the Create button.
- After the new project opens, view Solution Explorer, right click on the Dependencies node and select Manage NuGet Packages (If you don't see Solution Explorer, go to the Visual Studio menu and select View->Solution Explorer)
- In Nuget Package Manager, click Browse, then in the Search box, enter oracle.
- Select the latest Oracle.ManagedDataAccess.Core version, and then click the Install button. When the Preview Changes dialog opens click OK.
- Replace the contents of the Program.cs file with the following code:
using System; using Oracle.ManagedDataAccess.Client; namespace ODP.NET_Core_Autonomous { class Program { static void Main() { //Enter your ADB's user id, password, and net service name (if using a wallet) or database connection string (if not) string conString = "User Id=<ADMIN>;Password=<MYPASSWORD>;Data Source=<mydb_high>;Connection Timeout=30;"; //If using a wallet, enter directory where you unzipped your cloud credentials OracleConfiguration.TnsAdmin = @"<MYDIRECTORY>"; OracleConfiguration.WalletLocation = OracleConfiguration.TnsAdmin; using (OracleConnection con = new OracleConnection(conString)) { using (OracleCommand cmd = con.CreateCommand()) { try { con.Open(); Console.WriteLine("Successfully connected to Oracle Autonomous AI Database"); Console.WriteLine(); cmd.CommandText = "select CUST_FIRST_NAME, CUST_LAST_NAME, CUST_CITY, CUST_CREDIT_LIMIT " + "from SH.CUSTOMERS order by CUST_ID fetch first 20 rows only"; OracleDataReader reader = cmd.ExecuteReader(); while (reader.Read()) Console.WriteLine(reader.GetString(0) + " " + reader.GetString(1) + " in " + reader.GetString(2) + " has " + reader.GetInt16(3) + " in credit." ); } catch (Exception ex) { Console.WriteLine(ex.Message); } } } } } } - Modify Program.cs to include your ADB connection information:
- User Id: Enter ADMIN which is the user created by default during the creation of Autonomous AI Database. (If you created another ADB user, you can use that user instead.)
- Password: Enter user's password. If ADMIN user is used, enter the password that was provided during the Provision an ADB Instance step above.
- Data Source: If using a wallet, enter the net service name such as DBName_high. This is the Data Source Name you selected in the Create Data Connection dialog in the Connect to Oracle Autonomous AI Database step above and is seen in the Server Explorer data connections. (DBName is the Database Name entered during the Provision an ADB Instance step). If not using a wallet, enter the connection string copied from the Create Data Connection dialog.
- OracleConfiguration.TnsAdmin: If using a wallet, enter the directory where the Client Credentials for Autonomous AI Database were downloaded to in the Connect to Oracle Autonomous AI Database step.
- From the Visual Studio menu choose Debug->Start Debugging (or press F5) to save, build and then run the application.
- You should see a message that you connected to ADB and customer information returned from the database. Congratulations! You have successfully queried the Oracle Autonomous AI Database.
In this step you will build a .NET console application that can run on Windows, Linux, and macOS.
Note: If you connect to ADB from behind a firewall, you will likely encounter a connection timeout error. Set your ODP.NET network configuration to use an HTTP proxy to connect successfully to ADB. Learn how to do this in this ADB documentation section. Scroll down to the "Connections with an HTTP Proxy" section on the doc page.
.NET with Visual Studio
Open all Close allThis tutorial shows you how to connect .NET applications to Oracle Autonomous AI Database (ADB) using Oracle Data Provider for .NET (ODP.NET) Core, Visual Studio 2026, and the Oracle Developer Tools for Visual Studio extension. Follow the steps below.
(Note: If you have already completed the tutorial for .NET Framework with Visual Studio, you can skip to the last step of this tutorial. The other steps are identical.)

1. Install Oracle Developer Tools For Visual Studio
- Install Visual Studio 2026 if you do not already have it.
- From the Visual Studio menu select Extensions > Manage Extensions. In the Browse tab, enter "Oracle" in the search box. Locate "Oracle Developer Tools for Visual Studio" and select Install.
- After the download completes, close Visual Studio.
- The installation of the extension will begin once Visual Studio closes. Once the installation is complete, launch Visual Studio 2026 again.
2. Connect to Oracle Cloud Infrastructure from Visual Studio
- Follow these steps to create a cloud account if you do not already have one.
- Follow these instructions to create a config file that will be used to connect to your Oracle cloud account from Oracle Developer Tools for Visual Studio.
- An entry for your profile named DEFAULT will now appear under the Oracle Cloud Infrastructure node in Server Explorer.
- Right click on this profile name and select Change Compartment or Region. In the dialog select your compartment and region where your Autonomous AI Database is located or where you wish to create a new Autonomous AI Database.
3. Provision an ADB Instance
If you already have an ADB instance that you would like to use, you can skip to step 4: Connect to Oracle Autonomous AI Database.
- In Server Explorer, under your profile name, right click on Transaction Processing and choose Create New
- The Create Autonomous AI Database Serverless dialog opens. Fill in the dialog. When selecting the Network Access Type, choose Secure Access from everywhere (wallet required).
- Click the Create Autonomous AI Database button to create the database.
- You will see an icon for your database instance appear in the tree control under the Autonomous Transaction Processing Databases node. It will contain an orange ball while it is starting up. The database will be ready to use when the orange ball inside the icon disappears.
4. Connect to Oracle Autonomous AI Database
- In Server Explorer, locate the Autonomous AI Database icon for the instance created in the Provision an ADB Instance step. (A green star indicates that the ADB instance is Always Free). If the icon is contains an orange ball, wait for it to become available (no colored ball). If you skipped the Provision an ADB Instance step and wish to use another Autonomous AI Database, the instance should be available (the icon should not show an orange or red colored ball).
- Right click on the ADB icon and choose Create Data Connection from the menu.
- In the Create Data Connection dialog, if you see Download credentials (wallet) check the Download credentials files for the database check box and change the Files path if you desire to download the credentials file to a different location. Remember the path to your credentials files as you will use this later on in your .NET Framework application. Press the Continue button.
- If instead, you see Select Authentication and Connection String this means that your database does not use wallets. In this case, copy the connection string to a temporary file to be used in your application and then press OK
- The Connection Properties dialog opens with most fields pre-populated. If you are using a wallet, Select a Data Source Name from the drop down and make a note of this name as it will be used in your .NET app later. Enter Username ADMIN and enter the password that you provided in the Provision an ADB Instance step. Then click OK.
- A connection will appear in the Data Connections node in Server Explorer.
5. Execute a SQL Statement
In this step we will test a SQL statement that we will include in our application later. The sample application uses the Sales History (SH) sample schema. SH is a data set suited for online transaction processing operations. This schema is available with your shared ADB instance and do not count towards your storage. You can use any ADB user account to access these schemas.
- In Server Explorer, under Data Connections, right click on the newly create connection node and select Open New SQL File. The SQL and PL/SQL File Editor will open.
- Copy and paste the following SQL statement into the editor (click the copy button in the lower right corner of the code box in the examples below to copy and paste the contents):
select CUST_FIRST_NAME, CUST_LAST_NAME, CUST_CITY, CUST_CREDIT_LIMIT from sh.customers order by CUST_ID fetch first 20 rows only - Right click on the SQL statement in the editor and choose Execute
- View the results.
6. Build and Run a .NET Framework Application
- From the Visual Studio menu choose File->New->Project/Solution. In the Create a new project dialog, enter console into the Search field. Select the Console Application project type listed for C# and .NET. Then press the Next button.
- In the Configure your new project dialog enter ODP.NET_Autonomous for the Project Name and then press the Next button.
- In the Additional Information dialog, select a .NET Framework version and then press the Create button.
- After the new project opens, view Solution Explorer, right click on the Dependencies node and select Manage NuGet Packages (If you don't see Solution Explorer, go to the Visual Studio menu and select View->Solution Explorer)
- In Nuget Package Manager, click Browse, then in the Search box, enter oracle.
- Select the latest Oracle.ManagedDataAccess version, and then click the Install button. When the Preview Changes dialog opens click OK.
- Replace the contents of the Program.cs file with the following code:
using System; using Oracle.ManagedDataAccess.Client; namespace ODP.NET_Autonomous { class Program { static void Main() { //Enter your ADB's user id, password, and net service name (if using a wallet) or database connection string (if not) string conString = "User Id=<ADMIN>;Password=<MYPASSWORD>;Data Source=<mydb_high>;Connection Timeout=30;"; //If using a wallet, enter directory where you unzipped your cloud credentials OracleConfiguration.TnsAdmin = @"<MYDIRECTORY>"; OracleConfiguration.WalletLocation = OracleConfiguration.TnsAdmin; using (OracleConnection con = new OracleConnection(conString)) { using (OracleCommand cmd = con.CreateCommand()) { try { con.Open(); Console.WriteLine("Successfully connected to Oracle Autonomous AI Database"); Console.WriteLine(); cmd.CommandText = "select CUST_FIRST_NAME, CUST_LAST_NAME, CUST_CITY, CUST_CREDIT_LIMIT " + "from SH.CUSTOMERS order by CUST_ID fetch first 20 rows only"; OracleDataReader reader = cmd.ExecuteReader(); while (reader.Read()) Console.WriteLine(reader.GetString(0) + " " + reader.GetString(1) + " in " + reader.GetString(2) + " has " + reader.GetInt16(3) + " in credit." ); } catch (Exception ex) { Console.WriteLine(ex.Message); } } } } } } - Modify Program.cs to include your ADB connection information:
- User Id: Enter ADMIN which is the user created by default during the creation of Autonomous AI Database. (If you created another ADB user, you can use that user instead.)
- Password: Enter user's password. If ADMIN user is used, enter the password that was provided during the Provision an ADB Instance step above.
- Data Source: If using a wallet, enter the net service name such as DBName_high. This is the Data Source Name you selected in the Create Data Connection dialog in the Connect to Oracle Autonomous AI Database step above and is seen in the Server Explorer data connections. (DBName is the Database Name entered during the Provision an ADB Instance step). If not using a wallet, enter the connection string copied from the Create Data Connection dialog.
- OracleConfiguration.TnsAdmin: If using a wallet, enter the directory where the Client Credentials for Autonomous AI Database were downloaded to in the Connect to Oracle Autonomous AI Database step.
- From the Visual Studio menu choose Debug->Start Without Debugging (or press Control-F5) to save, build and then run the application.
- You should see a message that you connected to ADB and customer information returned from the database. Congratulations! You have successfully queried the Oracle Autonomous AI Database.
In this step you will build a .NET Framework console application.
Note: If you connect to ADB from behind a firewall, you will likely encounter a connection timeout error. Set your ODP.NET network configuration to use an HTTP proxy to connect successfully to ADB. Learn how to do this in this ADB documentation section. Scroll down to the "Connections with an HTTP Proxy" section on the doc page.
.NET Framework with Visual Studio
Open all Close allThis tutorial shows you how to connect .NET Framework applications to Oracle Autonomous AI Database (ADB) using Oracle Data Provider for .NET (ODP.NET), Visual Studio 2026, and the Oracle Developer Tools for Visual Studio extension. Follow the steps below.
(Note: If you have already completed the tutorial for .NET with Visual Studio, you can skip to the last step of this tutorial. The other steps are identical.)