How Do I Deploy Enterprise JavaBeans to IBM WebSphere?
An Oracle JDeveloper TechNote
February 2002
Content
- Starting WebSphere
- Creating a Simple EJB
- Creating the Test Client for WebSphere
- Testing the EJB locally with the embedded OC4J
- Creating the Deployment Profiles
- Deploying the EJB jar File to WebSphere
- Testing The EJB in WebSphere
- References
Introduction
This TechNote describes in detail the requirements and steps to deploy Enterprise JavaBeans to IBM WebSphere 4.0.
This document was written for Oracle9i JDeveloper Release Candidate 2 and IBM WebSphere AEs 4.0.1 on Windows, although other versions of Oracle9i JDeveloper and/or IBM WebSphere should behave the same.
Starting WebSphere
The IBM WebSphere documentation includes more information on how to start and stop WebSphere. Here are the basic steps if you are using WebSphere with the IBM HTTP Server:
- Using the Services control panel applet, start both the IBM HTTP Server and IBM HTTP Administration services. The Services control panel applet is located in the Control Panel on Windows NT, and under the Administrative Tools folder under the Control Panel on Windows 2000/XP.
- Open a command prompt and change directory to the bin directory under your WebSphere installation. By default, this will be C:\WebSphere\AppServer\bin.
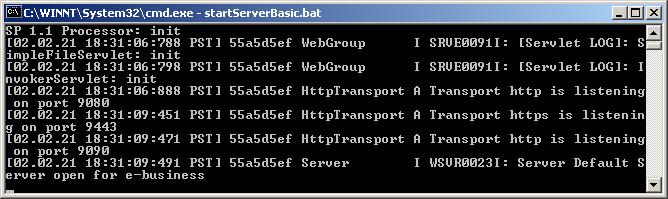
- Execute the batch file startServerBasic.bat, this will launch WebSphere using the console window for diagnostic messages, this is more convenient than referring to the log files for stdout and stderr to see messages from WebSphere.
You will know that WebSphere has been fully initialized when you see the phrase Server open for e-business in the console window.
Creating a Simple EJB
Our Session Bean will be named MySessionEJB, will contain one field called info, and have a corresponding getInfo and setInfo method on the bean.
Use the following steps to create a New Stateless Session Bean.
- From the Main Menu, choose File | New.
- In the New dialog that appeared, select the Projects category.
- Select the Workspace Item on the right side of the dialog and click OK.
- Accept the defaults for the New Workspace dialog by clicking OK.
- Accept the defaults for the New Project dialog by clicking OK.
- In the navigator, right-click the newly created project node, and select New from the context menu.
- Select the Enterprise JavaBeans category on the left of the dialog.
- Select the Stateless Session Bean item on the right of the dialog and click OK.
- Immediately click Finish. This will create a default Session Bean called MySessionBean.
- In the navigator, right-click the MySessionEJB node and select EJB Class Editor from the context menu.
- In the EJB Class Editor, select the Fields tab.
- Click the Add button at the top of the editor.
- In the Field Name text field, enter "info", and click OK.
- Choose File | Save All to save your work.
- Close the EJB Class Editor.
Creating the Test Client for WebSphere
We will create a simple Java Server Page (JSP) to test the Enterprise JavaBean. The JSP will look up an instance of our SessionBean (MySessionBean), and set the "info" property on the bean. It will then display the value of the "info" property using a call to "getInfo".
Here are the steps to create a simple JSP to test our EJB:
- In the navigator, right-click the Project node and choose New.
- Select the category Web Objects.
- Select the item JSP.
- On the New JSP dialog that has appeared, change the name to index.jsp and click the OK button.
- In the navigator, double click the newly created index.jsp node.
- Replace the text of the JSP with the following:
<%@ page contentType="text/html;charset=windows-1252"%>

<%@ page import="javax.naming.*,mypackage.*" %>

 <HTML>
 <HEAD>
 <META HTTP-EQUIV="Content-Type" CONTENT="text/html; charset=windows-1252">
 <TITLE>
 Hello World
 </TITLE>
 </HEAD>
 <BODY>
 <%
      Context ctx = new InitialContext();
      Object ref = ctx.lookup( "MySessionEJB" );
      MySessionEJBHome mySessionEJBHome = ( MySessionEJBHome )
          javax.rmi.PortableRemoteObject.narrow( ref, MySessionEJBHome.class );
      MySessionEJB mySessionEJB = mySessionEJBHome.create( );

      mySessionEJB.setInfo( "Hello World" );
      out.println( mySessionEJB.getInfo() );
%>
</BODY>
</HTML>
Testing the EJB locally with the embedded OC4J
It is quite simple to test our JSP which invokes an EJB in the embedded OC4J that is included with Oracle9i JDeveloper. Here are the steps:
- In the navigator, right-click the node index.jsp and select Run index.jsp from the context menu.
- Your web browser should be launched on the URL to see the JSP page. The page will simply display " Hello World".
Notice the URL which is used in your web browser. The only difference in this URL and the one to use with WebSphere is the port number. By default the embedded OC4J instance uses port 8988 and WebSphere uses ports 80 and 9080 by default for user applications.
Creating the Deployment Profiles
We must create three deployment profiles before we can deploy our J2EE application to WebSphere. They are as follows:
- J2EE EJB Module (EJB JAR file)
- J2EE Web Module (WAR file)
- J2EE Application (EAR file)
This is not as bad as it seems since the EAR file simply contains the EJB JAR file and the WAR file. The EAR file is just a convenient wrapper to load your entire J2EE application into an Application Server or to a client machine at once.
We will quickly create all three deployment profiles, here are the steps:
- In the navigator, right-click the project node and choose New from the context menu.
- Select the Deployment Profiles category from the right side of the dialog.
- Select J2EE EJB Module (EJB JAR file) from the items list on the right side of the dialog.
- In the Save Deployment Profile dialog, click OK.
- In the J2EE EJB Module Deployment Profile Settings dialog, click OK.
- Repeat Steps 1 and 2.
- Select J2EE Web Module (WAR file) from the items list on the right side of the dialog.
- Repeat Steps 4 and 5.
- Repeat Steps 1 and 2
- Select J2EE Application (EAR file) from the items list on the right side of the dialog.
- In the Save Deployment Profile dialog, click OK.
- In the J2EE Application Deployment Profile Settings dialog, select the node Application Assembly.
- In the tree on the right side of the dialog, check both ejb1.deploy and webapp1.deploy.
- Click OK.
- Choose File | Save All.
- In the navigator, right-click the deployment profile application1.deploy, and choose Deploy to EAR from the context menu. This will create a file named application1.ear located in your projects directory.
Deploying the EJB jar File to WebSphere
The basic steps to deploy an EJB contained within an EAR file follow the pattern of deploy the archive, save the configuration, and then restart the application server. Here are step-by-step instructions for these activities.
- Launch the web based administration interface for WebSphere by launching your web browser on the URL http://localhost:9090/admin. This is the default port of the IBM HTTP Administration server which contains the web based administration tool.
- Enter any user name in the text field. This user name is only used for tracking changes to the configuration files for auditing purposes. Click the Submit button.
- In the tree on the left hand side of the web browser, expand the Nodes node in the tree, and then expand the node for your machine name. (This should be the only item in the tree under the Nodes node)
- Under the node for your machine name, select the node Enterprise Applications, this will open the editor for your Enterprise Beans and Web Applications on the right side.
- On the right side, click the Install button. This will invoke the Application Installation Wizard that will be used to deploy your EAR file.
- Near the top of this page, you will see a text field labeled " Path" with a Browse button to the right. Click the Browse button and locate the EAR file application1.ear that was created as part of creating the deployment profiles.
- Click the Next button.
- In the only text field on the page titled Binding Enterprise Beans to JNDI Names, change the JNDI name from the original value of mypackage/EJSStatelessMySessionEJBHomeBean to MySessionEJB.
- Click the Next button.
- On the next page which is titled: Specifying Virtual Host names and Precompiled JSP option for Web Modules, leave the values at their default and click the Next button.
- On the next page that is titled: Confirm the following: just click Finish.
- Look at the console window which executed the startServerBasic batch file, you will see many lines of diagnostic information. When finished, it should end in something like " [02.02.25 13:43:17:185 PST] 21349531 SystemOut U 0 Errors, 0 Warnings, 0 Informational Messages"
- Now you must save the configuration of WebSphere, click the Save link at the top of the web browser.
- Now click the Save button to save your configuration to the original configuration file, and not a secondary copy.
- Before the EJB and JSP can be invoked WebSphere must be restarted. Open a command prompt and change directories to the bin directory under your WebSphere installation. By default, this will be C:\WebSphere\AppServer\bin.
- Execute the batch file stopServer.bat. This will stop WebSphere.
- Now start WebSphere again, following the same steps as before.
Now the JSP and EJB are ready to be executed.
Testing the EJB in WebSphere
The URL that the web browser uses will be the same as used in the step Testing the EJB locally with the embedded OC4J with the port number changed from 8988 to 80. The default URL is http://localhost/Workspace1-Project1-context-root/untitled1.jsp.
- Launch your web browser.
- In the address line, type http://localhost/Workspace1-Project1-context-root/untitled1.jsp and press Enter.
- Verify that "Hello World" is displayed in the web browser.