Oracle Solaris for IBM AIX Users
by Glynn Foster
Published February 2014
Hands-On Labs of the System Admin and Developer Community of OTN
Explore the basics of Oracle Solaris 11 administration compared to IBM AIX administration.
Table of Contents
| Did You Know?
IBM Power Systems running AIX are most similar to Oracle's SPARC systems running Oracle Solaris in terms of capability, capacity, reliability, availability, and serviceability (RAS). The following lab exercises use x86 systems running Oracle Solaris, allowing you to experiment with Oracle Solaris on hardware likely to be available to you. |
Lab Introduction
This lab explores the basics of the administration of Oracle Solaris 11 for administrators who are experienced with IBM AIX. It walks through system configuration including adding users and assigning roles, configuring automatic and manual networking, managing storage with the ZFS file system, creating virtualized application isolation with Oracle Solaris Zones, and managing services with the Service Management Framework. This lab:
- Covers the software lifecycle
- Explains how you can install and update software using the Image Packaging System with failsafe updates using ZFS boot environments
- Draws comparisons to how things are done in IBM AIX
- Identifies some of the unique differentiators of Oracle Solaris 11
Prerequisites
You should have familiarity with administering IBM AIX systems using both graphical and command-line interfaces.
The Environment
In this lab, you will be using virtual machines using Oracle VM VirtualBox, installed with Oracle Solaris 11. You can treat the Oracle Solaris 11 virtual machines as a bare-metal instance as far as this lab is concerned. Instructions for how to download and install Oracle Solaris 11 can be found at Install Oracle Solaris 11 on Oracle VM VirtualBox
For this lab, we have two virtual machines configured: "Oracle Solaris 11" and "Oracle Solaris 11 Client Install." "Oracle Solaris 11" is a preinstalled virtual machine with Oracle Solaris 11, including a full desktop environment. It has two network interfaces, both attached using the Internal Network configuration. It also has an additional 4 GB SATA storage controller attached to it. A local package repository has been set up, located at /repository, which is a copy of the "release" package repository hosted on http://pkg.oracle.com. Only the first exercise requires this configuration.
The "Oracle Solaris 11 Client Install" virtual machine is an empty virtual machine. It has been configured with a virtual CD/DVD drive with the Oracle Solaris 11 Interactive Text Installer ISO image attached to it. It has a single network interface, configured to use the Internal Network configuration. The system boot order has been configured to boot off the network first, then off the virtual CD/DVD drive, and finally off the hard disk.
The following login credentials are used for the purposes of this lab. The ouser account has been assigned the root role. Unlike IBM AIX, Oracle Solaris 11 doesn't allow root to directly log in to the system for auditing reasons; instead, an individual user account must assume the root role after login.
Table 1. Login Credentials
| User ID | Password |
|---|---|
ouser |
Oracle 123 |
root |
solaris11 |
Lab Outline
The lab is divided into a number of different exercises that cover many of the basic administration tasks. Each exercise is independent of the others.
At the end of the exercises, additional tasks are provided in the event that you wish to focus on more advanced administration for that area. The steps to complete these additional tasks are not listed, so you will need to refer to the product documentation, online how-to guides, and manual pages, if necessary.
Table 2. Exercises
| Exercise | Name | Topics Covered |
|---|---|---|
| 1 | Installation |
|
| 2 | Software Packaging |
|
| 3 | File Systems |
|
| 4 | Networking |
|
| 5 | User Management |
|
| 6 | Services |
|
| 7 | Virtualization |
|
Lab Goals
At the end of this lab, you will be familiar with basic administration in Oracle Solaris 11 and how it compares to IBM AIX Enterprise in areas including installation, software packaging, file systems, user management, services, networking, and virtualization. You will be comfortable researching and performing future administrative tasks by referring to product documentation, manual pages, or online how-to articles, and you will know where to get help.
| Did You Know?
IBM AIX and Oracle Solaris offer similar capabilities. The following table describes the approximate relationships between IBM AIX and Oracle Solaris technologies.
|
Exercise 1: Installation
Oracle Solaris 11 is distributed with a number of different installation choices, and you will choose one over the other depending on your needs and the system that needs to be installed. These choices provide flexibility for those wanting to install a standalone server, install many different servers in an automated way, or simply evaluate the operating system with a full desktop environment. The Oracle Solaris 11 installation choices are as follows:
Table 3. Installation Choices
| Installation Media Type | Typical Use Case |
|---|---|
| LiveCD/LiveUSB | Boots (installation is optional) a complete OS and desktop environment with a graphical installer, which is ideal for evaluation purposes |
| Interactive Text Installer | Installs a minimized OS with a text-based graphical installer, which is ideal for the foundation of most server installations |
| Automated Installer | Provides the ability to provision multiple systems over the network using installation manifests |
Installing a System Using the Interactive Text Installer
The Interactive Text Installer installs a fixed selection of software that is useful for most server-oriented situations. It will step you through some simple system configuration such as disk selection and partitioning, networking, users, and time zone. Advanced configuration can be done after the OS has been installed and is running.
Start the "Oracle Solaris 11 Client Install" virtual machine in Oracle VM VirtualBox. This virtual machine has been preconfigured to boot off the network initially and then boot off an ISO installation image. Wait for the network to time out, and then follow the steps below to walk through an installation using the Interactive Text Install. Rather than waiting through the entire installation once you have been prompted for some basic configuration, move on to the next section.
- Press Enter to accept the default keyboard layout (US-English).
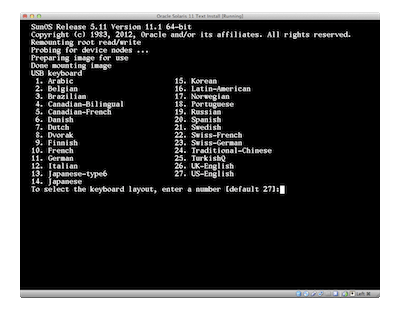
Figure 1. Choosing a keyboard layout.
- Press Enter to accept the default language (English).
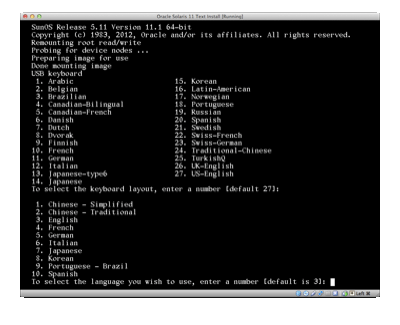
Figure 2. Accepting the default language.
- Select 1 to start the installation process.
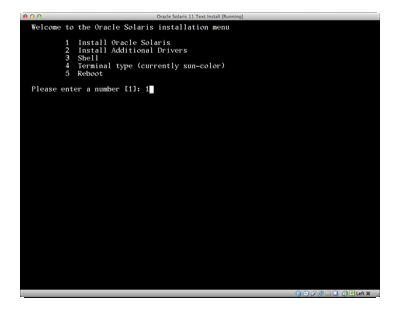
Figure 3. Starting the installation process.
- Press F2 to continue.

Figure 4. Welcome screen.
- Select Local Disks and press F2 to continue.
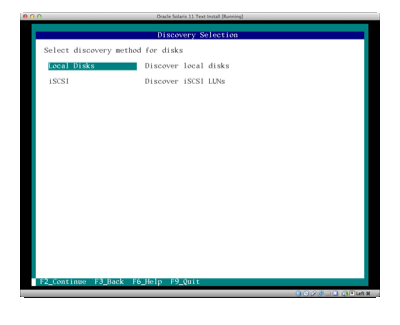
Figure 5. Selecting a discovery method for disks.
- Select the default disk option and press F2 to continue.
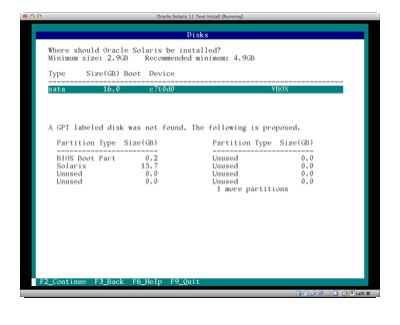
Figure 6. Selecting a disk.
- Select Use the entire disk and press F2 to continue.
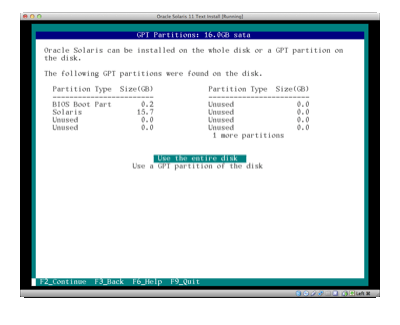
Figure 7. Selecting the entire disk.
- Select Automatically for your network connection, and press F2 to continue.
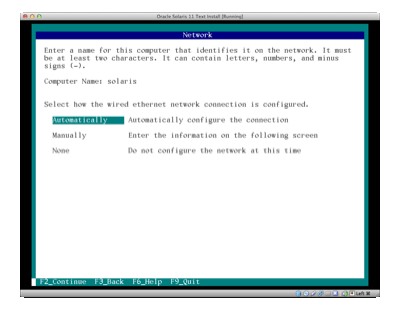
Figure 8. Selecting to configure the network connection automatically.
- Select the time zone region that is appropriate for your location, and press F2 to continue.
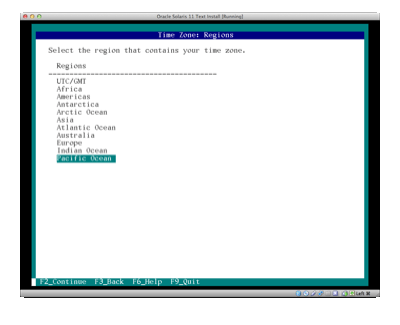
Figure 9. Selecting the region.
- Select the appropriate location, and press F2 to continue.
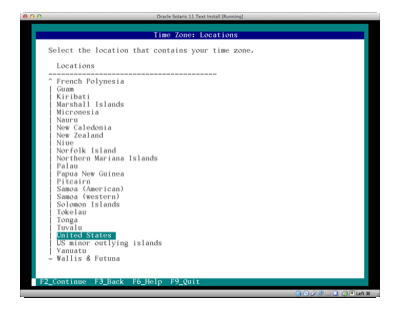
Figure 10. Selecting the location.
- Select the appropriate time zone, and press F2 to continue.
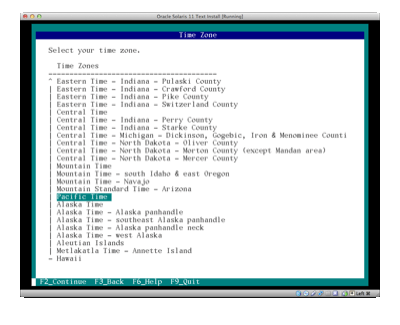
Figure 11. Selecting the time zone.
- Select the appropriate time and date, and press F2 to continue.
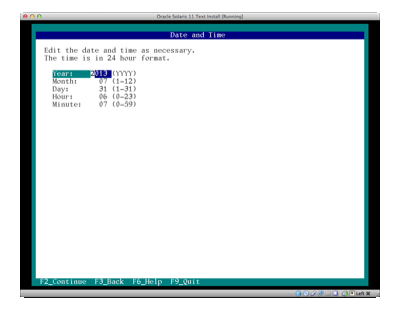
Figure 12. Selecting the time and date.
- Enter in the following user details and then press F2 to continue:
- Root User:
- Password:
solaris11 - Oracle User:
- Username:
ouser - Password:
Oracle123
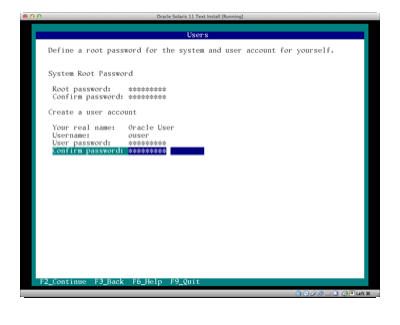
Figure 13. Entering user details.
- Select default anonymous registration, and then press F2 to continue.
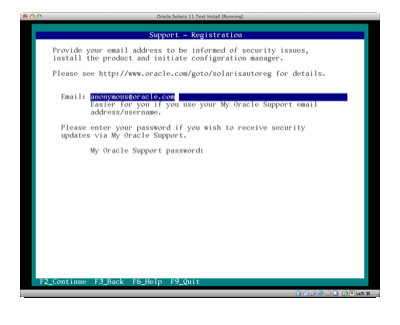
Figure 14. Selecting anonymous registration.
- Select No proxy, and press F2 to continue.
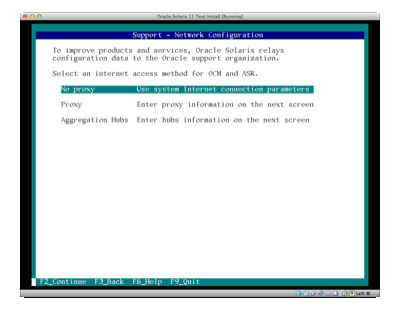
Figure 15. Selecting to use no proxy.
- Verify that the configuration you chose is correct, and press F2 to start the installation.
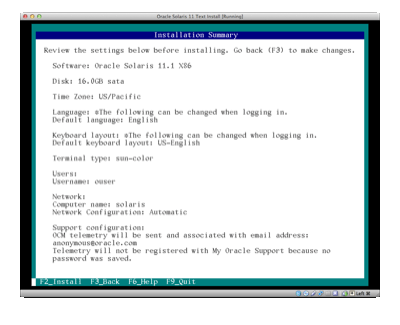
Figure 16. Verifying the selections and starting the installation.
- Press F8 to reboot into the installed OS. You might need to remove the CD/DVD virtual drive in the virtual machine settings under "Storage."
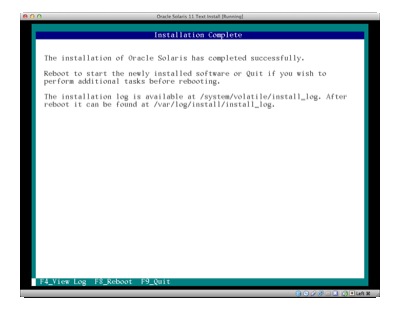
Figure 17. Rebooting.
Having successfully installed a system using the Interactive Text Installer, we can now close this virtual machine, because we no longer need it.
| Did You Know?
When installing a new instance of IBM AIX on a single system (a new and complete Base Operating System (BOS) install), system administrators typically use distribution media or perform virtual media-based networked installations. Oracle Solaris 11 offers similar installation options. Interactive installations from media using Oracle Solaris 11 Live Media for x86 DVD provide a full desktop environment, while the interactive text-based user interface creates server installations for both x86 and SPARC installations. In addition, Oracle Solaris 11 supports a hands-off automated installation process, called Automated Installer, that is analogous to the IBM AIX Network Installation Manager (NIM). Automated Installer relies on software repositories that loosely resemble IBM AIX software bundles. |
Installing a System Using the Automated Installer
The Automated Installer is a way to install many systems at a time over the network. Clients connect to an Automated Installer service running on a system and get matched to an installation manifest. The installation manifest details how the client gets installed, including software selection, virtualized environments, and system configuration. Once the client connects to the Automated Installer service and receives this information, it then connects to a package repository to retrieve the necessary software it needs to provision itself.
| Did You Know?
While the installation configuration that's available in Oracle Solaris 11 might seem limited, the strategy is to get the client up and running quickly, and then provide additional customization after the initial installation. Administrators wishing to do more advanced system provisioning should consider using the Automated Installer or deploying from system backups. |
Start the "Oracle Solaris 11" virtual machine in Oracle VM VirtualBox. Log in to your system:
solaris console login: ouser
Password: Oracle123
Now that we have logged in, let's assume the root role for further administrative tasks.
ouser@solaris: ~$ su -
Password: solaris11
root@solaris:~#
Automated Installer uses the installadm command-line interface. Let's set up a very simple service that can provision an x86-based system. In this lab, we will see how to administer installation services, but we will not provision any systems.
root@solaris:~# installadm list
There are no services configured on this server.
Let's create a client installation service called solaris:
root@solaris:~# installadm create-service -n solaris
Warning: Service svc:/network/dns/multicast:default is not online.
   Installation services will not be advertised via multicast DNS.

Creating service from: pkg:/install-image/solaris-auto-install
OK to use default image path: /export/auto_install/solaris? [y/N]: y
DOWNLOAD                                PKGS         FILES    XFER (MB)   SPEED
Completed                                1/1       514/514  294.3/294.3  7.3M/s

PHASE                                          ITEMS
Installing new actions                       662/662
Updating package state database                 Done
Updating image state                            Done
Creating fast lookup database                   Done
Reading search index                            Done
Updating search index                            1/1

Creating i386 service: solaris

Image path: /export/auto_install/solaris

Refreshing install services
Warning: mDNS registry of service solaris could not be verified.

Creating default-i386 alias

No local DHCP configuration found. This service is the default
alias for all PXE clients. If not already in place, the following should
be added to the DHCP configuration:
Boot server IP: 192.168.0.122
Boot file(s):
    bios clients (arch 00:00):  default-i386/boot/grub/pxegrub2
    uefi clients (arch 00:07):  default-i386/boot/grub/grub2netx64.efi

Note: determined more than one IP address configured for use with AI.
Please ensure the above 'Boot server IP' is correct.

Refreshing install services
Warning: mDNS registry of service default-i386 could not be verified.

root@solaris:~# installadm list

Service Name Alias Of Status  Arch   Image Path
------------ -------- ------  ----   ----------
default-i386 solaris  on      i386   /export/auto_install/solaris
solaris      -        on      i386   /export/auto_install/solaris
So what has happened here? When we created the service, we used the contents of the install-image/solaris-auto-install package to create a boot image—located in /export/auto_install/—that we will use for the solaris service. Since this is the first service created, we will also create our default service, default-i386, for x86 clients and point it to solaris.
In this lab, we have set up a local package repository on our server, as shown in the following output:
root@solaris:~# pkg publisher
PUBLISHER                   TYPE     STATUS P LOCATION
solaris                     origin   online F http://192.168.1.222/
| Did You Know?
The IBM AIX NIM utility uses a client-server model to automate the installation of multiple systems across an enterprise. In Oracle Solaris 11, the Automated Installer (AI) provides equivalent functionality. But it also leverages the Image Packaging System (IPS), Service Management Facility (SMF), and WAN-compatible networking protocols to provide operational flexibility. This allows AI to automate and batch installations based on customized, standardized system profiles, enabling hands-free installation of multiple systems in large-scale environments. |
To provision clients, Automated Installer, by default, connects to a package repository that is hosted on http://pkg.oracle.com. We need to change this default to point to our local package repository.
Local package repositories are used in data center environments where there are network restrictions or where administrators need more version control management over their software.
Package repository information is contained in the orig_default install manifest for our service. We can use the -m option to list manifests that are associated with our services, as follows:
root@solaris:~# installadm list -m
Service/Manifest Name Status  Criteria
--------------------- ------  --------
default-i386
  orig_default        Default  None
solaris
   orig_default       Default  None
To view the manifest, we can use the installadm export command to pipe the output to a file named /root/manifest.txt, as follows:
root@solaris:~# installadm export -n default-i386 -m orig_default > /root/manifest.txt
We use the default-i386 service because we have only a single service defined. Edit the /root/manifest.txt file and find the section that says the following:
<source>
  <publisher name="solaris">
    <origin name="http://pkg.oracle.com/solaris/release"/>
  </publisher>
</source>
Edit that section to say the following instead:
<source>
  <publisher name="solaris">
    <origin name="http://192.168.1.222/solaris"/>
  </publisher>
</source>
Then we can update our default manifest with this new configuration, as follows:
root@solaris:~# installadm update-manifest -n default-i386 -f /root/manifest.txt -m orig_default
We need to specify the service name default-i386 here instead of solaris, because we have only one service. (It is planned that future Oracle Solaris 11 releases will not require this.)
Before we start our network installation, we need to configure our DHCP server with an IP address range for our clients, the location of the Automated Installer service, and the location of our boot images for the Preboot Execution Environment (PXE) clients. Edit /etc/inet/dhcpd4.conf so it has the following content:
# dhcpd.conf

default-lease-time 9000;
max-lease-time 86400;

# If this DHCP server is the official DHCP server for the local
# network, the authoritative directive should be uncommented.
authoritative;

# arch option for PXEClient
option arch code 93 = unsigned integer 16;

# Set logging facility (accompanies setting in syslog.conf)
log-facility local7;

subnet 192.168.1.0 netmask 255.255.255.0 {
  range 192.168.1.20 192.168.1.30;
  option broadcast-address 192.168.1.255;
  option routers 192.168.1.1;
  next-server 192.168.1.222;
}

class "PXEBoot" {
  match if (substring(option vendor-class-identifier, 0, 9) = "PXEClient");
  if option arch = 00:00 {
    filename "default-i386/boot/grub/pxegrub2";
  } else if option arch = 00:07 {
    filename "default-i386/boot/grub/grub2netx64.efi";
  }
}
Now let's start the DHCP server. We will cover services in more detail a little later.
root@solaris:~# svcadm enable dhcp/server:ipv4
root@solaris:~# svcs dhcp/server:ipv4
STATE          STIME    FMRI
online         21:57:27 svc:/network/dhcp/server:ipv4
Now that the DHCP server is online, it's time to boot our client from the network, as described in the steps below.
Start the "Oracle Solaris 11 Client Install" virtual machine and watch it boot and install off the network. Once you are happy that the client system is installing, you can move onto the next exercise.
- The client system boots off the network and gets an IP address from the DHCP server.
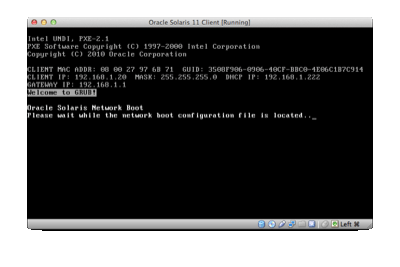
Figure 18. Client boots from network.
- Select the Automated Installer and press Enter.
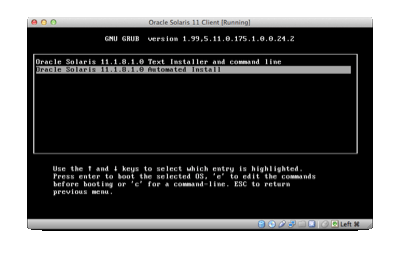
Figure 19. Selecting Automated Installer.
- The client system gets the IP address of the Automated Installer server, looks up the appropriate installation profile, and starts provisioning itself.
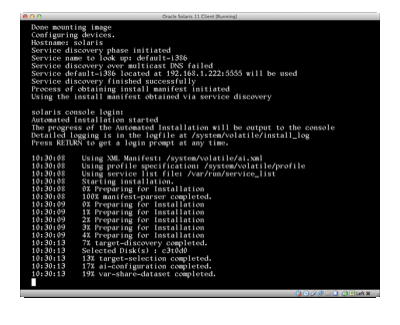
Figure 20. Client starts provisioning itself.
- The client system connects to the package repository and starts to calculate what packages are required.
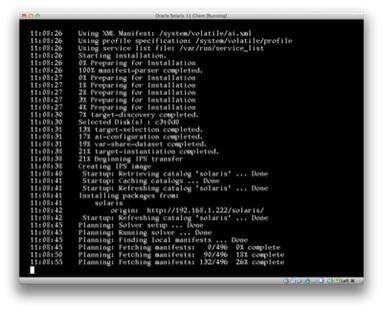
Figure 21. Client connects to the package repository.
- The client system starts to download packages from the repository.
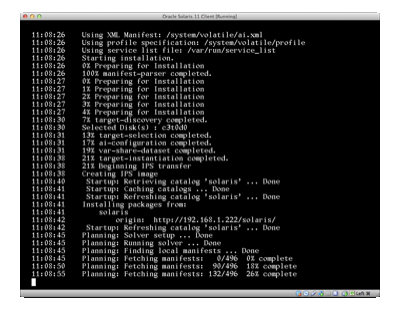
Figure 22. Client starts downloading packages from the repository.
- The client system has finished provisioning itself. You can now reboot the system.
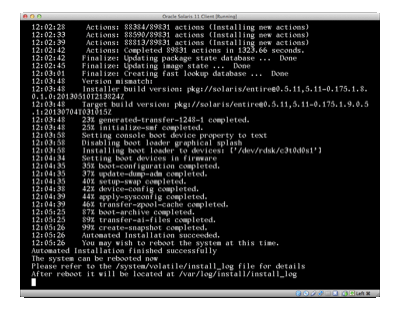
Figure 23. Client has finished provisioning itself.
| Did You Know?
An advantage of the Automated Installer is the ability to create virtualized environments, called Oracle Solaris Zones, as part of the bare-metal server installation and provision them with separate networking configuration, software selection, and delegated administration. |
Additional Tasks
- By default, the Automated Installer client installs use the
group/system/solaris-large-servergroup package to install software that is useful to most server environments. Modify the manifest to install thegroup/system/solaris-small-servergroup package for a minimized server installation. - If a system configuration profile is not provided with a particular installation service, a text-based graphical interface will be displayed upon reboot asking you a number of system configuration questions, such as the host name, network details, time zone, and so on. As an additional task, add a system configuration profile to the
solarisservice that configures a static IP address. Hint: Take a look at the profile located in/usr/share/auto_install/sc_profiles/static_network.xml. - The Automated Installer has the ability to provision virtualized environments—Oracle Solaris Zones—as part of a bare-metal client installation. Modify the
solarisservice to include the creation of a non-global zone.
| Did You Know?
IPS provides broad software management functionality that is similar to RPM repositories or NIM-based collections of filesets. Similar to NIM and the repositories it manages, IPS relies on software depots (called software repositories in Oracle Solaris 11) to access software packages for installation and update. IPS supports DVD, CD, and file-based local repositories, as well as network-based remote repositories. You can easily set up and manage local repositories to deploy packages within network-restricted and firewalled environments. The IPS |
Exercise 2: Software Packaging
Oracle Solaris 11 uses a new packaging system called the Image Packaging System, which is a network-based packaging system. Client systems connect to locally or remotely connected package repositories from which to install. Each package repository can include multiple publishers, which are individuals or groups responsible for making software available for installation.
Installing, Searching for, and Deleting a Package
Using the "Oracle Solaris 11" virtual machine, let's check to see what publishers are configured on this system using the pkg command:
root@solaris:~# pkg publisher
PUBLISHER                   TYPE     STATUS P LOCATION
solaris                     origin   online F http://192.168.1.222/
There is a single publisher configured with an address of http://192.168.1.222. This matches the IP address of this virtual machine; that is, it is a local package repository.
Let's search for the popular distributed source code management utility called git. We can use the pkg search command with the -p option to restrict the search to package names.
root@solaris:~# pkg search -p git
PACKAGE                                                PUBLISHER
pkg:/developer/versioning/git@1.7.9.2-0.175.1.0.0.24.0 solaris
Now let's install the package:
root@solaris:~# pkg install git
           Packages to install:  1
       Create boot environment: No
Create backup boot environment: No
            Services to change:  1

DOWNLOAD                                PKGS         FILES    XFER (MB)   SPEED
Completed                                1/1       334/334      8.5/8.5  933k/s

PHASE                                          ITEMS
Installing new actions                       496/496
Updating package state database                 Done
Updating image state                            Done
Creating fast lookup database                   Done
root@solaris:~# which git
/usr/bin/git
In this case, a single package was successfully installed totaling 8.5 MB in size. We can check the contents of this package using the pkg contents command:
root@solaris:~# pkg contents git
PATH
usr
usr/bin
usr/bin/git
usr/bin/git-cvsserver
usr/bin/git-receive-pack
usr/bin/git-shell
usr/bin/git-upload-archive
usr/bin/git-upload-pack
usr/bin/gitk
...
usr/share/man/man5/gittutorial-2.5
usr/share/man/man5/gittutorial.5
usr/share/man/man5/gitworkflows.5
We can also get more information about this package using the pkg info command:
root@solaris:~# pkg info git
          Name: developer/versioning/git
       Summary: git - Fast Version Control System
   Description: Git is a free & open source, distributed version
                control system designed to handle everything from
                small to very large projects with speed and efficiency.
      Category: Development/Source Code Management
         State: Installed
     Publisher: solaris
       Version: 1.7.9.2
 Build Release: 5.11
        Branch: 0.175.1.0.0.24.0
Packaging Date: September  4, 2012 05:17:20 PM
          Size: 22.89 MB
          FMRI: pkg://solaris/developer/versioning/git@1.7.9.2,5.11-0.175.1.0.0.24.0:20120904T171720Z
If we want to uninstall the package, we can easily do this, as follows:
root@solaris:~# pkg uninstall git
            Packages to remove:  1
       Create boot environment: No
Create backup boot environment: No
            Services to change:  1

PHASE                                          ITEMS
Removing old actions                         497/497
Updating package state database                 Done
Updating package cache                           1/1
Updating image state                            Done
Creating fast lookup database                   Done
root@solaris:~# which git
no git in /usr/sbin /usr/bin
| Did You Know?
For both earlier IBM AIX and Oracle Solaris versions, patching could sometimes be a complex process that required detailed manual analysis to understand dependencies before applying the required patches. IBM AIX addressed this complexity with tools such as SUMA and NIM, generic fileset management utilities, and optionally Tivoli Provisioning Manager. In contrast, Oracle Solaris 11 eliminates the software maintenance model of patch analysis and application. The IPS software packaging model releases updated software packages that are already integration-tested before they are made available for download and installation, reducing the risk of incompatibilities between production software modules or problems resulting from human error. In addition, package contents that have not changed are not downloaded, resulting in faster updates that minimize network bandwidth consumption. |
Updating a System
Updating a system in Oracle Solaris 11 is easy using the pkg update command, as shown in Listing 1:
root@solaris:~# pkg update
            Packages to remove:   1
            Packages to update: 147
           Mediators to change:   1
       Create boot environment: Yes
Create backup boot environment:  No

DOWNLOAD                                PKGS         FILES    XFER (MB)   SPEED
Completed                            148/148     5913/5913  285.6/285.6

PHASE                                          ITEMS
Removing old actions                         921/921
Installing new actions                     2245/2245
Updating modified actions                  6967/6967
Updating package state database                 Done
Updating package cache                       148/148
Updating image state                            Done
Creating fast lookup database                   Done

A clone of solaris exists and has been updated and activated.
On the next boot the Boot Environment solaris-1 will be
mounted on '/'.  Reboot when ready to switch to this updated BE.

----------------------------------------------------------------------
NOTE: Please review release notes posted at:

http://www.oracle.com/pls/topic/lookup?ctx=E26502&id=SERNS
----------------------------------------------------------------------
Listing 1
As we can see from the output in Listing 1, a new boot environment (BE) has been created, which is called solaris-1. This means that our existing file system has been cloned, and the updates have been applied to the clone rather than to our running system. Depending on what updates were available in the repository, you might see a different number of packages being updated.
| Did You Know?
In IBM AIX environments, system administrators use Fix Central, SUMA, NIM, and SMIT to load entire Service Packs (SPs). System backups are performed prior to updating a system, using tools such as the mksysb command. Oracle Solaris takes an entirely different approach. In Oracle Solaris 11, Boot Environments are the default and recommended best practice. Fast snapshot and cloning capabilities are used to replicate the active operating system image. This means you can perform a system update while production applications are running, and then quickly boot into the new boot environment when a planned maintenance window is scheduled. If a problem occurs after the update, you can quickly reboot back into the older boot environment. |
We can take a look at these boot environments by using the beadm command, as shown in Listing 2:
root@solaris:~# beadm list
BE        Active Mountpoint Space  Policy Created
--        ------ ---------- -----  ------ -------
solaris   N      /          10.04M static 2013-07-23 12:08
solaris-1 R      -          4.58G  static 2013-08-02 02:19
Listing 2
You will notice a few things in Listing 2. First, we currently have an active boot environment called solaris that is mounted at /. Our new boot environment that was created during the pkg update command, solaris-1, has been activated and will be the default boot environment after a reboot. If we didn't want solaris-1 to be active upon reboot, we can change the boot environment back using the beadm activate command:
root@solaris:~# beadm activate solaris
root@solaris:~# beadm list
BE        Active Mountpoint Space   Policy Created
--        ------ ---------- -----   ------ -------
solaris   NR     /          3.86G   static 2013-07-23 12:08
solaris-1 -      -          982.09M static 2013-08-02 02:19
You will also notice different sizes for boot environments. This difference is a result of the underlying ZFS file system, and its copy-on-write capability. ZFS will store only the delta between the two boot environments rather than a complete copy of the contents of the file system.
If we wanted to check the contents of this new boot environment, we can easily mount it, check our file system, and then unmount it again:
root@solaris:~# beadm mount solaris-1 /mnt
root@solaris:~# ls /mnt
bin     devices  kernel      net         proc        sbin        usr
boot    etc      lib         nfs4        repository  share       var
cdrom   export   media       opt         root        system
dev     home     mnt         platform    rpool       tmp
root@solaris:~# beadm unmount solaris-1
Boot environments aren't used solely when you want to update a system. Boot environments can also be used for any administrative changes as a best practice. For example, suppose you are making some advanced configuration changes to networking. If you create a boot environment prior to making your changes, you have a complete fallback environment in case anything goes wrong.
To create a new boot environment, use the beadm create command, as shown in Listing 3:
root@solaris:~# beadm create before-network-change
root@solaris:~# beadm list
BE                    Active Mountpoint Space   Policy Created
--                    ------ ---------- -----   ------ -------
before-network-change -      -          73.0K   static 2013-08-02 02:46
solaris               NR     /          3.86G   static 2013-07-23 12:08
solaris-1             -      -          982.09M static 2013-08-02 02:19
Listing 3
You can see from Listing 3 that the space taken to create a new boot environment is negligible.
Additional Tasks
- The Image Packaging System provides the ability to fix broken packages based on records kept in the package repository. Try breaking a package by deleting some package contents and then try to fix it.
- Behind each package is a package manifest that describes what a package is called, its version, and the package content and dependencies. Republish the
compress/gzippackage into a separate package repository and include only the files located in/usr/bin. Hint: You will need to take a look at thepkgrepo,pkgsend, andpkgrecvcommands.
| Did You Know?
Both JFS and JFS2 provide smaller maximum file and file system sizes than ZFS. For example, JFS limits files to 64 GB and file systems to 1 TB, while JFS2 limits files and file systems to 4 PB. ZFS is a 128-bit file system that supports up to one zettabyte of capacity. Scalability is not the only differentiator. In IBM AIX, a separate Logical Volume Manager (LVM) groups storage into logical volumes. ZFS eliminates the need for separate volume management. Instead of creating virtualized data volumes, ZFS aggregates devices into a storage pool. Space from a single storage pool is shared dynamically between multiple file systems and parceled out as file systems request it. Physical storage can be added to storage pools dynamically, without interrupting services. When capacity no longer is required by a file system in the pool, it is made available to other file systems. |
Exercise 3: File Systems
The default file system in Oracle Solaris 11 is ZFS. ZFS is an integrated file system and volume manager that provides a wide range of data services, including software RAID, encryption, and snapshot and cloning capability. One of the fundamental strengths of ZFS is its ability to protect against silent data corruption and preserve data integrity.
Creating Virtual Storage Pools and Data Sets
Unlike traditional file systems—which reside on single devices and, thus, require you to use a volume manager if you have more than one device—ZFS file systems are built on top of virtual storage pools called zpools. Let's take a look at what zpools are available on the system by using the zpool list command, as shown in Listing 4:
root@solaris:~# zpool list
NAME   SIZE  ALLOC   FREE  CAP  DEDUP  HEALTH  ALTROOT
rpool   20G  15.1G  4.87G  75%  1.00x  ONLINE  -
Listing 4
As we can see in Listing 4, there is a single zpool called rpool. Let's take a look at this more closely using the zpool status command:
root@solaris:~# zpool status rpool
  pool: rpool
 state: ONLINE
  scan: none requested
config:

        NAME        STATE     READ WRITE CKSUM
        rpool       ONLINE       0     0     0
        c7t0d0      ONLINE       0     0     0

errors: No known data errors
Listing 5
In Listing 5, we can see that this zpool is attached to a virtual device that represents a disk at /dev/dsk/c7t0d0. Oracle Solaris uses a device naming convention of cWtXdYsZ to indicate the logical controller number, physical bus target number, drive number, and slice (or partition) number.
Creating a new zpool is easy once we know the physical storage devices we wish to use. In this case, we will use the format command to look at the devices available to us, and then use the zpool create command to create a new zpool. We will pipe this command using echo, because we don't want to make any physical changes to the disk selections yet; we just want to list them.
root@solaris:~# echo | format
Searching for disks...done

AVAILABLE DISK SELECTIONS:
       0. c7t0d0 <ATA-VBOX HARDDISK-1.0-20.30GB>
          /pci@0,0/pci8086,2829@d/disk@0,0
       1. c7t2d0 <ATA-VBOX HARDDISK-1.0-16.00GB>
          /pci@0,0/pci8086,2829@d/disk@2,0
Specify disk (enter its number): Specify disk (enter its number):
root@solaris:~# zpool create mypool c7t2d0
root@solaris:~# zpool list
NAME     SIZE  ALLOC   FREE  CAP  DEDUP  HEALTH  ALTROOT
mypool  15.9G   152K  15.9G   0%  1.00x  ONLINE  -
rpool     20G  15.1G  4.87G  75%  1.00x  ONLINE  -
root@solaris:~# zpool status mypool
  pool: mypool
 state: ONLINE
  scan: none requested
config:

        NAME      STATE     READ WRITE CKSUM
        mypool    ONLINE       0     0     0
          c7t2d0  ONLINE       0     0     0

errors: No known data errors
To see a list of data sets within these storage pools, we use the zfs list command, as shown in Listing 6:
root@solaris:~# zfs list
NAME                                    USED  AVAIL  REFER  MOUNTPOINT
mypool                                   85K  15.6G    31K  /mypool
rpool                                  15.2G  4.50G  4.58M  /rpool
rpool/ROOT                             3.72G  4.50G    31K  legacy
rpool/ROOT/before-network-changes        72K  4.50G  2.09G  /
rpool/ROOT/before-network-changes/var     1K  4.50G   122M  /var
rpool/ROOT/solaris                     2.80G  4.50G  2.09G  /
rpool/ROOT/solaris-1                    951M  4.50G  2.15G  /
rpool/ROOT/solaris-1/var               31.5M  4.50G   404M  /var
rpool/ROOT/solaris/var                  503M  4.50G   122M  /var
rpool/VARSHARE                           58K  4.50G    58K  /var/share
rpool/dump                              792M  4.53G   768M  -
rpool/export                            326M  4.50G   326M  /export
rpool/export/home                        70K  4.50G    32K  /export/home
rpool/export/home/ouser                  38K  4.50G    38K  /export/home/ouser
rpool/repository                       9.33G  4.50G  9.33G  /repository
rpool/swap                             1.03G  4.54G  1.00G  -
Listing 6
As we can see in Listing 6, there are a number of ZFS data sets here, which are defined by pool/{filesystem,volume,snapshot}. For our newly created zpool, mypool, ZFS has automatically created a file system on top of mypool and mounted the file system at /mypool. To create another file system under mypool we use the zfs create command, as shown in Listing 7:
root@solaris:~# zfs create mypool/mydataset
root@solaris:~# zfs create mypool/dbdata
root@solaris:~# zfs list -r mypool
NAME              USED  AVAIL  REFER  MOUNTPOINT
mypool            162K  15.6G    33K  /mypool
mypool/dbdata      31K  15.6G    31K  /mypool/dbdata
mypool/mydataset   31K  15.6G    31K  /mypool/mydataset
Listing 7
In Listing 7, we created two additional file systems, mydataset and dbdata, and then we listed all data sets on mypool.
Let's create a 1 GB file in the mypool/mydataset file system, clone it, and compare the file sizes, as shown in Listing 8:
root@solaris:~# mkfile 1g /mypool/mydataset/foobar
root@solaris:/mypool/mydataset# zfs list -r mypool
NAME               USED  AVAIL  REFER  MOUNTPOINT
mypool            1.00G  14.6G    33K  /mypool
mypool/dbdata       31K  14.6G    31K  /mypool/dbdata
mypool/mydataset  1.00G  14.6G  1.00G  /mypool/mydataset
root@solaris:/mypool/mydataset# zfs snapshot mypool/mydataset@today
root@solaris:/mypool/mydataset# zfs clone mypool/mydataset@today \
mypool/newdataset
root@solaris:/mypool/mydataset# zfs list -r mypool
NAME                USED  AVAIL  REFER  MOUNTPOINT
mypool             1.00G  14.6G    34K  /mypool
mypool/dbdata        31K  14.6G    31K  /mypool/dbdata
mypool/mydataset   1.00G  14.6G  1.00G  /mypool/mydataset
mypool/newdataset    18K  14.6G  1.00G  /mypool/newdataset
Listing 8
To clone a ZFS data set, we must first take a snapshot of it using the zfs snapshot command and give it the name today. A ZFS snapshot is a read-only copy of a file system or volume. Once we have a snapshot, we clone the snapshot to the new data set. A ZFS clone is a writable file system or volume that can be created only from a snapshot. As you can see from the output in Listing 8, mypool/newdataset uses only 18 K of space, thanks to the copy-on-write capability of ZFS.
| Did You Know?
Two of the big differentiators of ZFS are its ease of use and its wide variety of integrated data services. Through a single set of command-line interfaces, zfs and zpool, administrators can mirror disks, set up advanced software RAID configurations, enable compression (and/or deduplication) or encryption, and migrate data around their data centers. The continuous integrity checking and automatic repair capabilities of ZFS put it out in front for modern file systems. |
Encrypting Data Using ZFS
As a final example of ZFS, let's create an encrypted data set. Encryption must be enabled during the creation of a data set; it can't be enabled after a data set has been created. Again, we use the zfs create command and set the encryption property to on:
root@solaris:/mypool/mydataset# zfs create -o encryption=on \
mypool/myprivatedataset
Enter passphrase for 'mypool/myprivatedataset': solaris11
Enter again: solaris11
Now that the data set is encrypted, what would happen if we exported our mypool zpool and imported it onto another system, as shown in Listing 9?
root@solaris:~# zpool export mypool
root@solaris:~# zpool list
NAME   SIZE  ALLOC   FREE  CAP  DEDUP  HEALTH  ALTROOT
rpool   20G  15.1G  4.87G  75%  1.00x  ONLINE  -
root@solaris:~# zpool import mypool
Enter passphrase for 'mypool/myprivatedataset': solaris11
root@solaris:~# zpool list
NAME     SIZE  ALLOC   FREE  CAP  DEDUP  HEALTH  ALTROOT
mypool  15.9G  1.00G  14.9G   6%  1.00x  ONLINE  -
rpool     20G  15.1G  4.87G  75%  1.00x  ONLINE  -
Listing 9
In Listing 9, we're importing it back into the same system, but notice how the system asked for a password before making the data set available to us.
Additional Tasks
- ZFS provides the ability to mirror zpools based on the disks available to you. Try destroying
mypooland using the/dev/dsk/c7t2d0disk to mirrorrpool. - Create a random file within
/mypool/myprivatedata. Export and import the pool using the wrong passphrase. What happens to the file you created? - ZFS supports data set compression. Enable compression on a data set and see what compression ratios you are achieving.
| Did You Know?
Oracle Solaris 11 has integrated network administration. Using a small number of command-line interfaces, administrators can administer both layer 2 and layer 3 networking, including bridging, vLANs, link aggregations, IPMP, IP tunneling, and InfiniBand. The addition of virtual networking allows administrators to model complex network topologies in a single server, often removing the need for additional, expensive network hardware. |
Exercise 4: Networking
Oracle Solaris 11 includes a set of integrated administration tools for configuring networking. Everything from a very simple automatic network configuration using DHCP to a more-complicated configuration that includes bridging, link aggregation, virtual LANs, IP tunneling, and firewalling across a variety of network fabrics is covered using a small set of command-line interfaces.
The networking commands in Oracle Solaris 11 are separated between management at the data link layer (layer 2) and the IP layer (layer 3) with dladm and ipadm.
Note: It is recommended that administrators no longer use ifconfig in Oracle Solaris 11, even though the command is still available for compatibility purposes.
Configuring a Static IP Address
First, let's check to see what physical network interfaces are available to us. We use the dladm show-phys command:
root@solaris:~# dladm show-phys
LINK         MEDIA                STATE      SPEED  DUPLEX    DEVICE
net1         Ethernet             unknown    0      unknown   e1000g1
net0         Ethernet             up         1000   full      e1000g0
Oracle Solaris 11 uses link name aliasing to abstract from the underlying network device name. We will configure a static IP address for the net1 link.
First, we need to create an IP interface for this that can handle both IPv4 and IPv6 (though we will care only about IPv4 addresses in this hands-on lab). We need to use the ipadm create-ip command:
root@solaris:~# ipadm create-ip net1
root@solaris:~# ipadm show-if net1
IFNAME     CLASS    STATE    ACTIVE OVER
net1       ip       down     no     --
Once we have created our IP interface, we need to create an address for this interface using the ipadm create-addr command.
root@solaris:~# ipadm create-addr -T static -a 192.168.2.111 net1/v4
root@solaris:~# ipadm show-addr net1/v4
ADDROBJ           TYPE     STATE        ADDR
net1/v4           static   ok           192.168.2.111/24
root@solaris:~# ipadm show-if net1
IFNAME     CLASS    STATE    ACTIVE OVER
net1       ip       ok       yes    --
Configuring a Dynamic IP Address
Configuring a network interface using DHCP is very similar to what we did for configuring a static IP address. Let's first delete the current IP address on net1, and then ask the DHCP server to assign an address:
root@solaris:~# ipadm delete-addr net1/v4
root@solaris:~# ipadm create-addr -T dhcp net1/v4
root@solaris:~# ipadm show-addr net1/v4
ADDROBJ           TYPE     STATE        ADDR
net1/v4           dhcp     ok           192.168.1.21/24
root@solaris:~# ipadm show-if net1
IFNAME     CLASS    STATE    ACTIVE OVER
net1       ip       ok       yes    --
Configuring a Virtual Network
VNICs (or virtual network interface controllers) look and act like a physical network interface. We can create them over any physical network interface using the dladm create-vnic command:
root@solaris:~# dladm create-vnic -l net1 vnic1
root@solaris:~# dladm show-vnic
LINK        OVER         SPEED  MACADDRESS        MACADDRTYPE       VID
vnic1       net1         1000   2:8:20:f7:a2:13   random            0
And then, as before, we can create an IP interface and assign a static IP address:
root@solaris:~# ipadm create-ip vnic1
root@solaris:~# ipadm create-addr -T static -a 192.168.2.112 vnic1/v4
root@solaris:~# ipadm show-addr vnic1/v4
ADDROBJ           TYPE     STATE        ADDR
vnic1/v4          static   ok           192.168.2.112/24
root@solaris:~# ipadm show-if vnic1
IFNAME     CLASS    STATE    ACTIVE OVER
vnic1      ip       ok       yes    --
Configuring DNS
With Oracle Solaris 11, DNS configuration is now stored in the Service Management Facility repository. The Service Management Facility service—network/dns/client—manages configuration information that traditionally exists in /etc/resolv.conf, and system/name-service/switch manages configuration information that traditionally exists in /etc/nsswitch.conf. In both cases, these files are preserved for compatibility.
To configure the DNS configuration, we must use svccfg to set configuration properties and then use svcadm refresh:
root@solaris:~# svccfg -s svc:/network/dns/client setprop config/nameserver=net_address: '(192.168.1.1)'
root@solaris:~# svcadm refresh network/dns/client
root@solaris:~# svcadm enable network/dns/client
root@solaris:~# svccfg -s system/name-service/switch setprop config/default = '"files dns"'
root@solaris:~# svcadm refresh system/name-service/switch
We won't worry too much about the details around DNS configuration in this hands-on lab, because we are using a private Oracle VM VirtualBox network that is not connected to the internet.
Additional Tasks
- Oracle Solaris 11 networking supports the organization of network interfaces into link aggregations. Configure
net0andnet1to be aggregated with IP address 192.168.1.200. - For the VNIC we created,
vnic1, set the maximum bandwidth to be 10 M. Assign this VNIC to a zone,myzone, and demonstrate the impact of setting this resource. Hint: You might need to complete the virtualization exercise first.
Exercise 5: User Management
| Did You Know?
IBM AIX and Oracle Solaris 11 both have RBAC and MLS security features. The default Oracle Solaris 11 configuration uses RBACwith root disabled. Trusted extensions, a built-in, advanced securityfeature, provides integrated MLS security. Noadditional packages need to be purchased. |
One of the biggest differences with Oracle Solaris 11 is that there is no traditional root account by default. This is done for security reasons, due to the lack of accountability in a multiuser environment. By making the root account a role by default, administrators log in with their normal user account and then take on additional privileges.
Roles are special accounts that correspond to a functional responsibility rather than to an actual person. Each user may have zero or more roles. Roles are not allowed to log in to the system as a primary user. Instead, a user must assume a role.
Let's start by confirming that root is indeed a role:
root@solaris:~# userattr type root
role
Now we can check to see what roles have been assigned to ouser, as shown in Listing 10:
ouser@solaris:~$ roles ouser
root
Listing 10
In Listing 10, we can see that ouser has been given the root role. This is the default behavior for the first user account that is created as part of an Oracle Solaris 11 installation.
Role-based access control (RBAC) is a foundation of user management in Oracle Solaris 11. A right is the permission to execute an executable command as a privileged user, for example, executing reboot as root.
An authorization is a permission that enables a user or role to perform a class of actions that could affect security, for example having access to certain hardware.
Rights profiles are a collection of administrative capabilities that can be assigned to a user or role. A rights profile can consist of authorizations, commands with security attributes, and other rights profiles. We can see a list of profiles that have been assigned to a user using the profiles command:
root@solaris:~# profiles ouser
          System Administrator
          Audit Review
          Extended Accounting Flow Management
          acctadm
....
          CPU Power Management
          Basic Solaris User
          All
We can look a little deeper into profiles to see a list of executable commands that are associated to each rights profile, along with any other special attributes such as user and group IDs, by using the -p and -l option to the profiles command, as shown in Listing 11:
root@solaris:~# profiles -p 'System Administrator' info
      name=System Administrator
      desc=Can perform most non-security administrative tasks
    profiles=Audit Review,Extended Accounting Flow Management,Extended Accounting Net
    Management,Extended Accounting Process Management,Extended Accounting Task
    Management,Printer Management,Cron Management,Device Management,File System
    Management,Log Management,Mail Management,Maintenance and Repair,Media Backup,Media
    Catalog,Media Restore,Name Service Management,Network Management,Object Access
    Management,Process Management,Project Management,RAD Management,Service
    Operator,Shadow Migration Monitor,Software Installation,System Configuration,User
    Management,ZFS Storage Management,Install Service Management
      help=RtSysAdmin.html
Listing 11
In Listing 11, we can see that the System Administrator rights profile has a number of other profiles associated with it. Let's take a look at the Install Service Management profile, as shown in Listing 12:
root@solaris:~# profiles -p 'Install Service Management' info
    name=Install Service Management
    desc=Install Service Administration
    auths=solaris.autoinstall.service
    profiles=Install Manifest Management,Install Profile Management,Install Client Management
Listing 12
In Listing 12, we see three profiles that are associated, along with an authorization of solaris.autoinstall.service.
Let's now look at the Install Profile Management profile, as shown in Listing 13:
root@solaris:~# profiles -p 'Install Profile Management' info
    name=Install Profile Management
    desc=Install System Configuration Profile Administration
    auths=solaris.autoinstall.profile
    cmd=/usr/sbin/installadm
Listing 13
In Listing 13, we can see that this profile associates the command installadm.
Adding a New User
Now that we have looked at the basics of roles, profiles, and authorizations, let's create a new user account, testuser. We'll use the -m option to automatically create a ZFS data set that's mounted at /export/home.
root@solaris:~# useradd -m testuser
root@solaris:~# id testuser
uid=101(testuser) gid=10(staff)
Let's check to see what roles and profiles have been applied to this account:
root@solaris:~# roles testuser
No roles
root@solaris:~# profiles testuser
testuser:
          Basic Solaris User
          All
Initially, only the basic rights profiles are assigned, along with the ability to execute commands as the user or a role.
Adding a Rights Profile to a User
Let's log in to the testuser user and try to execute a command to add a new Automated Installer service, as shown in Listing 14:
root@solaris:~# su - testuser
Oracle Corporation  SunOS 5.11  11.1    September 2012
-bash-4.1$ /usr/sbin/installadm create-service -n new-service
Insufficient permissions to perform operation.
Authorization <solaris.autoinstall.service> required to perform this operation.
Listing 14
As we can see in Listing 14, we don't have the necessary authorizations. Let's add these now using the usermod command with the -P option to add the Install Service Management rights profile.
-bash-4.1$ exit
logout
root@solaris:~# usermod -P +'Install Service Management' testuser
root@solaris:~# profiles testuser
testuser:
          Install Service Management
          Install Manifest Management
          Install Profile Management
          Install Client Management
          Basic Solaris User
          All
And now, log back in to the account and try again, as shown in Listing 15:
root@solaris:~# su - testuser
Oracle Corporation  SunOS 5.11  11.1    September 2012
-bash-4.1$ /usr/sbin/installadm create-service -n new-service
Insufficient permission to perform operation.
euid required to be 0 to perform this operation.
Listing 15
In Listing 15, we still get an error message, because we need to escalate our privilege:
-bash-4.1$ pfexec /usr/sbin/installadm create-service -n new-service
Warning: Service svc:/network/dns/multicast:default is not online.
   Installation services will not be advertised via multicast DNS.

Creating service from: pkg:/install-image/solaris-auto-install
OK to use default image path: /export/auto_install/new-service? [y/N]: y
DOWNLOAD                       PKGS         FILES    XFER (MB)   SPEED
Completed                       1/1       514/514  294.3/294.3  7.6M/s

PHASE                                          ITEMS
Installing new actions                       662/662
Updating package state database                 Done
Updating image state                            Done
Creating fast lookup database                   Done
Reading search index                            Done
Updating search index                            1/1

Creating i386 service: new-service

Image path: /export/auto_install/new-service

Refreshing install services
Warning: mDNS registry of service new-service could not be verified.
-bash-4.1$ /usr/sbin/installadm list

Service Name Alias Of Status  Arch   Image Path
------------ -------- ------  ----   ----------
default-i386 solaris  on      i386   /export/auto_install/solaris
new-service  -        on      i386   /export/auto_install/new-service
solaris      -        on      i386   /export/auto_install/solaris
-bash-4.1$ exit
logout
root@solaris:~#
We have now covered the very basics of user management—including roles, authorizations, and rights profiles—in Oracle Solaris 11.
| Did You Know?
Oracle Solaris Trusted Extensions is a set of security extensions that feature a mandatory access control model covering all aspects of the operating system, including device access, file and user management, networking, auditing, and other services. This is achieved by adding sensitivity labels to objects, thereby establishing explicit relationships among these objects. |
Additional Tasks
- Add an authorization to the
testuseraccount to allow that use to enable and disable thenetwork/http:apache22Service Management Facility service. Hint: You will need to look at thesolaris.smf.manage.*authorizations and add the appropriate authorization within the service configuration properties. - Add a new rights profile that includes both the administration of the Install Service Management and Software Installation rights profiles, and assign it to a new user.
Exercise 6: Services
Oracle Solaris 11 uses the Service Management Facility to manage application and system services on a system. The Service Management Facility provides administrators with the ability to enable and disable services, including the services' dependencies, and also to automatically restart the services in the event of hardware or software faults.
| Did You Know?
The Service Management Facility (SMF) represents a move away from the legacy init system (such as used by IBM AIX) that starts services sequentially. SMF is dependency-based rather than event-base, leading to greater reliability of application and system services as well as providing faster boot up times. SMF also provides the capability of back-end service configuration storage. |
Listing Application and System Services
To show what services are managed under the Service Management Facility, we can use the svcs command:
root@solaris:~# svcs
STATE          STIME    FMRI
legacy_run      2:06:12 lrc:/etc/rc2_d/S47pppd
legacy_run      2:06:12 lrc:/etc/rc2_d/S81dodatadm_udaplt
legacy_run      2:06:13 lrc:/etc/rc2_d/S89PRESERVE
disabled        2:06:34 svc:/system/ocm:default
disabled       14:05:08 svc:/platform/i86pc/acpihpd:default
online          2:05:39 svc:/application/virtualbox/vboxmslnk:default
online          2:05:39 svc:/application/virtualbox/vboxservice:default
online          2:05:39 svc:/system/power:default
online          2:05:39 svc:/network/shares:default
online          2:05:40 svc:/application/cups/scheduler:default
...
online         14:05:35 svc:/system/filesystem/local:default
online         14:05:36 svc:/system/boot-loader-update:default
online         14:05:36 svc:/system/cron:default
online         14:05:36 svc:/system/filesystem/ufs/quota:default
The svcs command lists all the legacy services, temporarily disabled (until next reboot) services, and online services. In some cases, we might see multiple instances of the same service that have different underlying configurations, for example, multiple web servers listening on different ports.
To get a larger set of services, including all the permanently disabled services, we use the -a option to svcs command:
root@solaris:~# svcs -a
STATE          STIME    FMRI
legacy_run      2:06:12 lrc:/etc/rc2_d/S47pppd
legacy_run      2:06:12 lrc:/etc/rc2_d/S81dodatadm_udaplt
legacy_run      2:06:13 lrc:/etc/rc2_d/S89PRESERVE
disabled        2:05:55 svc:/application/cups/in-lpd:default
disabled        2:05:55 svc:/network/rpc/rstat:default
disabled        2:05:55 svc:/network/shell:default
disabled        2:05:55 svc:/network/shell:kshell
disabled        2:05:55 svc:/network/discard:dgram
disabled        2:05:55 svc:/network/discard:stream
disabled        2:05:55 svc:/network/telnet:default
....
online         14:05:35 svc:/system/filesystem/local:default
online         14:05:36 svc:/system/boot-loader-update:default
online         14:05:36 svc:/system/cron:default
online         14:05:36 svc:/system/filesystem/ufs/quota:default
Enabling and Disabling Services
Let's focus on the Apache web server service:
root@solaris:~# svcs -a | grep apache22
disabled       14:03:40 svc:/network/http:apache22
We can find out more information about this service using the -l option, as shown in Listing 16:
root@solaris:~# svcs -l apache22
fmri         svc:/network/http:apache22
name         Apache 2.2 HTTP server
enabled      false
state        disabled
next_state   none
state_time   August  2, 2013 02:03:40 PM UTC
restarter    svc:/system/svc/restarter:default
manifest     /lib/svc/manifest/network/http-apache22.xml
dependency   require_all/error svc:/milestone/network:default (online)
dependency   require_all/none svc:/system/filesystem/local:default (online)
dependency   optional_all/error svc:/system/filesystem/autofs:default (online)
Listing 16
In Listing 16, we can see that the Apache service depends on three services that are all currently online.
Let's use the svcadm command to enable the Apache service, as shown in Listing 17:
root@solaris:~# svcadm enable apache22
root@solaris:~# svcs apache22
STATE          STIME    FMRI
online         21:45:54 svc:/network/http:apache22
Listing 17
We can see in Listing 17 that this service is now online.
We can check to see what processes it has started using the svcs -p command, as shown in Listing 18:
root@solaris:~# svcs -p apache22
STATE          STIME    FMRI
online         21:45:54 svc:/network/http:apache22
               21:45:54     2707 httpd
               21:45:55     2709 httpd
               21:45:55     2710 httpd
               21:45:55     2711 httpd
               21:45:55     2712 httpd
               21:45:55     2713 httpd
Listing 18
Let's now kill the process IDs, as shown in Listing 19, and see what happens. You will need to use the process IDs shown in Listing 18.
root@solaris:~# kill -9 2707 2709 2710 2711 2712 2713
root@solaris:~# svcs apache22
STATE          STIME    FMRI
online         21:52:19 svc:/network/http:apache22
root@solaris:~# svcs -p apache22
STATE          STIME    FMRI
online         21:52:19 svc:/network/http:apache22
               21:52:19     2798 httpd
               21:52:20     2799 httpd
               21:52:20     2800 httpd
               21:52:20     2801 httpd
               21:52:20     2802 httpd
               21:52:20     2803 httpd
Listing 19
As we can see in Listing 19, the Apache service has remained online, and it has automatically restarted new httpd processes. If we don't need this service online anymore, we can simply disable it:
root@solaris:~# svcadm disable apache22
root@solaris:~# svcs apache22
STATE          STIME    FMRI
disabled       21:54:54 svc:/network/http:apache22
Listing and Setting Service Properties
Each Service Management Facility service has a number of properties associated with it. We can use the svcprop command to access properties and their values.
Let's look at the application/pkg/server service and get all the properties under the pkg property group.
root@solaris:/usr/sbin# svcprop -p pkg application/pkg/server
pkg/address net_address
pkg/cfg_file astring ""
pkg/content_root astring usr/share/lib/pkg
pkg/debug astring ""
pkg/file_root astring ""
pkg/log_access astring none
pkg/log_errors astring stderr
pkg/mirror boolean false
pkg/pkg_root astring /
pkg/proxy_base astring ""
pkg/socket_timeout count 60
pkg/sort_file_max_size astring ""
pkg/ssl_cert_file astring ""
pkg/ssl_dialog astring smf
pkg/ssl_key_file astring ""
pkg/threads count 60
pkg/writable_root astring ""
pkg/inst_root astring /repository/
pkg/readonly boolean true
pkg/port count 80
If we wanted to set a property, we need to use a different command, svccfg, which supports two different modes: a mode that is used at the command line and a mode that uses an interactive interface. We will use the command-line interface to change the pkg/port property to 99:
root@solaris:/usr/sbin# svccfg -s pkg/server setprop pkg/port=99
root@solaris:/usr/sbin# svcprop -p pkg/port application/pkg/server 99
Additional Tasks
- The Service Management Facility uses a configuration repository in the back end to store information about a particular service. Configuration is stored at different layers in the repository to manage configuration across system updates. Using the
application/pkg/serverservice as an example, see if you can find out what administrative customizations have been made. Hint: There should be two customizations that have been made. - The Service Management Facility supports administrative notifications through e-mail and SNMP traps. Using the
application/pkg/serverservice, set up an e-mail notification that will be triggered if the service goes from the online state to the maintenance or disabled state. - Write a simple script that gets a list of packages installed on a system.
Exercise 7: Virtualization
Oracle Solaris Zones technology provides a low-overhead virtualization capability in Oracle Solaris 11, allowing you to create different isolated application environments on a single instance of the operating system. This greatly cuts down the administrative overhead that is needed to manage time and resources across multiple systems and multiple physical servers. Each Oracle Solaris Zone contains a complete resource-controlled environment that allows you to allocate resources such as CPU, memory, networking, and storage.
| Did You Know?
IBM AIX offers several virtualization capabilities that are rooted in the hypervisor and can be managed by one or more tools, including PowerVM, HMC, and IVM. When optimizing Oracle Solaris deployments, you can take advantage of layered virtualization technologies. Physical domains, available on select Oracle servers, are similar to the hard partitioning capabilities offered on IBM z Series Systems. Logical domains, which are similar to IBM AIX LPARs, and Oracle Solaris Zones, which are similar to WPARs, can be created on any Oracle server (SPARC and x86) running Oracle Solaris to take advantage of hypervisor-based and operating system virtualization capabilities. |
Creating a Zone
Let's start by creating a simple test zone using the zonecfg command:
root@solaris:~# zonecfg -z testzone
Use 'create' to begin configuring a new zone.
zonecfg:testzone> create
create: Using system default template 'SYSdefault'
zonecfg:testzone> set zonepath=/zones/testzone
zonecfg:testzone> set autoboot=true
zonecfg:testzone> verify
zonecfg:testzone> commit
zonecfg:testzone> exit
Let's now check to see what has been created by using the zoneadm command to list all configured zones, as shown in Listing 20:
root@solaris:~# zoneadm list -cv
  ID NAME      STATUS     PATH                     BRAND    IP
   0 global    running    /                        solaris  shared
   - testzone  configured /zones/testzone          solaris  excl
Listing 20
As we can see in Listing 20, our testzone has been created. It will be a zone of type solaris, with a fully exclusive IP networking stack. By default, all zones are configured to have an automatic VNIC, which gives us a network device automatically. It is automatically created when the zone is booted and automatically destroyed when the zone is shut down.
Now that the zone is configured, we need to install it:
root@solaris:~# zoneadm -z testzone install
The following ZFS file system(s) have been created:
    rpool/zones
    rpool/zones/testzone
Progress being logged to /var/log/zones/zoneadm.20130804T215019Z.testzone.install
       Image: Preparing at /zones/testzone/root.

 AI Manifest: /tmp/manifest.xml.zwaW.h
  SC Profile: /usr/share/auto_install/sc_profiles/enable_sci.xml
    Zonename: testzone
Installation: Starting ...

              Creating IPS image
Startup linked: 1/1 done
              Installing packages from:
                  solaris
                      origin:  http://192.168.1.222/
DOWNLOAD                     PKGS       FILES    XFER (MB)   SPEED
Completed                 183/183 33556/33556  222.2/222.2  224k/s

PHASE                                          ITEMS
Installing new actions                   46825/46825
Updating package state database                 Done
Updating image state                            Done
Creating fast lookup database                   Done
Installation: Succeeded

      Note: Man pages can be obtained by installing pkg:/system/manual

 done.

      Done: Installation completed in 1784.947 seconds.

  Next Steps: Boot the zone, then log into the zone console (zlogin -C)

              to complete the configuration process.

Log saved in non-global zone as /zones/testzone/root/var/log/zones/zoneadm.20130804T215019Z.testzone.install
Our zone will install itself from the Image Packaging System package repository.
We can now check the status of our zone, and list the new ZFS data sets that have been created:
root@solaris:~# zoneadm list -iv
  ID NAME          STATUS     PATH                    BRAND    IP
   0 global        running    /                       solaris  shared
   - testzone      installed  /zones/testzone         solaris  excl

root@solaris:~# zfs list | grep zones
rpool/zones                                  415M  3.61G    32K  /zones
rpool/zones/testzone                         415M  3.61G    32K  /zones/testzone
rpool/zones/testzone/rpool                   415M  3.61G    31K  /rpool
rpool/zones/testzone/rpool/ROOT              415M  3.61G    31K  legacy
rpool/zones/testzone/rpool/ROOT/solaris      415M  3.61G   390M  /zones/testzone/root
rpool/zones/testzone/rpool/ROOT/solaris/var 24.8M  3.61G  24.2M  /zones/testzone/root/var
rpool/zones/testzone/rpool/VARSHARE           31K  3.61G    31K  /var/share
rpool/zones/testzone/rpool/export             62K  3.61G    31K  /export
rpool/zones/testzone/rpool/export/home        31K  3.61G    31K  /export/home
The final step in getting testzone up and running is to boot it:
root@solaris:~# zoneadm -z testzone boot
root@solaris:~# zoneadm list -v
  ID NAME             STATUS     PATH               BRAND    IP
   0 global           running    /                  solaris  shared
   1 testzone         running    /zones/testzone    solaris  excl
And now we can log in to the zone:
root@solaris:~# zlogin -C testzone
When we log in to the console, we are prompted by the interactive text-based System Configuration Tool, which walks us through providing the configuration for this zone. Provide the following values as configuration:
- Hostname:
testzone - Networking: Automatic
-
rootpassword:solaris11 -
ouserpassword:Oracle123
Once we have successfully initialized the configuration of the zone, we can now log in and check our zone environment, as shown in Listing 21:
root@testzone:~# uname -a
SunOS testzone 5.11 11.1 i86pc i386 i86pc
root@testzone:~# ipadm show-addr
show-addr
ADDROBJ           TYPE     STATE        ADDR
lo0/v4            static   ok           127.0.0.1/8
net0/v4           dhcp     ok           192.168.1.22/24
lo0/v6            static   ok           ::1/128
net0/v6           addrconf ok           fe80::8:20ff:fece:1bb0/10
root@testzone:~# dladm show-link
LINK                CLASS     MTU    STATE    OVER
net0                vnic      1500   up       ?
root@testzone:~# zfs list
NAME                     USED  AVAIL  REFER  MOUNTPOINT
rpool                    431M  3.59G    31K  /rpool
rpool/ROOT               431M  3.59G    31K  legacy
rpool/ROOT/solaris       431M  3.59G   404M  /
rpool/ROOT/solaris/var  24.9M  3.59G  24.3M  /var
rpool/VARSHARE            39K  3.59G    39K  /var/share
rpool/export            96.5K  3.59G    32K  /export
rpool/export/home       64.5K  3.59G    32K  /export/home
rpool/export/home/ouser 32.5K  3.59G  32.5K  /export/home/ouser
Listing 21
In Listing 21, you will notice a few different things. First, we have an exclusive IP stack that can be used by the zone. This IP stack is taking advantage of network virtualization, and a VNIC has been automatically created during the zone setup. You'll also notice that only a few ZFS data sets have been exposed within the zone, compared to the ones that are available in the global zone.
Let's now log out of the zone, disconnect from the console by typing ~. and then check to see what VNICs have been created in the global zone, as shown in Listing 22:
root@testzone:~# exit
logout

testzone console login: ~.
[Connection to zone 'testzone' console closed]
root@solaris:~# dladm show-vnic
LINK          OVER      SPEED  MACADDRESS        MACADDRTYPE       VID
vnic1         net1      1000   2:8:20:f7:a2:13   random            0
testzone/net0 net0      1000   2:8:20:fd:6f:e7   random            0
Listing 22
In Listing 22, we can see that a new VNIC called testzone/net0 has been created over physical interface net0.
| Did You Know?
Oracle Solaris Zones is well known in the industry for providing the lowest overhead virtualization solution, integrated at the very heart of the operating system. Oracle Solaris Zones can be quickly created and cloned, and provide excellent secure, isolated environments for multi-tenancy in the cloud. |
Cloning a Zone
Now that we have successfully created a zone, let's quickly clone it. We must first shut down our existing testzone:
root@solaris:~# zoneadm -z testzone shutdown
Let's create a new zone, newzone:
root@solaris:~# zonecfg -z newzone
Use 'create' to begin configuring a new zone.
zonecfg:newzone> create
create: Using system default template 'SYSdefault'
zonecfg:newzone> set zonepath=/zones/newzone
zonecfg:newzone> verify
zonecfg:newzone> commit
zonecfg:newzone> exit
And, finally, we can use the zoneadm clone command to clone our existing testzone, as shown in Listing 23:
root@solaris:~# zoneadm -z newzone clone testzone
The following ZFS file system(s) have been created:
    rpool/zones/newzone
Progress being logged to /var/log/zones/zoneadm.20130804T225815Z.newzone.clone
Log saved in non-global zone as /zones/newzone/root/var/log/zones/zoneadm.20130804T25815Z.newzone.clone
root@solaris:~# zoneadm list -iv
  ID NAME             STATUS     PATH                BRAND    IP
   0 global           running    /                   solaris  shared
   - testzone         installed  /zones/testzone     solaris  excl
   - newzone          installed  /zones/newzone      solaris  excl
Listing 23
In Listing 23, notice how fast newzone is created compared to how long it took to originally install testzone. We can now boot this new zone as before and finish the system configuration steps.
Additional Tasks
- During zone creation, administrators can also provide a system configuration profile rather than interactively going through the steps in the System Configuration Tool. Create a new zone,
myzone, and clonenewzonewith an additional system profile. Hint: You can use thesysconfigcommand-line interface to create a profile for yourself. - Oracle Solaris Zones support a feature called Immutable Zones (or read-only root file systems). Configure
myzoneto have a strict read-only policy. - Oracle Solaris Zones can be configured for resource management. Configure
myzoneto have memory capping of 1Gb.
Summary
Congratulations for completing this hands-on lab! I hope you've had a chance to work through most of the sections, and you are feeling confident to take on some of the additional tasks.
See Also
The following is a list of good resources about administering Oracle Solaris 11:
- Migrating from IBM AIX to Oracle Solaris Learning Library
- Oracle Solaris 11 how-to guides
- Additional Oracle Solaris 11 hands-on labs
About the Author
Glynn Foster is a principal product manager for Oracle Solaris and works on technologies that relate to the provisioning and software lifecycle of the operating system, including those within cloud environments.
Revision 1.1, 02/26/2014